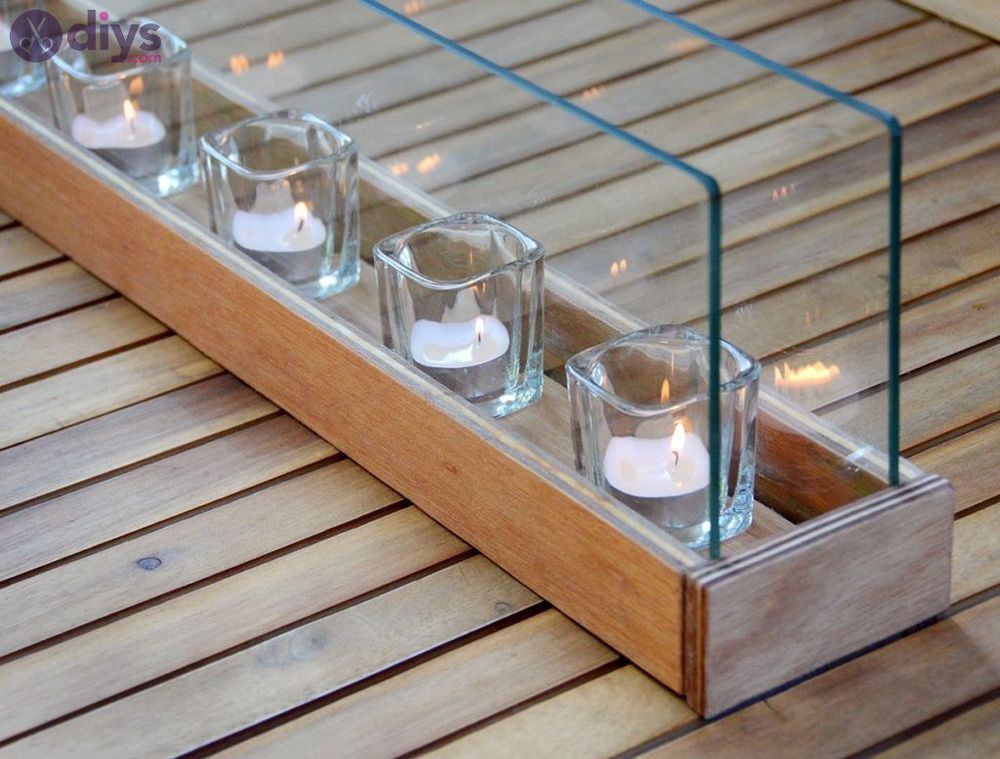
45 Christmas Table Decorations To Center Your Holiday Family Dinners
Posted by admin on
It’s almost time for the yearly holiday dinner on Christmas! Your family always gathers to celebrate this special day, and you can’t help but feel excited and anxious at the same time. As you’re getting everything ready for dinner, you realize that you don’t have any Christmas table decorations to add a festive appeal to your preparations.
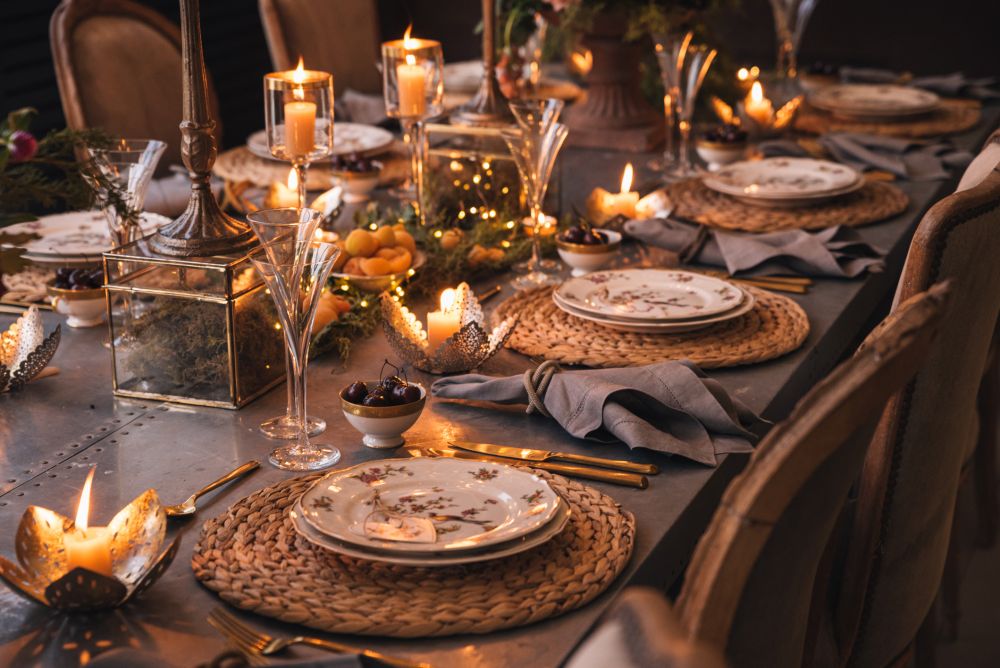
Not to worry, though, since we’re here to help! In this article, you’ll find some basic guidelines on how to make your table look beautiful and inviting during the holiday season.
To do this, you have to decide on which type of decor you like best. So we did a bit of research and created an extensive list of Christmas table decorations that we feel deserve your attention this year. Besides, you don’t have to make up your mind about a single piece of decor since there’s nothing stopping you from using several ideas to create a pleasant and comfy Christmas dinner.
Best Christmas Table Decorations to Try in 2021
Here are the top Christmas table decorations you should definitely try this year. Be sure to explore each option before deciding which you like best!
1. String Art Tree – Christmas Table Decorations
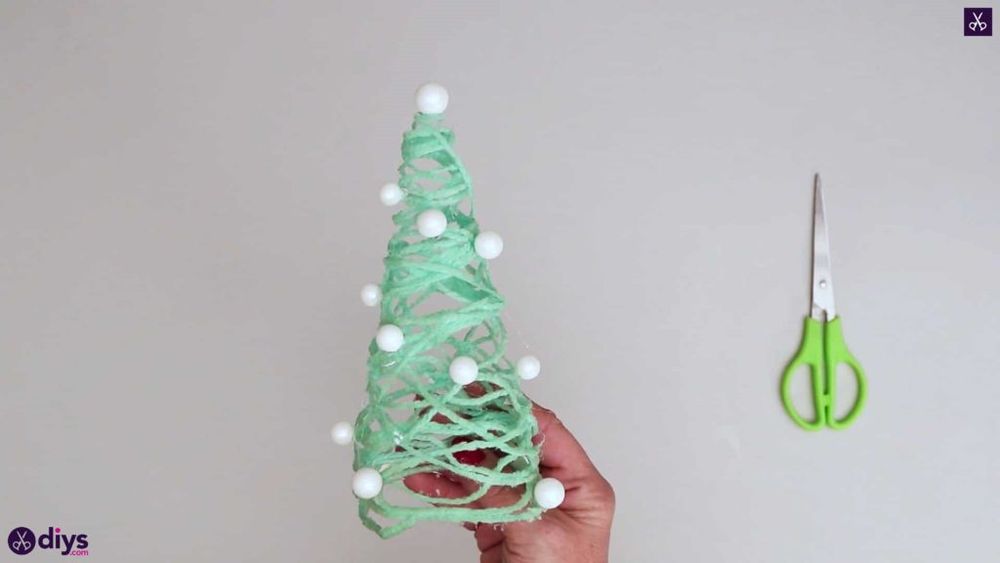
String art is a unique method of putting colors and patterns in shapes to form a picture. It can be tricky for kids, but they’ll enjoy the process more when they’re able to create their own masterpieces.
If you need Christmas table decorations, this is the project that will light up their faces with glee. You don’t have to put on your crafting hat since it’s easy enough for your kids to do it on their own.
And if you keep your little ones busy making string art trees from all sorts of materials around the house, then you’ll also be saved from a big mess in your living room or bedroom!
This simple craft uses paper plates as its base and washi tape as the primary material needed, among other things. Have your kids cut small or medium-sized paper plates to form tree shapes. Then, turn the plates so that the flat side will be face down on a workspace. Use washi tape to decorate these cutout trees to make string art designs.
You can choose from plain green trees for an understated look or opt for brightly colored ones with various patterns and designs. You can also pick one over another depending on the things you have in your house that may help inspire your child’s creativity.
For example, if you have leftover yarns around, then let them take advantage of it by winding it all over the tree until they are filled up entirely! Once finished crafting, allow this masterpiece to dry before placing it on the dinner table.
If you want to make a 3D string art tree out of yarn, check out our straightforward tutorial! It involves hot glue, a plastic file sleeve, and pearl beads.
2. Modern Cone Tree – Christmas Centerpiece
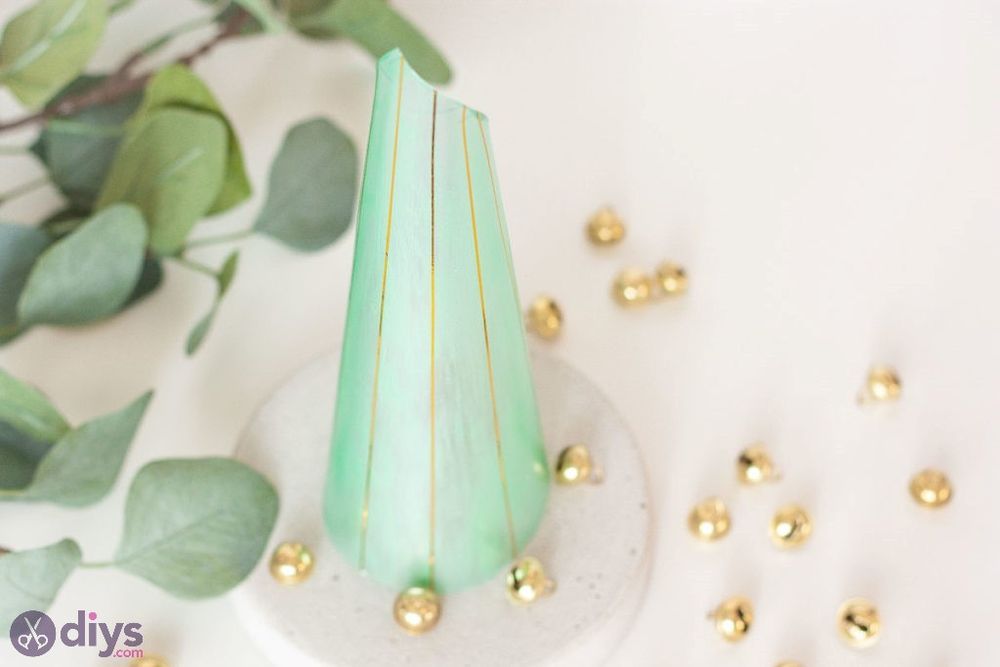
Christmas centerpieces are one of the most exciting things about this holiday season! For example, you can makeshift a modern cone tree to turn your home into a winter wonderland instantly. It looks stylish, too, so you won’t have to worry about it clashing with your other décor pieces at home.
For this project, you’ll need different materials depending on what you want to make. You can choose from 7.5-cm or 15-cm cones for an average-sized tabletop decoration or go big by using 45-cm ones instead. For the three-dimensional shapes, you will require taller cone forms made out of empty paper towel rolls, while smaller base cones need tissue rolls cut in half longways.
These items are easily found around the house, so they’re great to use for crafting. If you want to make your own cones, you’ll need corrugated cardboard and paper maché paste.
Start by painting all parts of the cones in two coats using silver paint or metallic spray paints. Once done, stick the large half-tubes onto the middle part of each full tube cut in half lengthwise.
Be sure not to miss any spots in between to achieve a seamless look. To add more pizzazz, use colorful yarn or string around the tree, which also doubles as ornaments when added with tiny round balls of paper maché clay at its tips.
Use this idea to get your kids started on their holiday decorating project by having them create their very own modern cone trees! It’s simple enough for them to do without worrying about the structure bending.
Read our tutorial for another version where you can make a modern cone tree out of acetate paper!
3. Wine Cork Tree – Christmas Table Centerpiece
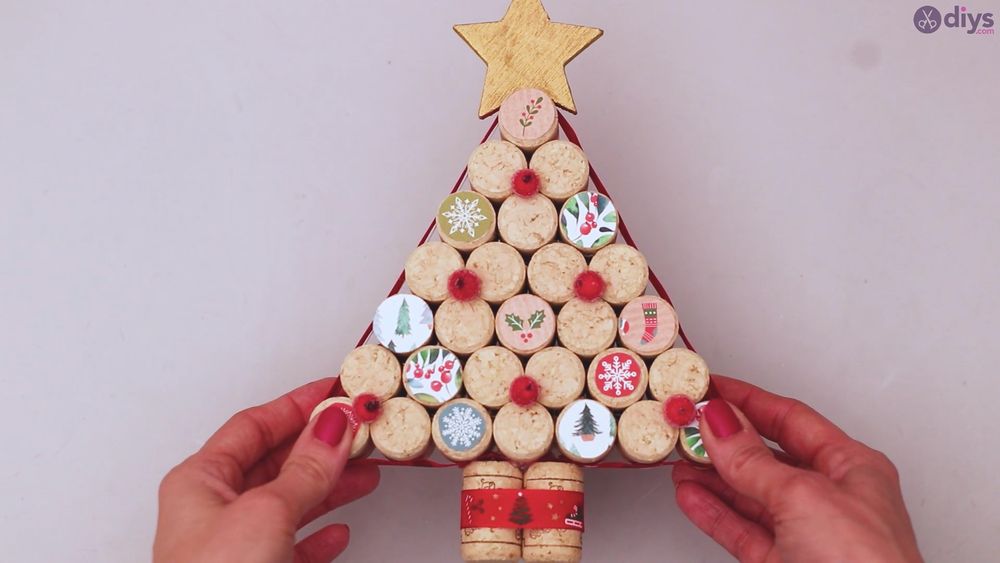
If you’re looking for a quick Christmas table centerpiece project to do over the weekend, you can make a simple tabletop centerpiece out of wine corks. It’s an eco-friendly idea that can be done by virtually anyone at home, especially if you have an impressive collection of wine corks and no plans to use them.
You will need wooden skewers, a hot glue gun, and colored ribbons for this craft. It’s also a good idea to use acrylic paint or spray paint, depending on how you want your finished project to look.
Starting from one end, glue all wine corks to the wooden skewer using the hot glue gun until they are all covered up entirely. Be sure not to oversaturate each cork with glue that it won’t come off anymore.
Once finished, tie a ribbon of your preferred color around the cork tree’s trunk. You can also add more layers or even make it into a Christmas wreath by adding some small pine branches and leaves.
For something more elaborate, you can stack up wine corks and cut them in half using wire snips. Or, you can stack up wine corks vertically and then glue them to the top part of an empty tin can with a cylindrical shape for added texture.
Just remember to smooth out each cork cut in half at the very least so that they stay firmly attached to their base instead of sliding off when accidentally bumped.
For more inspiration, don’t hesitate to read our guide about making a wine cork tree!
4. Rope-Wrapped Basket – Christmas Coffee Table Decor
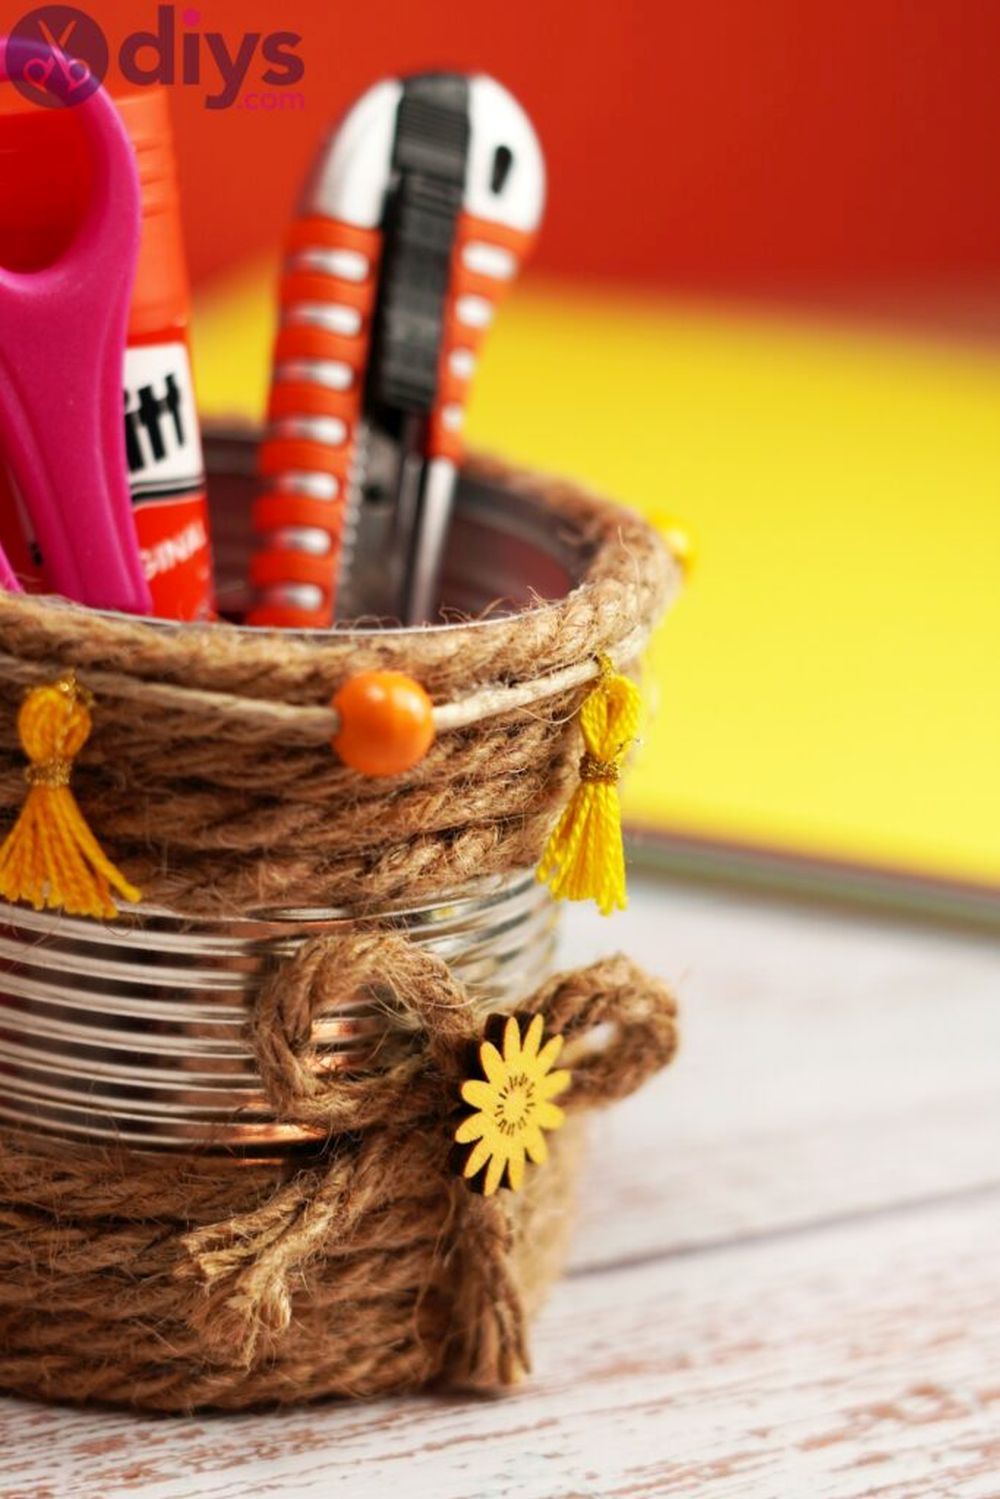
If you’re looking for a Christmas coffee table decor project to do with your kids, why not try making decorative baskets out of rope? You can then fill up the basket with paper flowers, twigs, ornaments, or other types of festive decorations.
To make a tin can basket wrapped with rope, you need a metal can that’s ideally 2 inches in diameter and a hot glue gun. It’s also a good idea to have about 70 feet of 1/4-inch sisal rope available from any home improvement store.
Cut the rope into eight pieces, each measuring around 30 inches long. Then, wind each piece up tightly around the tin can repeatedly to fully cover it with a layer of rope. Make sure not to leave any gaps in between by adjusting the winding pattern until you’re satisfied with its appearance.
Do the same thing again, but this time cover the first layer of wrapped tin can with a second layer in parallel using a different color or design for added detail. This will create a basket out of your tin cans in just a couple of minutes.
You can even add a handle to the top of your tin can basket. Just pull out a section of rope from the wrapping and attach it to the underside of your can’s lid. You can then attach a piece of wood to create a handle using hot glue, making it easy to carry.
For more inspiration, feel free to explore our guide about making a tin can basket wrapped with rope! You can embellish it with wood flower decor or gold thread, for example.
5. Wine Cork Napkin Holder – Christmas Table Decoration Ideas
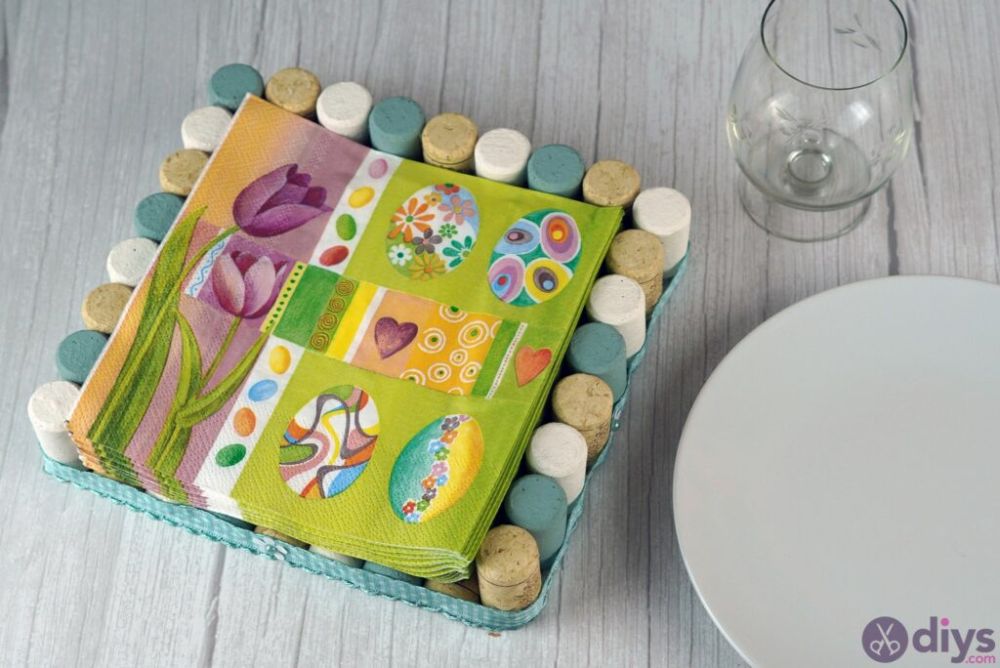
If you’re looking for creative Christmas table decoration ideas, consider making a napkin holder out of wine corks. You can use this as a centerpiece or as an accent piece on top of your dinner table’s plates and utensils.
To make a Christmas wine cork napkin holder, you need two wooden discs with the same diameter, some fabric that matches your festive theme and color scheme, and natural-colored cotton thread. About 40 to 50 wine corks are required, depending on their size and thickness. And you also need a metal screw hook for every cork used.
Cut the fabric into circles with diameters measuring 2 inches wider than those of your wooden discs. Fold them in half and add long stitches to three sides, leaving one side unstitched to make a pocket. Now, slip your wooden discs into the pockets and attach the screw hooks to each one.
To improve the appearance, you can add colorful buttons or other types of decorative trimmings to your finished wine cork napkin holder. It can even be embellished with twine, glitter tape, or any other form of festive wrapping paper cut into circles for an extra dash of color.
Read our straightforward guide for more details about making a wine cork napkin holder this Christmas!
6. Branch Vase – Christmas Dining Table Decor
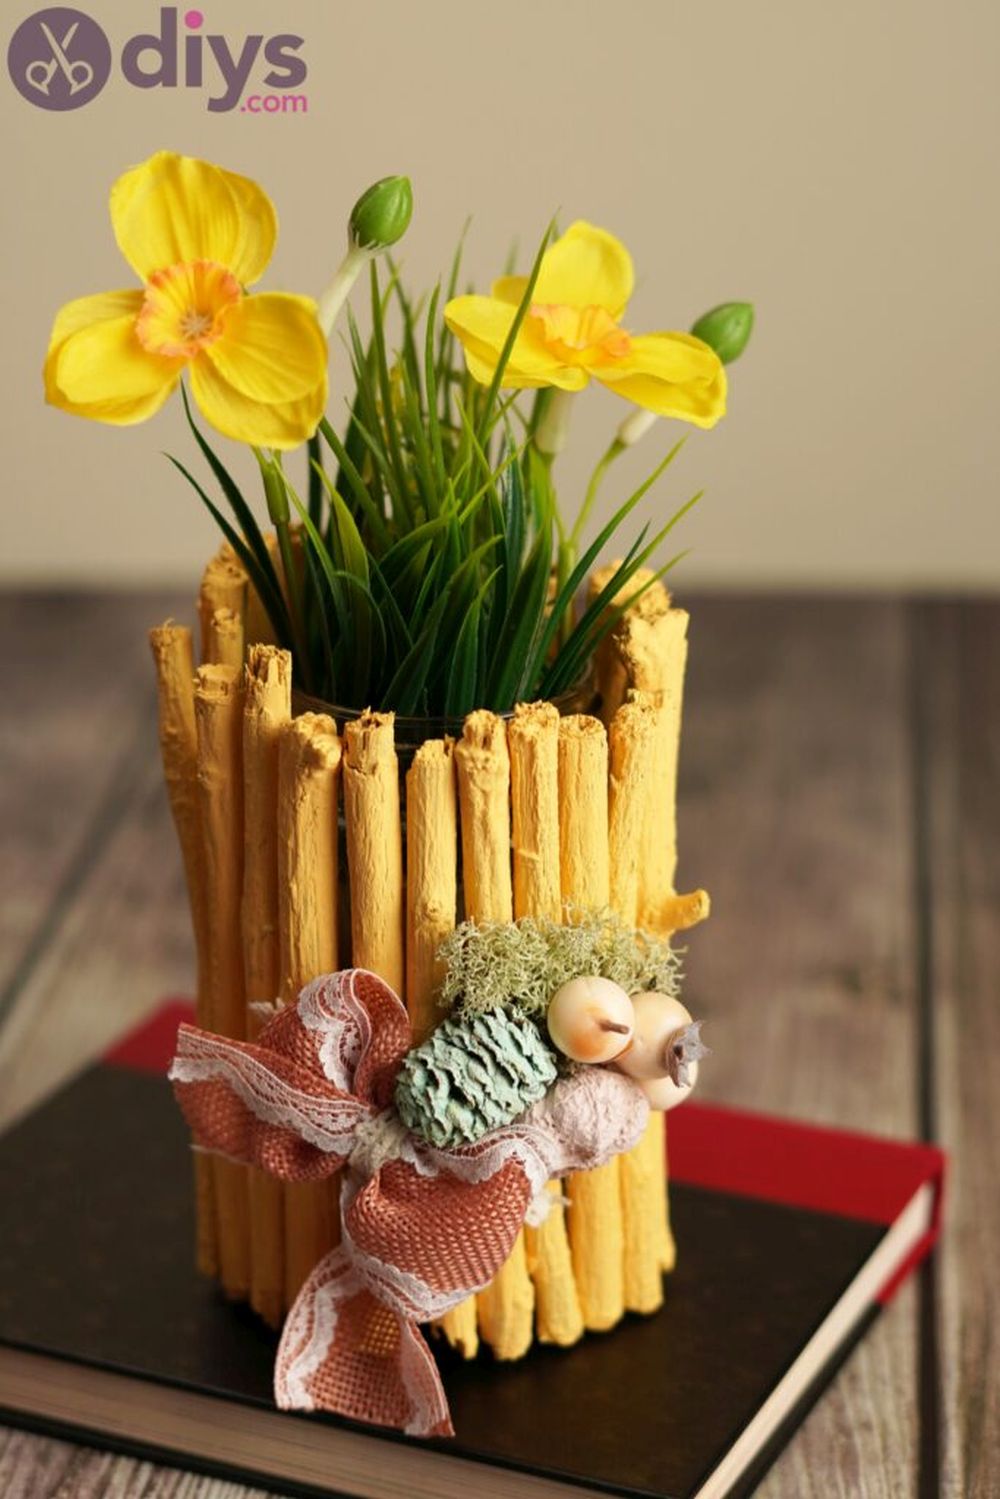
According to experts, flowers are the most popular type of Christmas dining table decor. Therefore, you should try making your own floral arrangement using a branch vase.
To make a branch vase for your festive dinner table, you need an ordinary tumbler with an opening of 2 inches wide at its narrowest point. You should also have a couple of pieces of faux evergreen garland measuring 1 foot long each, together with something small and round to serve as the vase’s base. Finally, you need ornaments made out of natural materials like twigs and pine cones for decoration.
First, wrap one end of each piece of garland tightly around the tumbler with its leaves facing toward the inner surface of the vase. Then, insert the second end of the garland into the tumbler opening to secure it. Let its leaves hang out of the glass container to make the table centerpiece as attractive as possible.
On top of your branches, you can insert small items like natural-shaped Christmas tree ornaments and gold pine cones to embellish your table’s appearance.
Get more inspiring ideas for decorating a branch vase by reading our easy-to-follow tutorial!
7. Cotton Flower Wreath – Christmas Dining Table Centerpiece
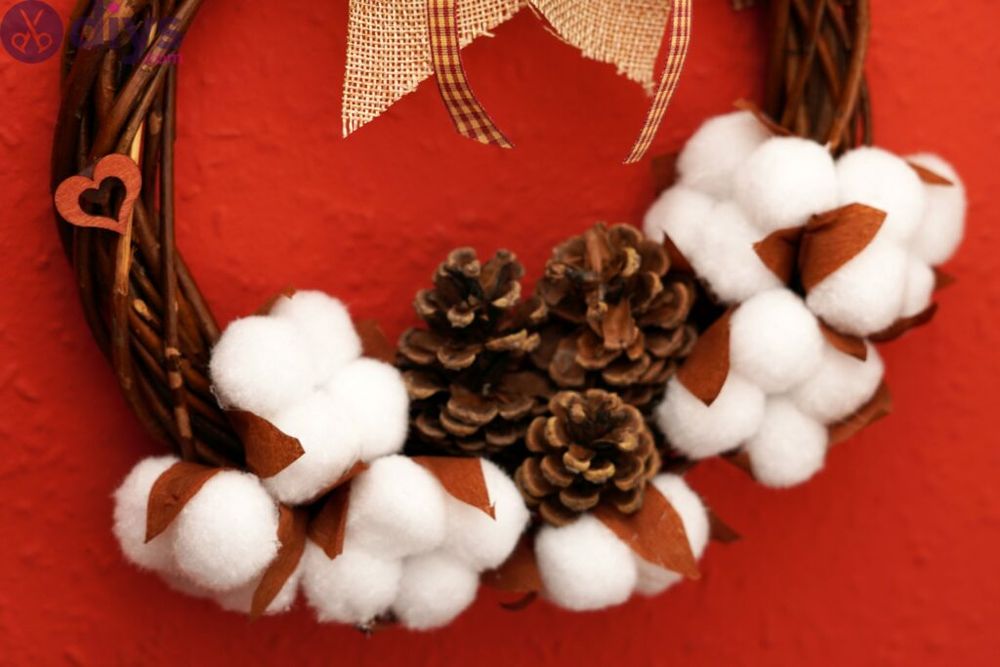
Cotton is one of the most popular choices among Christmas dining table centerpiece materials, making it an ideal candidate for a festive wreath. However, instead of hanging the cotton flower wreath on a door, you can place it on your table or lean it against a vase.
To make this table accent, you’ll need about 5 to 6 large cotton balls, two brown pipe cleaners measuring 3 inches each, and some decorative thread in your preferred colors. If desired, you can add sprigs of dried flowers or other types of adornments that match your theme and color scheme.
First, wrap the pipe cleaners tightly around the center section of one cotton ball to create inseparable segments. Do this twice so that they become thicker than usual. Then, insert these segments into another cotton ball with its top section facing downward, so their bottom portions can form a circle when joined together.
Next, secure the two cotton balls together with a string of thread at their lowest edges and another at their middle section to create a ring-shaped wreath. Now you can embellish your cotton flower wreath using anything from dried leaves and petals to berries and pinecones.
Read our straightforward tutorial for more details about making a cotton flower wreath this Christmas!
8. Twig Tree – Cheap and Simple Christmas Table Decorations
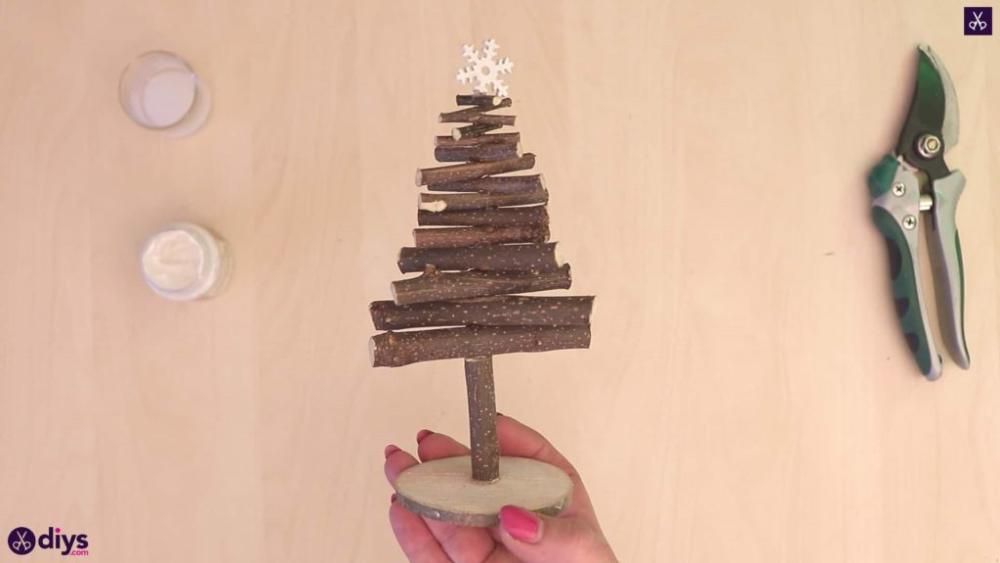
If you need a cheap and simple Christmas table decoration, you should consider making a Christmas tree out of twigs. It should be easy enough if you have these natural objects in your backyard.
To make a twig tree for your festive dinner table, you need an ordinary jar with a lid and some waterproof glue. It’s also essential to have two or three types of wooden sticks measuring between 1 inch and 3 inches in length each – depending on the size of the jar’s opening – plus some small-sized trinkets made out of natural materials like pinecones and leaves.
First, attach the small trinkets to the inside surface of your jar lid using hot glue so that they serve as ornaments. Then, fill the jar halfway with water before putting its lid on tightly to keep it from spilling.
Once the glue has completely dried up, you can begin inserting your wooden sticks into it until you create a tall twig tree that matches the size of your jar opening. You can also use more than two types of raw materials if you wish for added visual interest.
If you don’t want to use jars, you can assemble the twigs on wooden discs instead. Find out more about this variant in our step-by-step guide!
9. Wine Cork Napkin Ring – Christmas Decorations
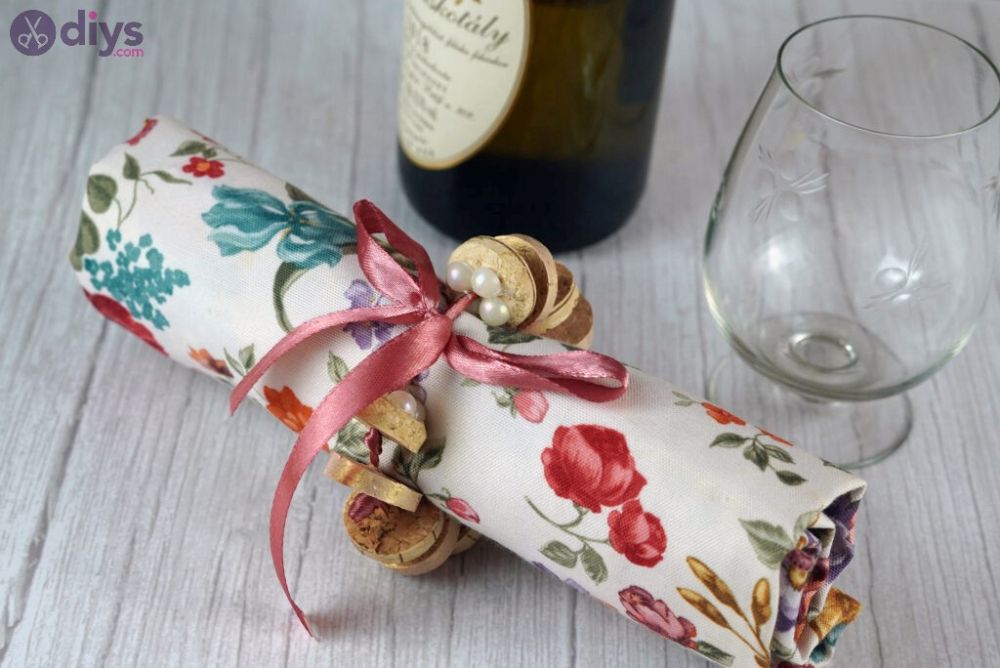
Another way you can dress up your dining table for Christmas is by using wine cork napkin rings. It’s easy and affordable to make if you have a bunch of wine corks lying around your kitchen storage and no plans on using them.
For this Christmas decoration activity, you’ll need a few pieces of cork from old bottles of wine and at least one wooden disc that measures 4 inches across its center. You can also add twigs with leaves for added texture and color.
To assemble the holders, simply glue two opposite sides of the wood disc to the bottom edge of a single cork slice before placing another similar-sized wooden piece at the top – leaving a space in between them. Repeat this same process until they become six.
Then, you can use them to hold your dinner napkins in place by inserting the pointed ends at their topmost parts into one end of the cork ring before sliding their other ends through your favorite cloth napkin. This way, you’ll be able to beautifully dress up your dining table this Christmas!
Check out our tutorial for more ways to decorate a wine cork napkin ring!
10. Rustic Painted Pot – Christmas Decoration Ideas
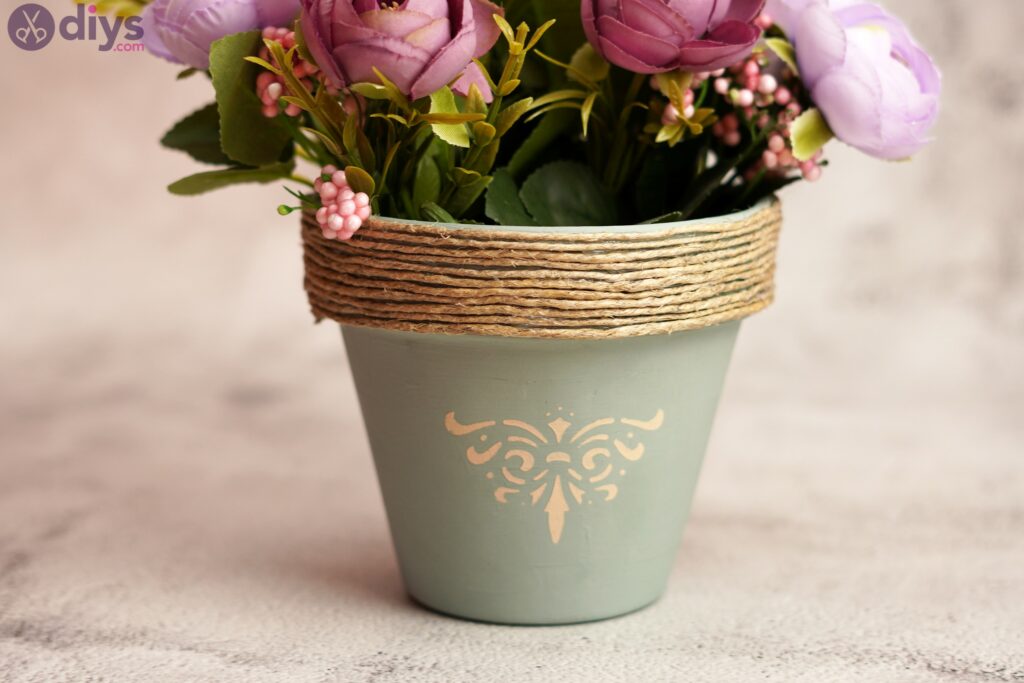
If you’re looking for something that can serve as a centerpiece on your dining table this Christmas, then be sure to have a bunch of rustic painted pots at hand. These handmade masterpieces are great additions to any space when it comes to Christmas decoration ideas.
To create rustic painted pots as centerpiece items, you just need earthenware pots and small-sized ornaments made out of natural materials like twigs and pinecones. You’ll also require acrylic paint in the colors of your preference – plus a brush for convenience.
The first step is to cover the entire outer surface of the pot with a layer of white primer paint. Once it dries up completely, apply another layer of dark brown paint before decorating your masterpiece with twigs and pinecones.
Once the glue has dried up, you can place your rustic painted pots on your dining table this Christmas to instantly give it an elegant appeal. You can also use other colors to make it look more interesting.
To learn more about how you can create beautiful rustic painted pots, refer to our step-by-step guide!
11. Wine Cork Candle Holders – Christmas Table Decorations
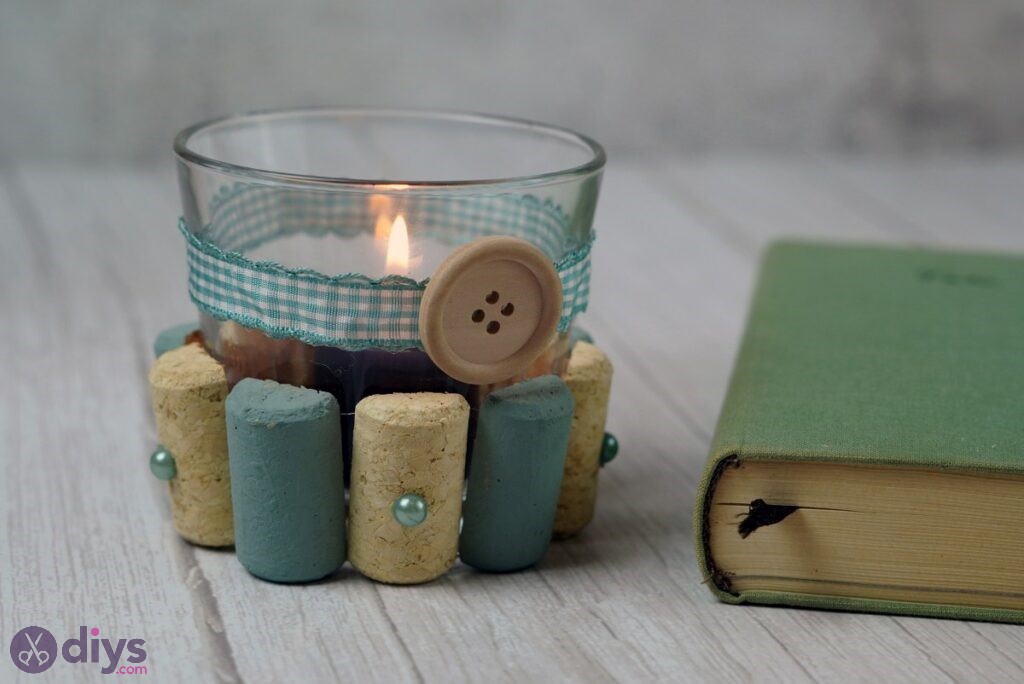
Another great addition to your dining table this Christmas is a set of candleholders made out of wine corks. They make fantastic vintage pieces for any type of room and can also be used as centerpieces during the festive season.
To make a set of wine cork candle holders, you’ll need a pack or two of different-sized wine corks plus some small-sized glass jars whose contents have been emptied. You can also use old jam jars to create these DIY masterpieces for a stunning effect!
To assemble the sets, insert one end of each cork slice into the opening at the topmost part of each container. Then, arrange them in a row on your dining table to instantly give it an elegant look. Make sure to place them away from any flammable materials like paper, cloth napkins, or table mats.
To learn more about how you can create these beautiful wine cork candle holders as Christmas table decorations, we recommend reading our step-by-step guide! For example, it’s possible to embellish them with a silk ribbon, wooden buttons, or acrylic paints.
12. Glass Votive Candle Holders with Lace Cover – Christmas Centerpiece
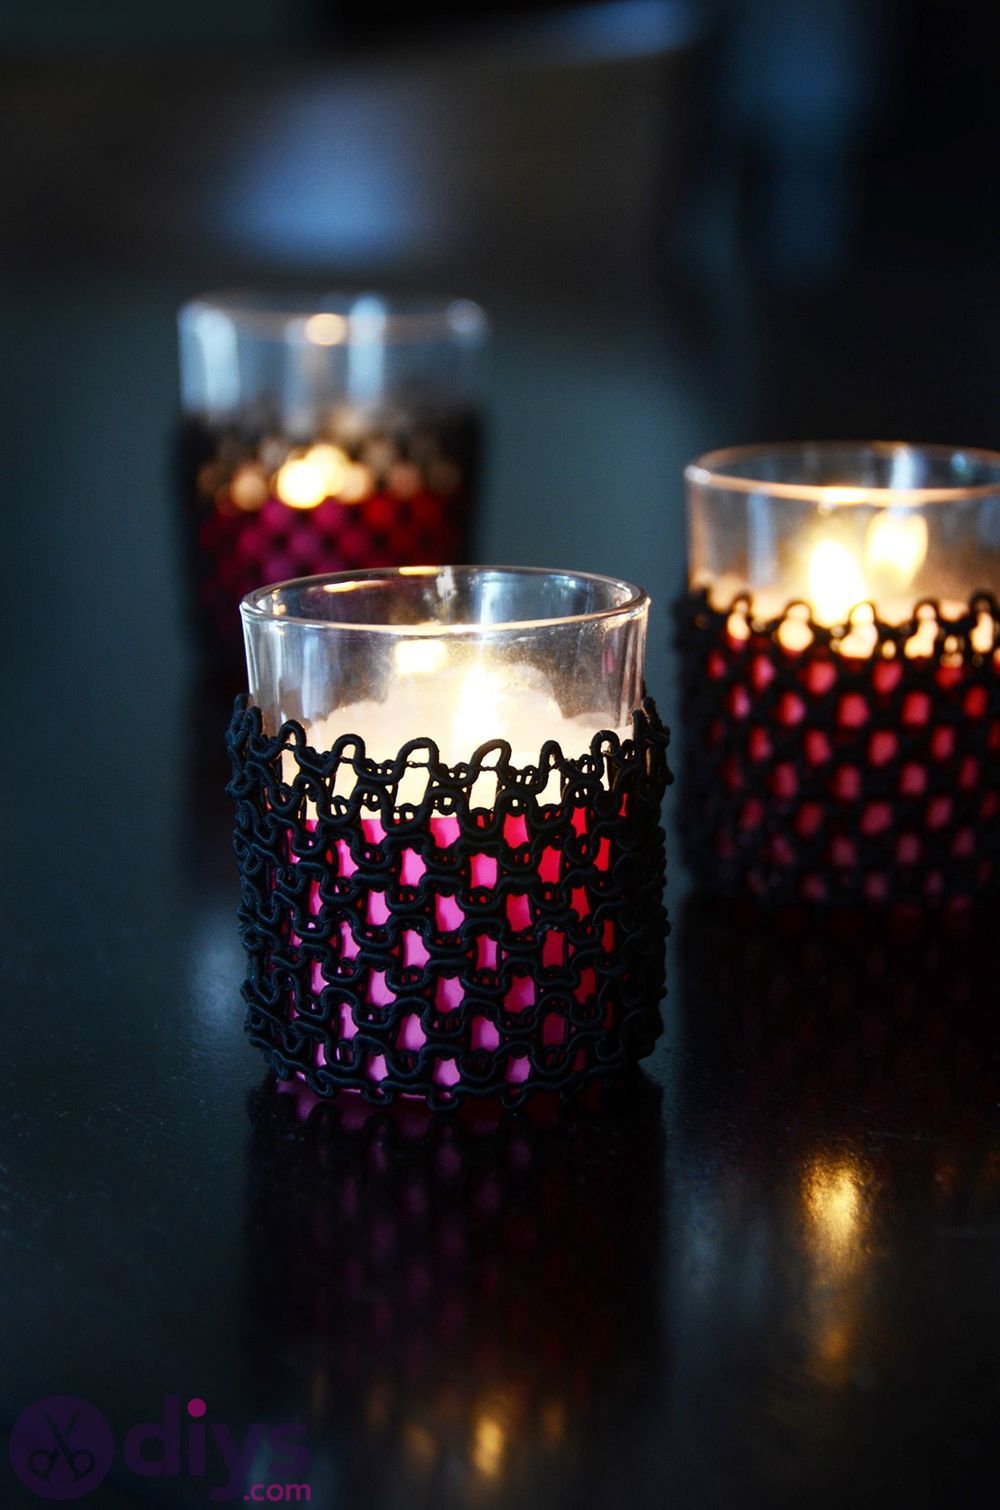
For a centerpiece on your dining table this Christmas, you can use glass votive candle holders. These are perfect for creating rustic or vintage-inspired looks that will keep your guests amused with their beauty.
To make these simple yet eye-catching votive candle holders, you require some solid glass vases whose bases have been cut off and other earthenware crocks of different shapes and sizes. You’ll also need a selection of lace covers in complementary colors as well as waterproof glue to fuse the pieces together.
The first step is to place the votive candle holder inside its crock before covering it with a layer of lace fabric. Then, use glue to fasten the material’s edges around the surface of the vase. Once the glue dries up, you can place it on your dining table this Christmas with a votive candle inside to instantly give it an elegant look.
To learn more about how you can create these glass votive candle holders as centerpieces, you should read our step-by-step guide.
13. Modern Votive Candle Holders – Christmas Table Centerpiece
This Christmas, a great way to decorate your dining table is with modern votive candle holders that you’ve prepared yourself. With just a few supplies and some time, you can create beautiful votive candle holders like these in no time. Plus, they make fantastic homemade gifts for friends and family too!
One way to make these stunning votive candle holder centerpieces is to use an oversized glass container whose top has been cut off, together with small-sized glass containers of different shapes and sizes.
You’ll also require cylindrical candles, acrylic paint in different colors, mod podge glue (or another type of waterproof adhesive), metallic spray paints (optional), patterned tissue paper (optional), twine or yarn for embellishments, ribbon, and lace.
The first step is painting the larger glass container in a color of your choice with acrylic or spray paints if you want it to be metallic. Then, use mod podge glue to affix the tissue paper around its lower half for an intricate look.
After this, place the smaller-sized glass containers inside it before slotting cylindrical candles into them. You can also embellish these votive candle holders with twine or yarn, as well as ribbons and other types of trimmings. Just make sure they’re all glued on securely!
To learn more about creating stunning modern votive candle holders as Christmas table centerpieces, we suggest that you read our step-by-step guide!
14. Clear Ornament Vase – Christmas Coffee Table Decor

You can give your coffee table a festive overhaul this Christmas by decorating it with a clear ornament vase. It’s an easy DIY project that requires only a few supplies and instantly gives your place a lovely, Christmassy look.
To get this show on the road, you need a glass or acrylic vase, gold spray paint (optional), a marker for drawing a line around the base of the container, and clear glass glitter in gold tones, or any other type of glitter if you prefer.
It’s also a good idea to have a hot glue gun with glue sticks, strong adhesive tape, string or twine for embellishment purposes, and solid-colored gift wrap paper.
The first step is using strong adhesive tape to cordon off the lower half of the vase so that you have room to work. Then, you should use a marker to draw a line about an inch lower than the top of your vase before filling it up with glitter.
Next, you need to remove the tape from its base and place it inside another container or bowl before pouring in some glue for extra security. Afterward, leave the adhesive to dry overnight until it’s firmly fixed to its base.
Finally, it’s time to embellish your clear ornament vase by tying a piece of string around its waist and threading on twine or other types of trimmings along the way!
To learn more about creating this stunning Christmas coffee table decor, we suggest taking a look at our step-by-step guide.
15. Typography Holiday Wreath – Christmas Table Decoration Ideas
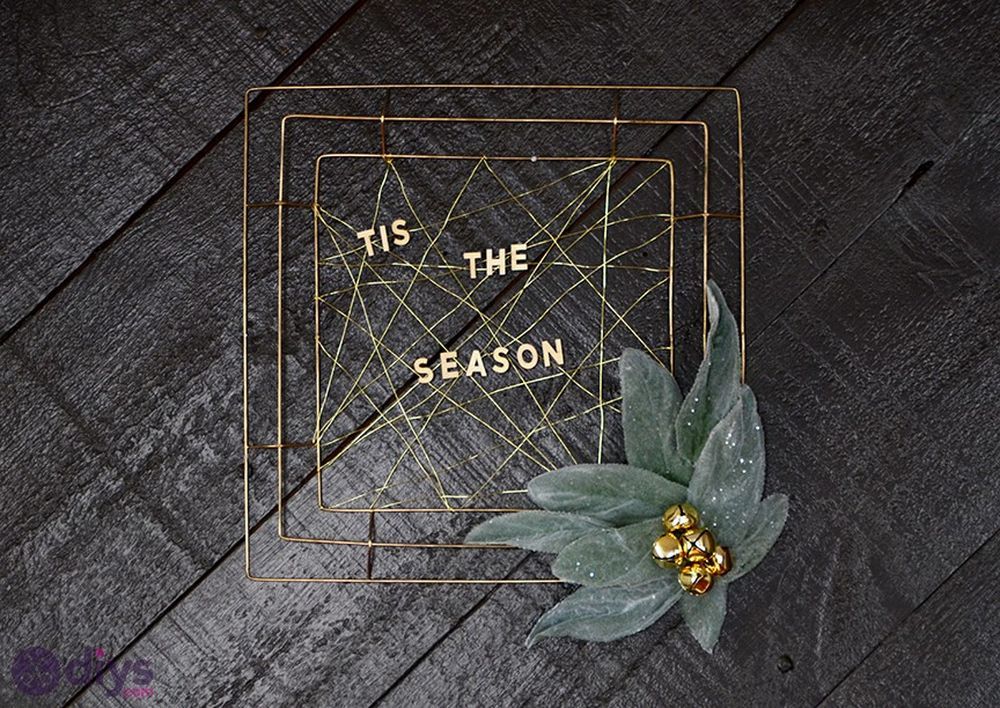
One of the most stylish ways to decorate your dining table at Christmas is with a typography holiday wreath that displays festive words and phrases on an evergreen canvas.
You’ll need some supplies and a steady hand, but otherwise, this Christmas table decoration idea is pretty easy to put together – and you can change what you say as often as you like!
To make this stunning typography holiday wreath, we suggest finding three pieces of twine or yarn in different colors. Secure the middle piece around your thumb before using a string to wrap green floral wire around its top half.
You should then use green floral wire to attach the third piece of string at your desired height before securing white fabric chalk onto it with hot glue. You can then emboss all kinds of festive words and phrases onto your white chalk fabric using a pencil eraser!
Read our step-by-step guide if you’re interested in an alternative way of making a stylish typography holiday wreath!
16. Wreath Ornament – Christmas Dining Table Decor
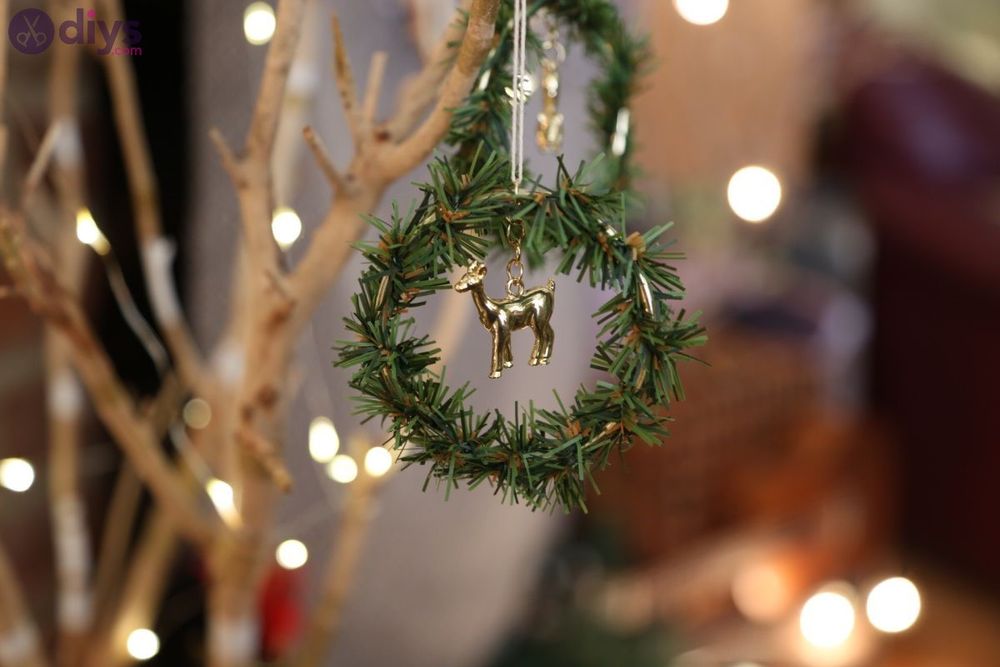
This Christmas, you can drape your dining table with a wreath ornament to give it an extra festive look. Then, show off this ultra-easy project by displaying up to three of these wreaths on the tabletop at once!
For this Christmas dining table decor, you’ll need some green yarn or twine, grapevine balls that are roughly four inches in diameter (or any other type of ball), scissors for cutting the strands, white craft glue that dries clear, and metallic gold spray paint.
Start by placing one grapevine ball inside each wreath ring before spraying it with gold spray paint and setting it aside to dry overnight. Afterward, it’s simply a case of stringing together three different-sized balls for your wreath ornament before gluing them to the bottom of each wreath ring!
This simple DIY is guaranteed to make your dining table look elegant, festive, and ready for Christmas dinner. We suggest checking out our step-by-step guide to learn more.
17. Geometric Hand-Stitched Wooden Slice Ornaments – Christmas Dining Table Centerpiece
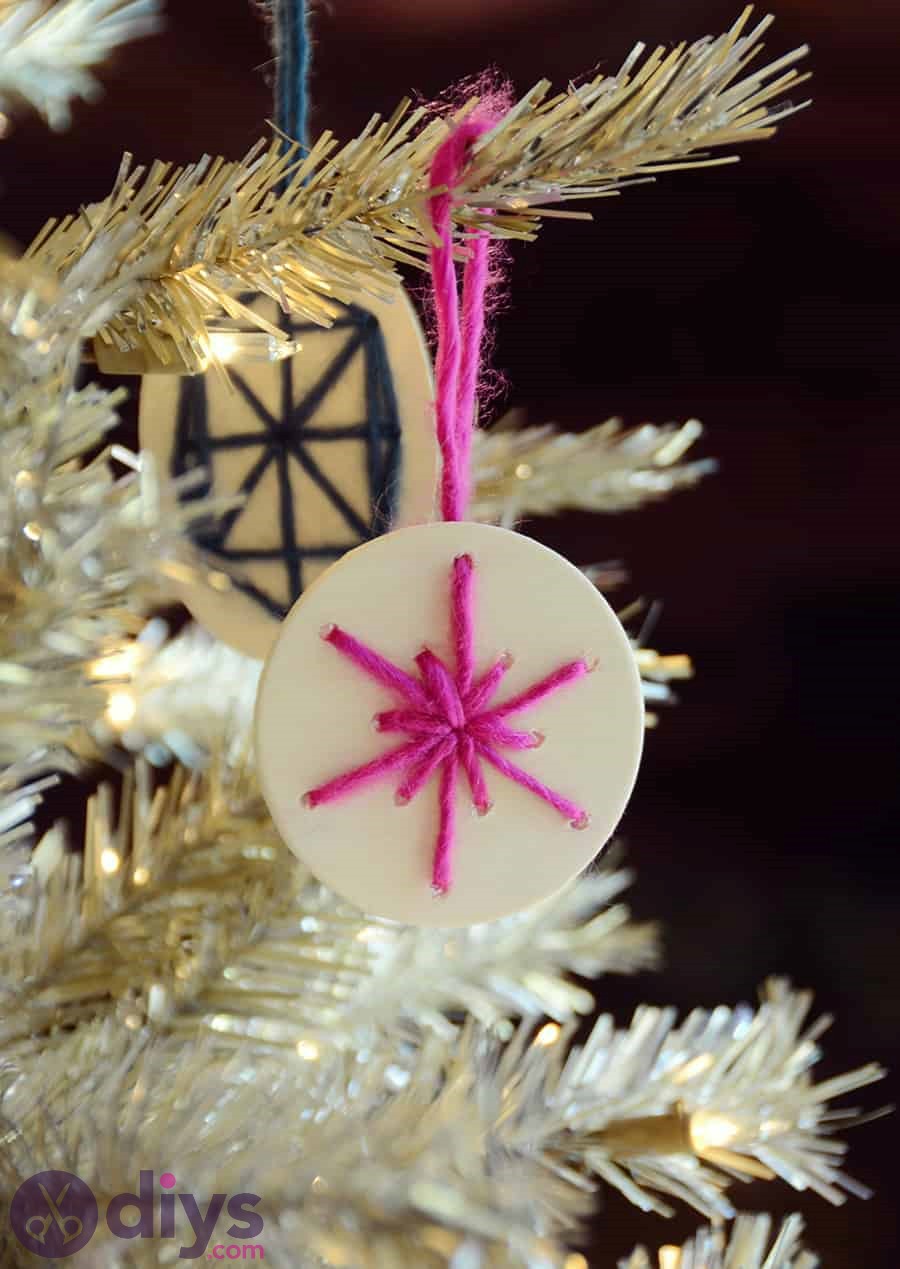
Why not upgrade your dining table with a few geometric hand-stitched wooden slice ornaments this festive season? Most people enjoy choosing traditional tree decorations for their homes, but we think you can’t go wrong with these beautiful ornaments that have been carefully stitched by hand.
As far as materials are concerned, we suggest using white felt and colored yarns of different colors and sizes for the filling and stitching. You could spray-paint them gold or in any other color that matches your Christmas party theme.
It’s also a good idea to get several wooden slices measuring roughly 1 inch thick and 3 inches long. For embellishment purposes, equip yourself with a hole saw bit (two half-inch bits will do) as well as jute twine or string. Good glue is also required.
If you’re interested in making these elegant wooden slice ornaments as a Christmas dining table centerpiece, we suggest exploring our step-by-step instructions.
18. Wood Basket Made from Twigs – Cheap and Simple Christmas Table Decorations
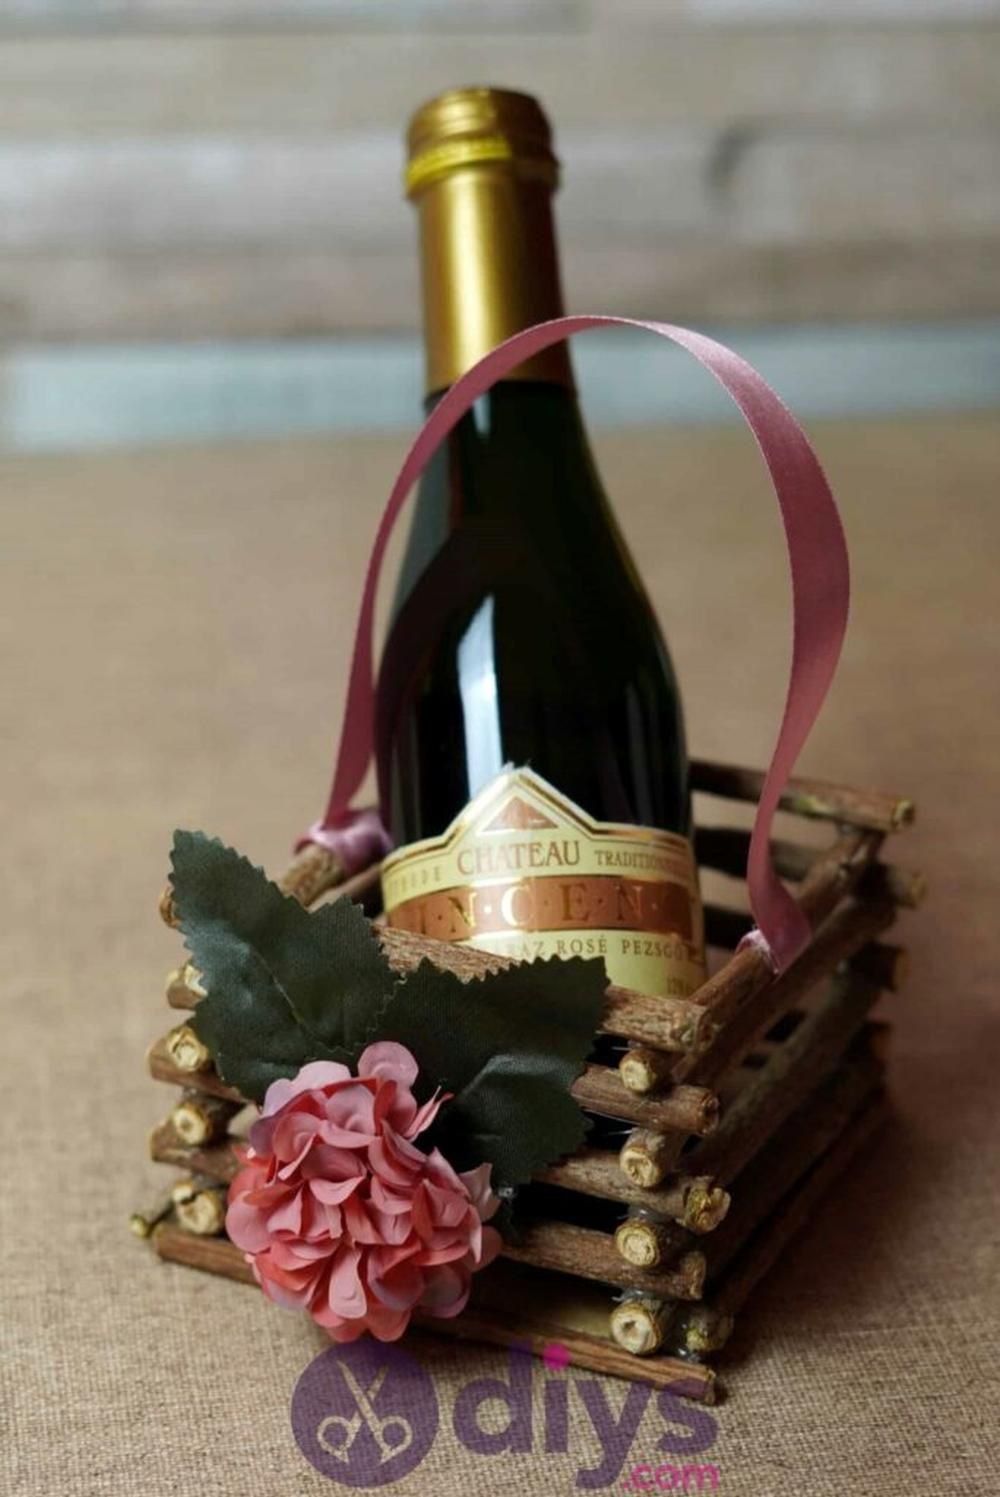
The best way to dress up your dining table and add a touch of Christmas cheer is with an elegant wooden basket made from twigs! It’s easy enough to make, and you can produce several baskets for yourself or your family members.
For this project, we suggest using twigs that measure roughly 2 inches in diameter. The length should be determined by the size of the basket that you’re after. Together with the basket, you should gather jute string or twine and branch clippers before getting creative!
Cut the sticks into lengths that match the size of your desired baskets. Then, thread the jute rope through the center and tie it tightly to form a base for your basket. Continue threading and tying until it’s formed into a spherical shape with no gaps. Once you’re done, make sure to tie off any loose ends.
If you’re looking for a more elegant approach to this cheap and simple Christmas table decoration idea, look over our step-by-step! It involves artificial flowers or leaves, a silk ribbon, and sandpaper.
19. Paper Roses – Christmas Decorations
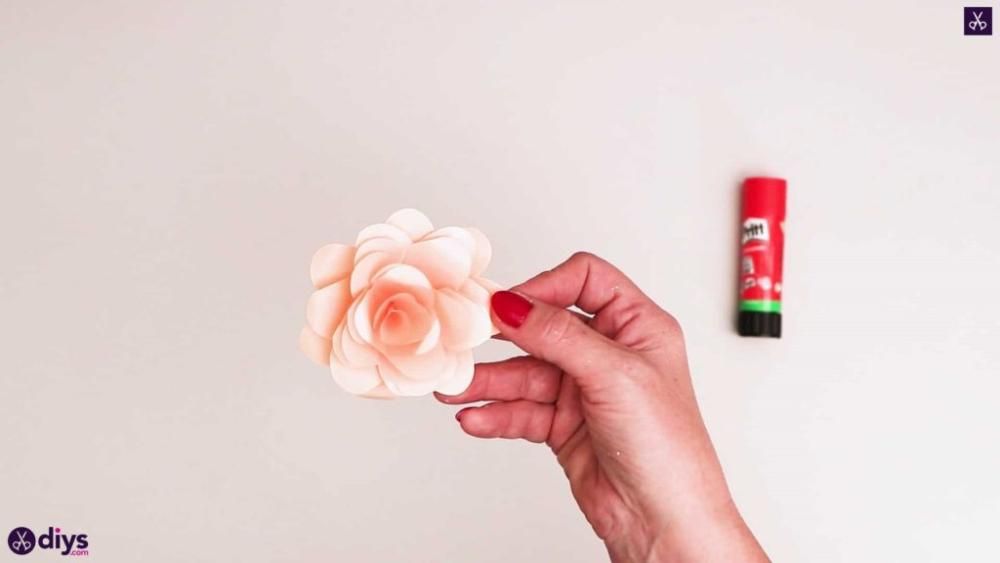
If you want a unique and easy way to decorate your dining table or mantelpiece with Christmas decorations, then consider making paper roses! We recommend going green by choosing birch twigs as the base for this project instead of other materials.
First, cut an arm’s length of twig from a birch tree and set it aside for later use. Then, carefully coat the individual branches with white glue from a glue gun. This step can be tricky if you’ve never done it before, but we suggest using the smallest-sized nozzle possible.
Once every branch has been coated in glue, start adding strips of brown construction paper until all branches have been covered. Make sure there are no gaps between each strip – that will hinder proper gluing later on. To make the paper strips, simply tear them by hand or use scissors to cut them.
Once you’ve finished applying all of the pieces of construction paper, start gluing individual petals onto each branch until it forms into a rose-looking shape! We suggest using pink and red paint for this purpose. It should only take about half an hour for your rose creations to dry. Last but not least, find a nice spot in your house to display your new creation!
You can also check out our intuitive tutorial to learn more about making paper roses.
20. Paper Santa Candy Holder – Christmas Decoration Ideas
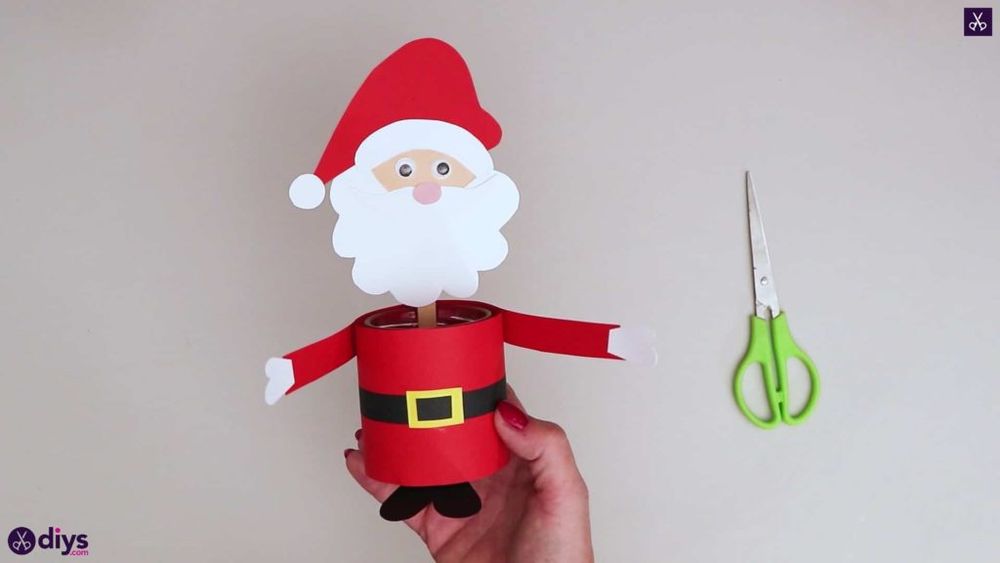
Take inspiration from our tutorial on how to make paper Santa candy holders for Christmas! We suggest using birch twigs as the base, which will require a length of about 4 inches and a height of 6 inches. After adding jute string or fiber twine to the branches, we’ll move on to making candy holders.
First, cut various pieces of construction paper into star-shaped pieces that measure roughly 1 inch in width and height. Make sure there’s no space between each piece before sticking them with white glue!
After assembling these stars, start gluing them over the top half of the branch. This ensures that your candy bowl is sturdy enough to not tip over easily!
Last but not least, add a strip of red construction paper before adding white lids that measure 1 inch in width. You can also insert a piece or two of candy into the holder to let your guests know what it’s good for. And you’re done!
For more inspiration about this Christmas decoration idea, feel free to explore our in-depth guide!
21. Pinecone Trees – Christmas Table Decorations
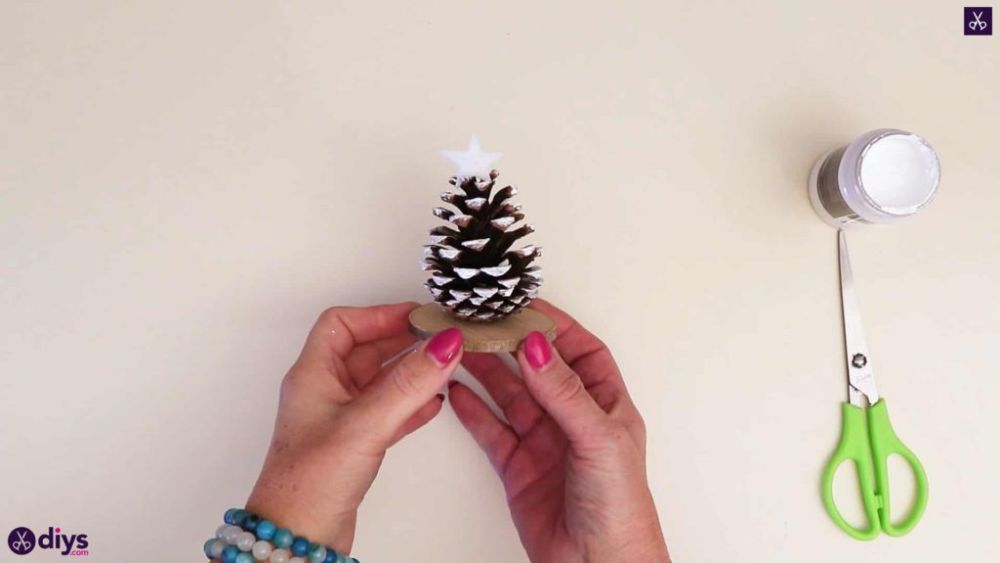
Looking for a more enriching experience with pinecone trees? We recommend using either a birch twig or a wire base. These materials are flexible and can be bent into various shapes, unlike other materials that only come in one form! If you’re going to use a wire base, make sure it’s colored green before starting this project.
Start gluing pinecones to the base using hot glue. To ensure your tree is sturdy enough to stand upright on its own, we recommend adding at least three cones per branch!
Once that’s done, spend some time decorating it with other types of natural materials like moss or leaves. This will significantly enhance the Christmas look of your decoration!
It should take about 10 minutes to finish decorating a pinecone tree. We think your diner table decorations will look better after making several pinecone trees this way! Just find a nice spot to display your new creations. It will make your visitors feel extra cheerful during the holidays!
For more inspiration about this Christmas decoration idea, read our straightforward guide! It teaches you a simpler method for making pinecone trees decorations by attaching them to a wooden disc.
22. Elegant Tree – Christmas Centerpiece
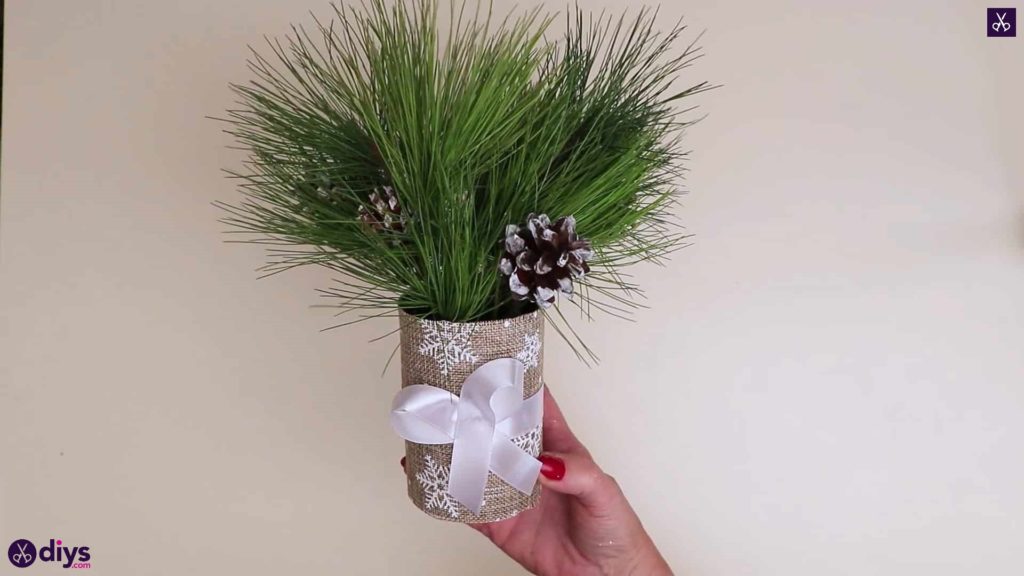
When it comes to Christmas centerpieces, you can’t go wrong with an elegant tree that will brighten up the dining table and make your guests feel cheerful. It’s a simple project that doesn’t require too many materials. Plus, you can whip up an elegant tree in just a few minutes.
Start by gluing small branches to a wooden base. The branches should measure roughly 4 inches in length and width. Make sure the surface is stable before working with these branches to avoid any unfortunate accidents.
After ensuring you have a strong foundation, look for fake green leaves and flowers, together with any other decorations you want to add to the tree. This Christmas centerpiece will be ready after placing all decorations on the branches!
For instance, you can use green glitter since it has a wintery look and goes well with most decors. However, feel free to use any kind of decoration material that fits your style for this decoration. After finishing, don’t forget to clean up the mess, and you’ll be all set!
For more inspiration, read our in-depth guide about making elegant Christmas trees!
23. Miniature Pot Pastel Decoration – Christmas Table Centerpiece
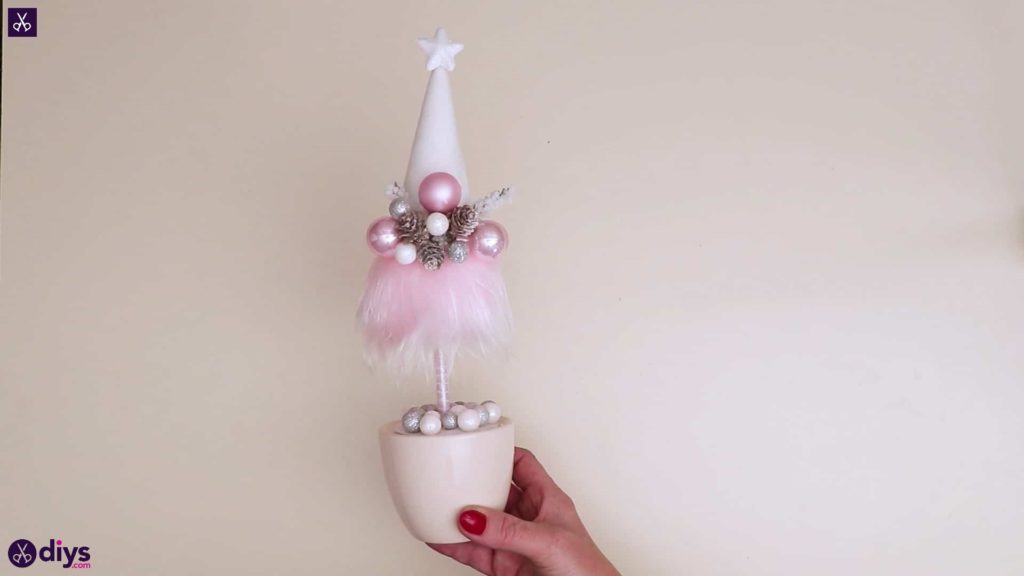
If you’re looking for simple ways to spruce up your dining table, consider using miniature pots and decorating them with pastel colors. It’s an elegant Christmas table centerpiece that will certainly amaze your guests.
We recommend using either clay or plastic to make these decorations. You can find many colors of both materials in craft shops! Plus, you can use any small holiday item that may come in handy, like trees, figurines, and so on.
Start by making a hole at the top of each pot with a screwdriver or pencil before inserting twigs into the holes. If the twig doesn’t fit easily inside the pot, don’t force it – you need to sand down the wood before attaching it! The same goes for bending branches into certain shapes or angles before sticking them to your project.
Once all four twigs are inside the pot, it’s time to paint. If you’re going for pastel colors, try white, pink, blue, and light green. After giving each of your miniature pots a nice coat of paint, don’t forget to clean up all the mess. You’ll be ready for the next step once that’s done!
To ensure your table is safe during this project, it would be best to cover it with some newspaper. This way, you can simply fold all the newspapers into a ball after working on each pot without having to worry about cleaning up.
At last, decorate each pot with small items that come in handy for this project. For instance, you can use fake trees or flowers since they will look great around these plant stands. Don’t forget to add a few lights as well!
For more inspiration, don’t hesitate to explore our intuitive tutorial about making pastel Christmas tabletop centerpieces!
24. Snowflake Art – Christmas Coffee Table Decor
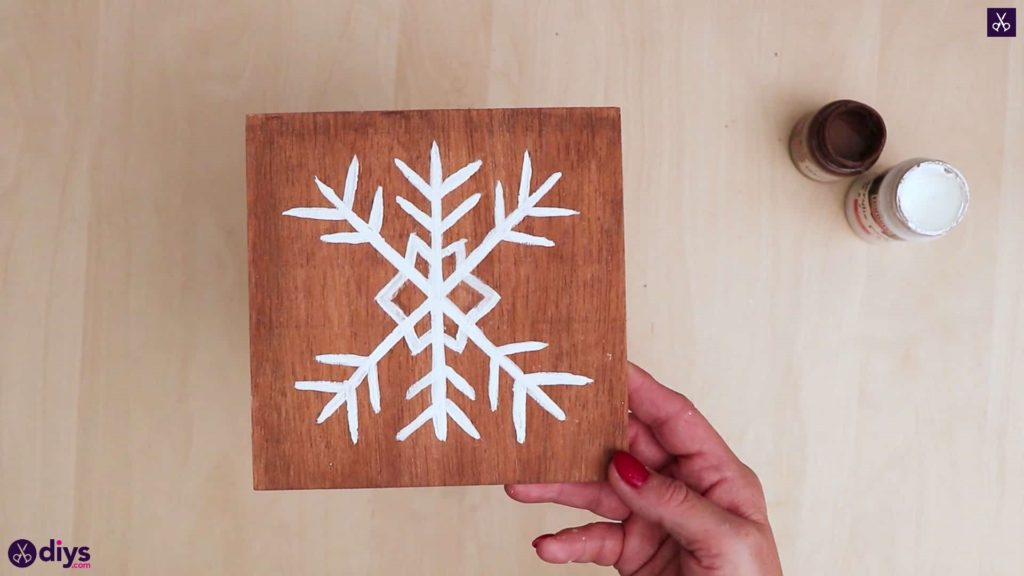
A beautiful and creative Christmas coffee table decoration that doesn’t take too much time to make is a snowflake design on a wooden board.
Or, if you’re looking for simple ways to spruce up your living room, consider painting the floor with a few of these boards and adding a few LED lights on top. You’ll see how gorgeous this project turns out in the end!
Start by printing out several images of snowflakes from the Internet or creating your own drawings. Make sure you print them on glossy paper since it has an incredible paint adherence compared to matte images. Then, place each sheet against the wood and use tape to secure it in place.
After using tape, you can start painting with acrylic paints and any paintbrush. Don’t worry about painting a few streaks or other imperfections since the snowflake shapes will help you mask those mistakes.
Once the paint dries, it’s time to remove the paper sheets from each wooden plank. In addition, you can wrap LED lights around nails and place them on top of the boards if you want to improve this Christmas coffee table decoration.
Place some miniature trees as well, and voila! This beautiful design is ready for showing off at any parties your friends may have planned!
To learn more about making unique snowflake art, read our in-depth guide!
25. Snowflake Embroidered Heart Ornaments – Christmas Table Decoration Ideas
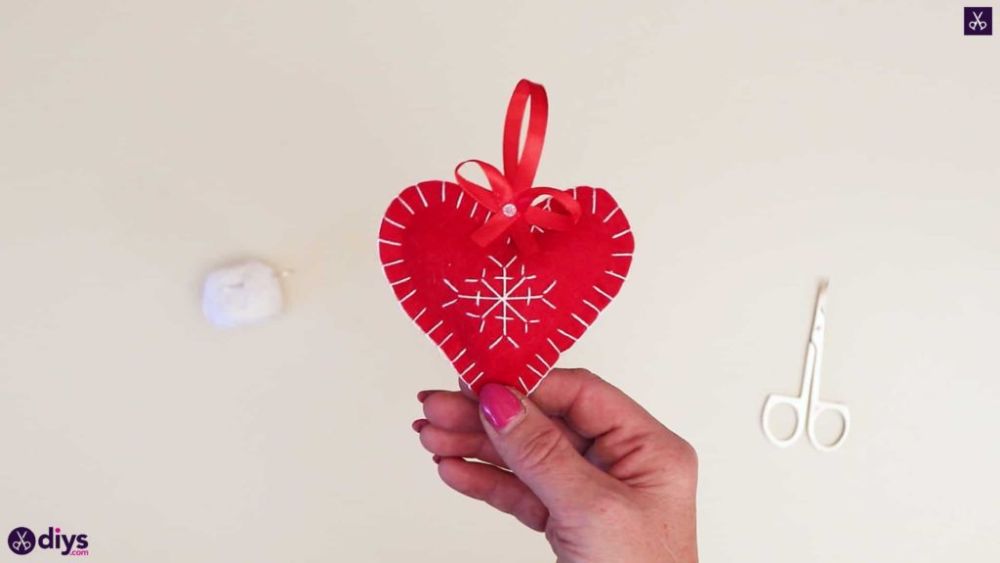
You can go for a snowflake embroidery pattern if you want to add some Christmas table decoration ideas to your home and show a little love for your friends and family. This excellent DIY project will certainly amaze your guests, especially the ones who admire handmade crafts!
Start by stitching fabric together and cutting snowflakes from different sizes of felt. Then, use embroidery thread in white or silver color to outline each crocheted piece. A needle with an eye large enough to accommodate thick threads will make this step easier for you.
As soon as all outlines are drawn on both sides of the fabric, you can start crocheting all pieces together using single stitches inside each shape in curvy lines. Don’t forget that the smaller the snowflake, the smaller your stitches should be.
Once all pieces are attached, you can move on to adding lights! You have two ways of doing so: placing lights between each row of stitches or looping a piece of wire along each row and attaching LED lights at the end. However, the second method will take more time since it’s not that easy pulling wires through the fabric without damaging it.
You can place these beautiful items wherever you want in your home or office! For example, you can hang them above the fireplace or simply put them within reach on top of a coffee table during your next holiday party night!
If you are curious about learning more about snowflake embroidered heart ornaments, look over our in-depth guide!
26. Coasters from Painted Wood Slices – Christmas Dining Table Decor
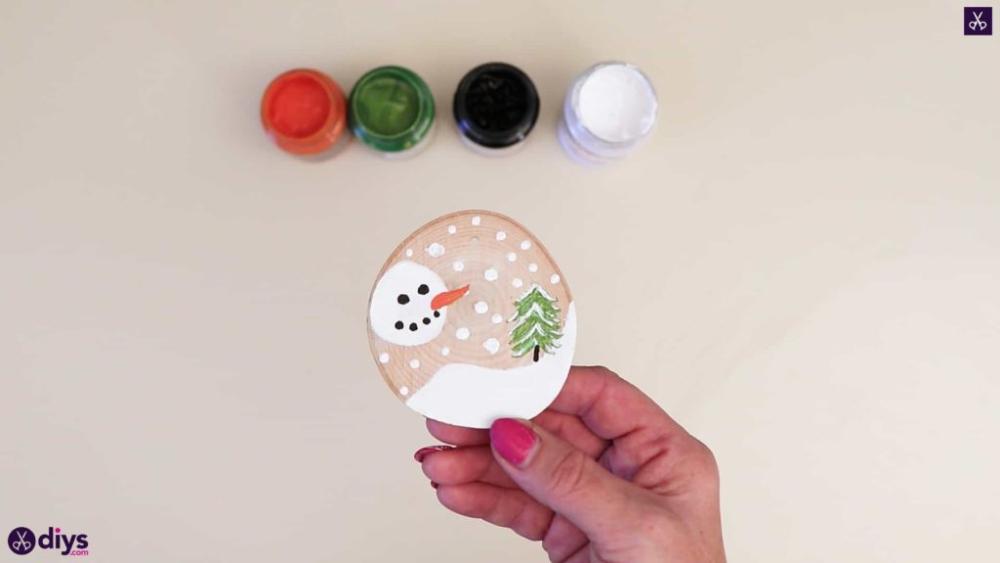
Making coasters from painted wood slices is a neat way to decorate your dining room table for Christmas. Start by picking wood slices of different shapes and sizes from discarded furniture or any lumber supplier you know. Smooth out the surfaces on each piece, then paint them with white acrylic paint and allow them to dry.
Afterward, pick fabric scraps in various styles and cut small circles from each one. Use adhesive fabric glue to attach them to the painted pieces and to wooden bowls with small bases decorated in the same manner as the coasters!
Once all circles are attached to the base and sides of coasters, use a marker or pencil to draw lines radiating inward towards their centers. Then, paint over those lines using colorful acrylic paints and allow everything to dry.
Finally, add a thin layer of varnish over each piece using spray paint to protect them from damage and water stains when in use!
If you want to learn more about making coasters from painted wood slices, check out our straightforward tutorial!
27. Concrete Advent Candle Holders – Christmas Dining Table Centerpiece
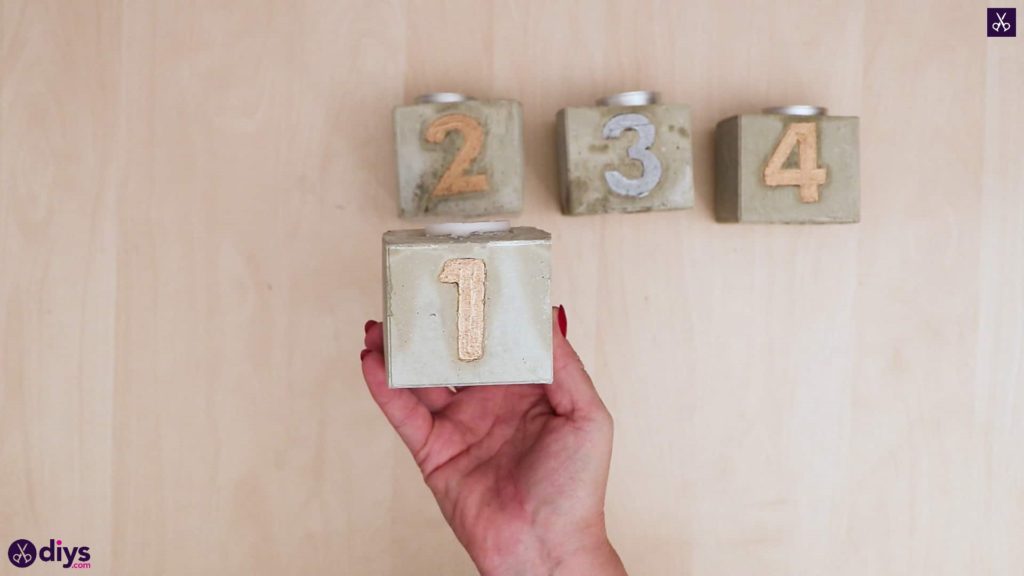
A set of four concrete advent candle holders is a wonderful DIY project that will help you to decorate your dining room table for Christmas. It’s tasteful and easy to make!
Start by working with a wire mesh made from thin, bendable materials and shaping it into a circle on your work surface. Then, use strong metal clamps on the top and bottom edges to hold the mesh in place while pouring concrete inside its center.
As soon as the first layer of concrete is dry enough to retain its shape without assistance, prepare another batch and flip the mold over onto your work surface. Make sure that the wires are pointing downwards before pouring the mixture into the container!
Then, attach these pieces to wooden boards – the same ones used for making tabletop photo frames – for easier transport. Draw lines around the edge of each piece with a marker or pencil to resemble candle holder bases, then paint them white.
Finally, go over these lines by drawing smaller wavy lines that resemble flames and fill in the color between them! Allow everything to dry completely before moving on to the next step.
After painting all pieces, share your advent candle holders with family and friends as unique centerpieces for your next holiday dinner table! If you want more details about this project, take a look at our tutorial!
28. Twine-Wrapped Bottles – Cheap and Simple Christmas Table Decorations
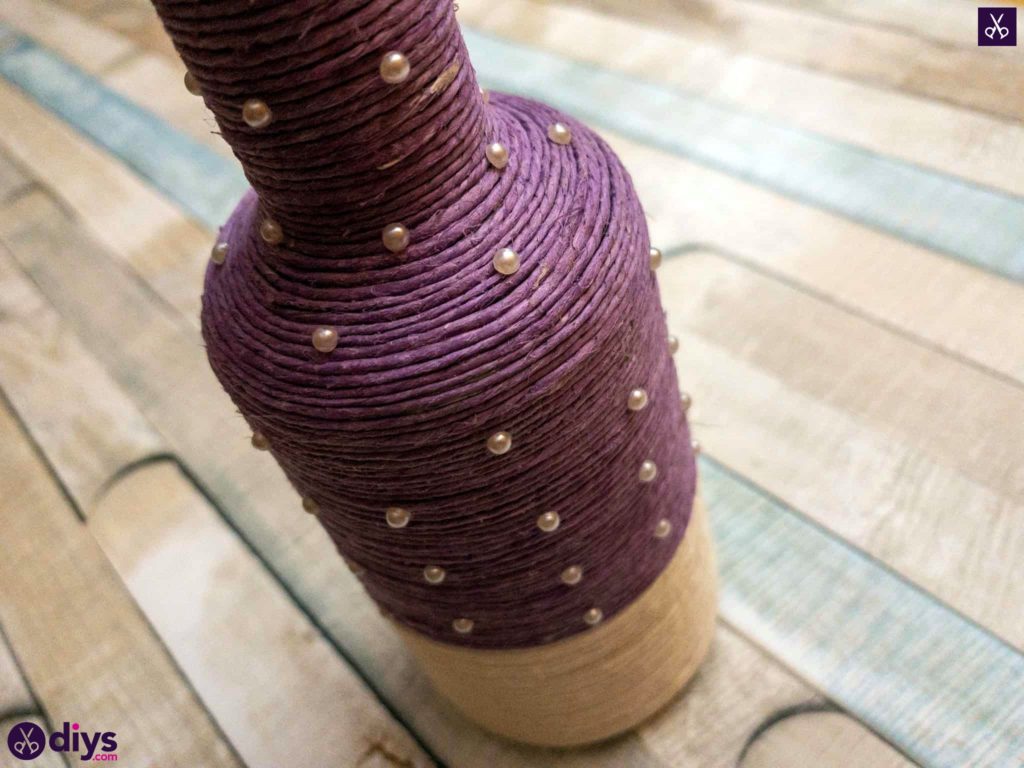
Christmas is almost here, so you might want to start your preparations for the upcoming holiday season soon. And there’s no better way to do that than with cheap and simple Christmas table decorations, especially if you’re on a tight budget!
Creating twine-wrapped bottles is the perfect DIY project of how you can easily make attractive decoration ideas using everyday objects! All you need are glass bottles of various shapes and sizes – beer ones will do just fine – plus twine, adhesive tape, and markers or pencils.
Take each bottle and wrap it tightly with twine that’s been cut into medium-length pieces. The more pieces you use on one item, the thicker its form will be when everything is complete.
Afterward, paint these items with acrylic paints in different colors. Make sure to leave them to dry for several hours before moving on to the next step! Use adhesive tape to cover the lower part of these bottles and draw circles on them with markers or pencils. If you want a more festive and colorful result, add some metallic paint over them!
Once you completely finish all items and give them enough time to dry, bring out your twine-wrapped bottles and display them in groups around your house for an impressive effect!
To learn more about making twine-wrapped bottles, you should review our in-depth guide.
29. Cinnamon Stick Candle Holders – Christmas Decorations
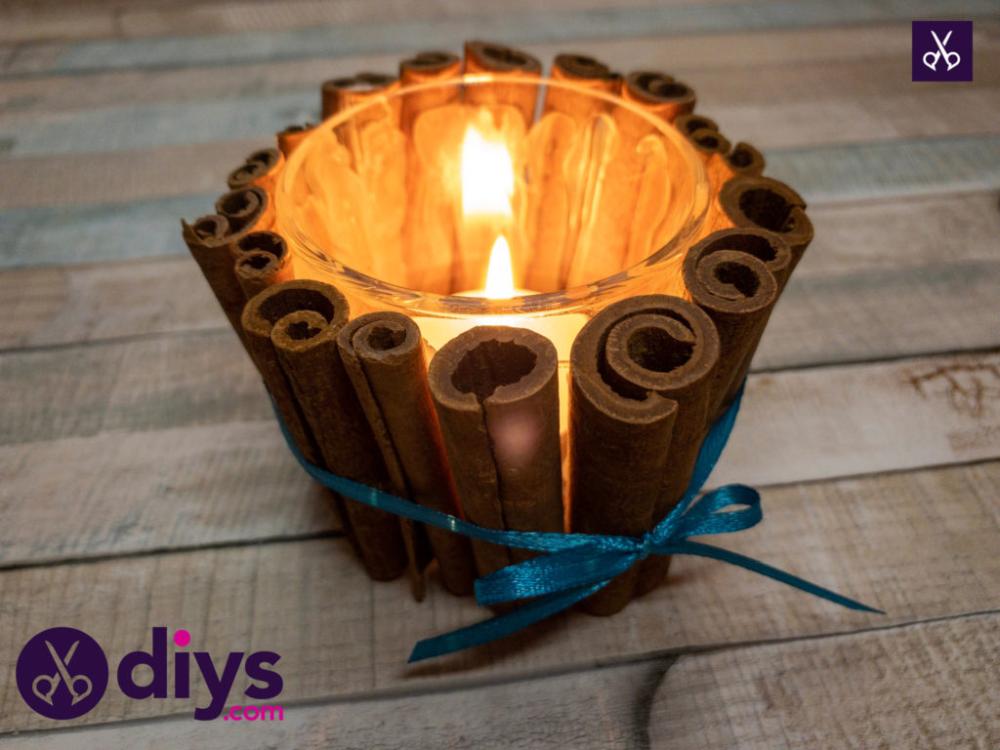
To make impressive tabletop Christmas decorations for the upcoming holiday season, you should start by gathering all necessary supplies and deciding on an effective design. And few options are as good as cinnamon stick candle holders!
They are very easy to create and require just a few items: clean, empty jars (small ones work best), twine, paint, scented sticks of cinnamon, and cloves or whole star anise.
Take each jar and pour some glue into its bottom. Then add a few of your favorite spices and shake the jar to distribute them evenly across its surface. Afterward, cover these items with more glue so that they impregnate the entire mixture inside the container!
While the glue dries outside, create some colorful twine bows and attach them to the jar’s mouth. To give these Christmas decorations a more festive look, draw patterns on them with glitter paint!
Finally, display your cinnamon stick candle holders on the tabletop – preferably in groups of three or four for an eye-pleasing effect – and then light up their wicks to make your preparations for the upcoming holiday season complete!
For more details about crafting these beautiful cinnamon stick candle holders, pay a visit to our comprehensive guide!
30. Gilded Candles – Christmas Decoration Ideas
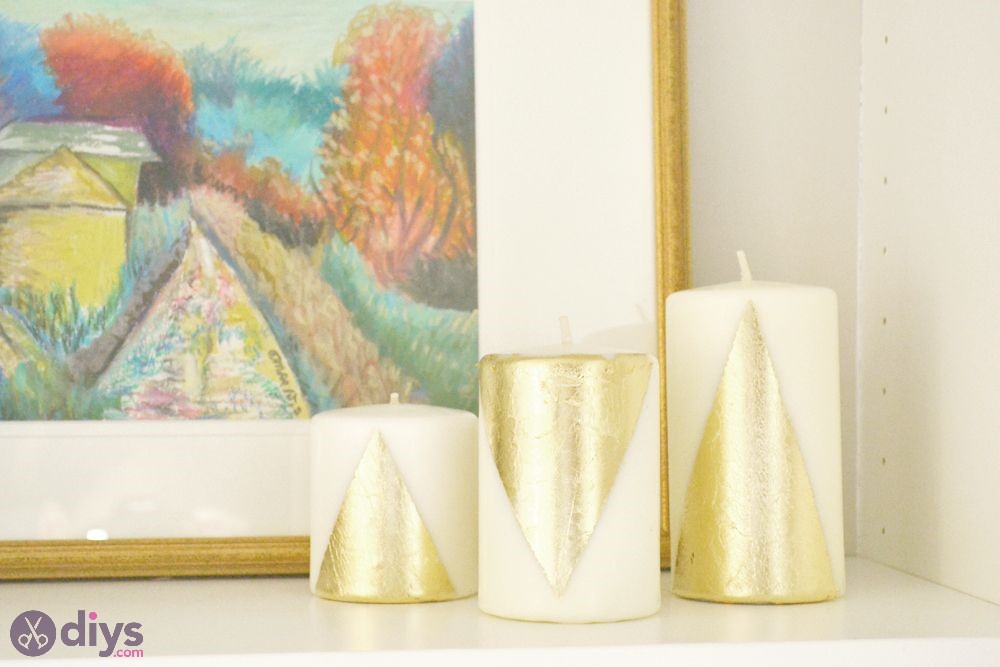
Looking for impressive Christmas decoration ideas that are also easy to put to practical use? Then you should try gilded candles, as they are some of the simplest yet most effective handmade ornaments on our list!
To make one yourself, prepare a pair of short tapers (unscented would be perfect), together with gold spray paint and primer explicitly designed for plastics. If you don’t have any at hand, use a white primer instead.
After washing your tapers thoroughly with soapy water and allowing them to dry completely, prime the exterior surfaces until they’re completely covered with sticky paint! Once this process is done, cover them again, but this time with gold paint. And there you have it: ready-to-use gilded candles that not only look stunning but also emit a pleasant scent!
Learn more about making gilded candles in our straightforward tutorial!
More Christmas Table Decorations
We have even more Christmas table deco suggestions ready for you, so let’s take a look at them too!
31. Edible Snowglobe Christmas Table Decoration
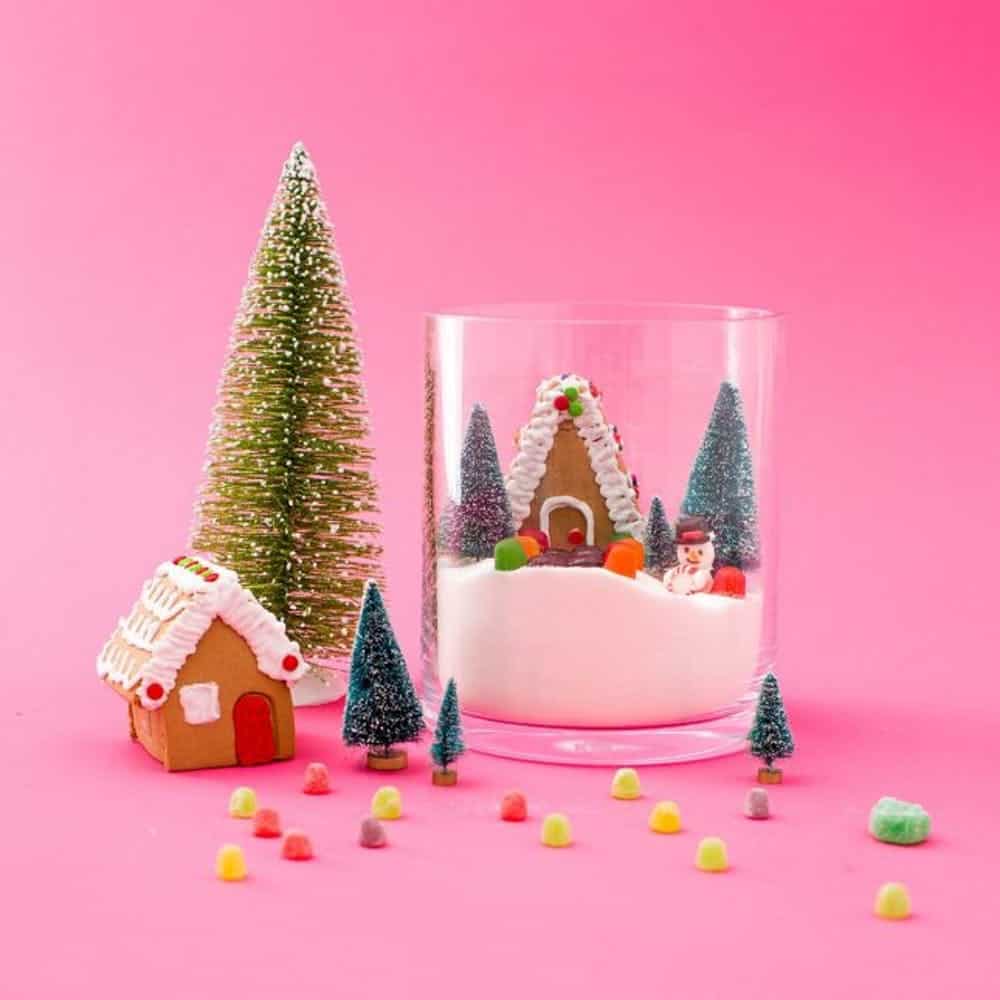
Just like you can gather the family and create an edible gingerbread house, you can do that same thing with a snowglobe! Hop on over to Brit + Co and grab the details. Then use it as a centerpiece for the table!
32. Star Tealights Christmas Coffee Table Decor
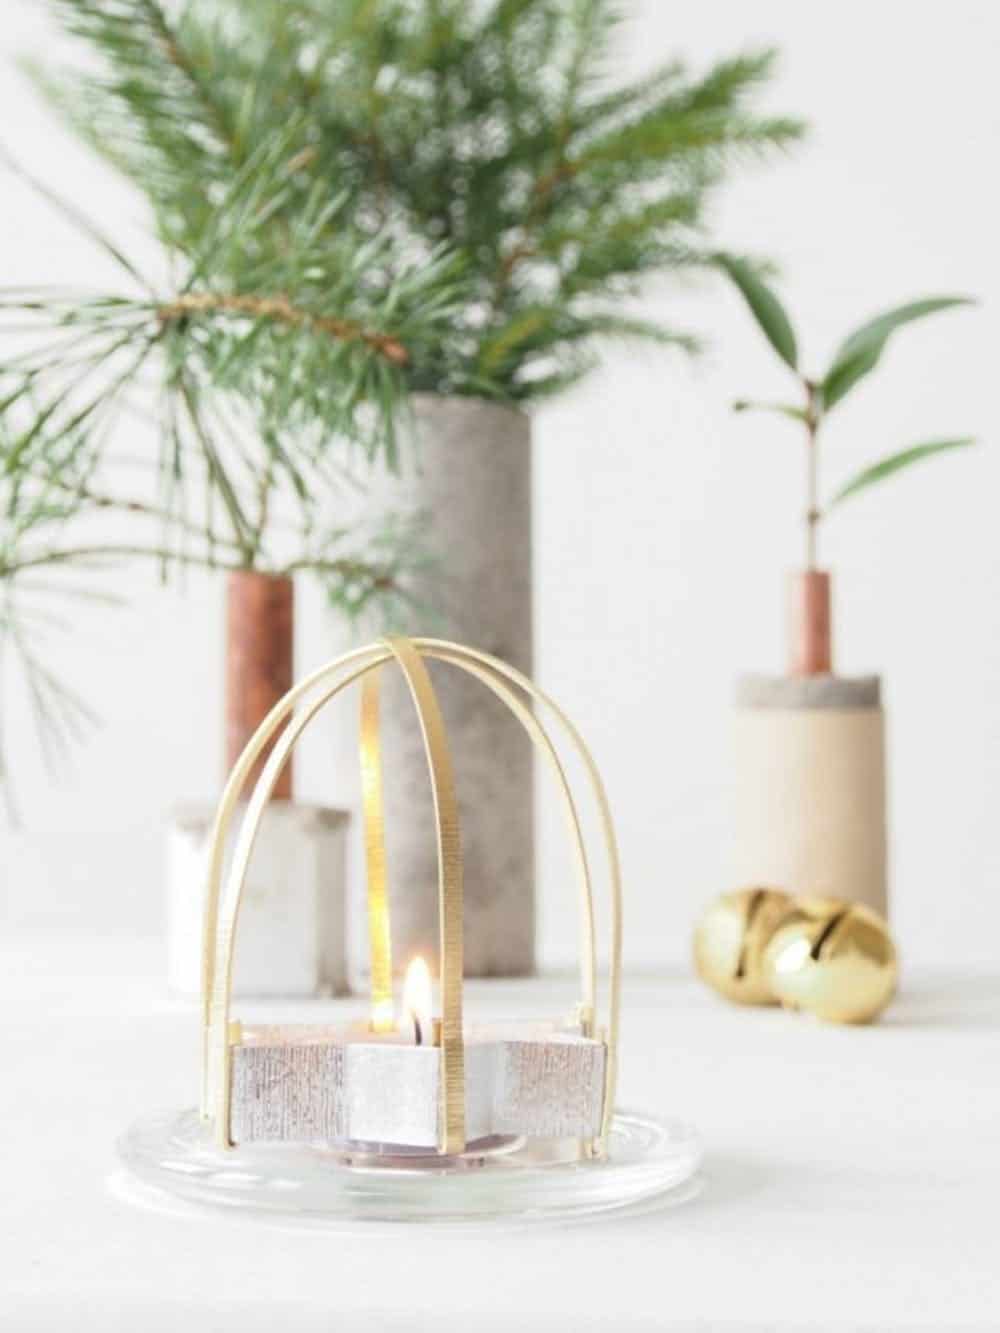
These beauties are DIY-friendly and you can whip up several to cover a big dining room table. Hop on over to monsterscircus to grab the tutorial. You can personalize the colors too!
33. Holiday Vignettes – Christmas Decorations
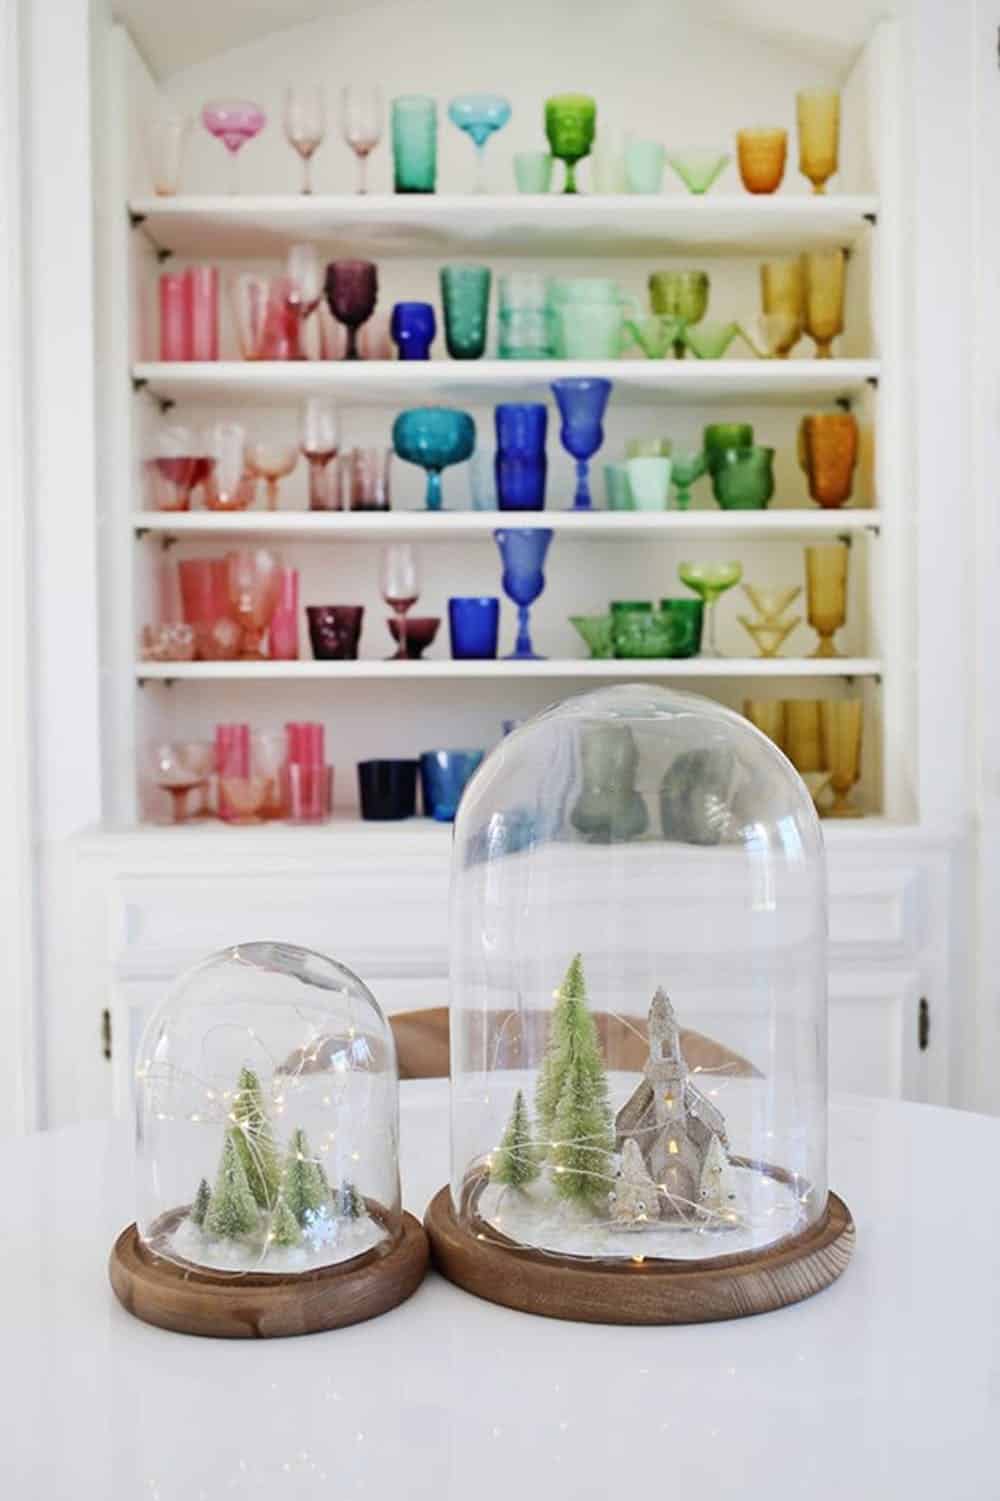
You could even create some of your own scenes like they did at A Beautiful Mess – and then use them to decorate the tables. These can be a family project! What’s so great about this idea is how much you can personalize them.
34. Garland Layered Stand – Christmas Decoration Ideas
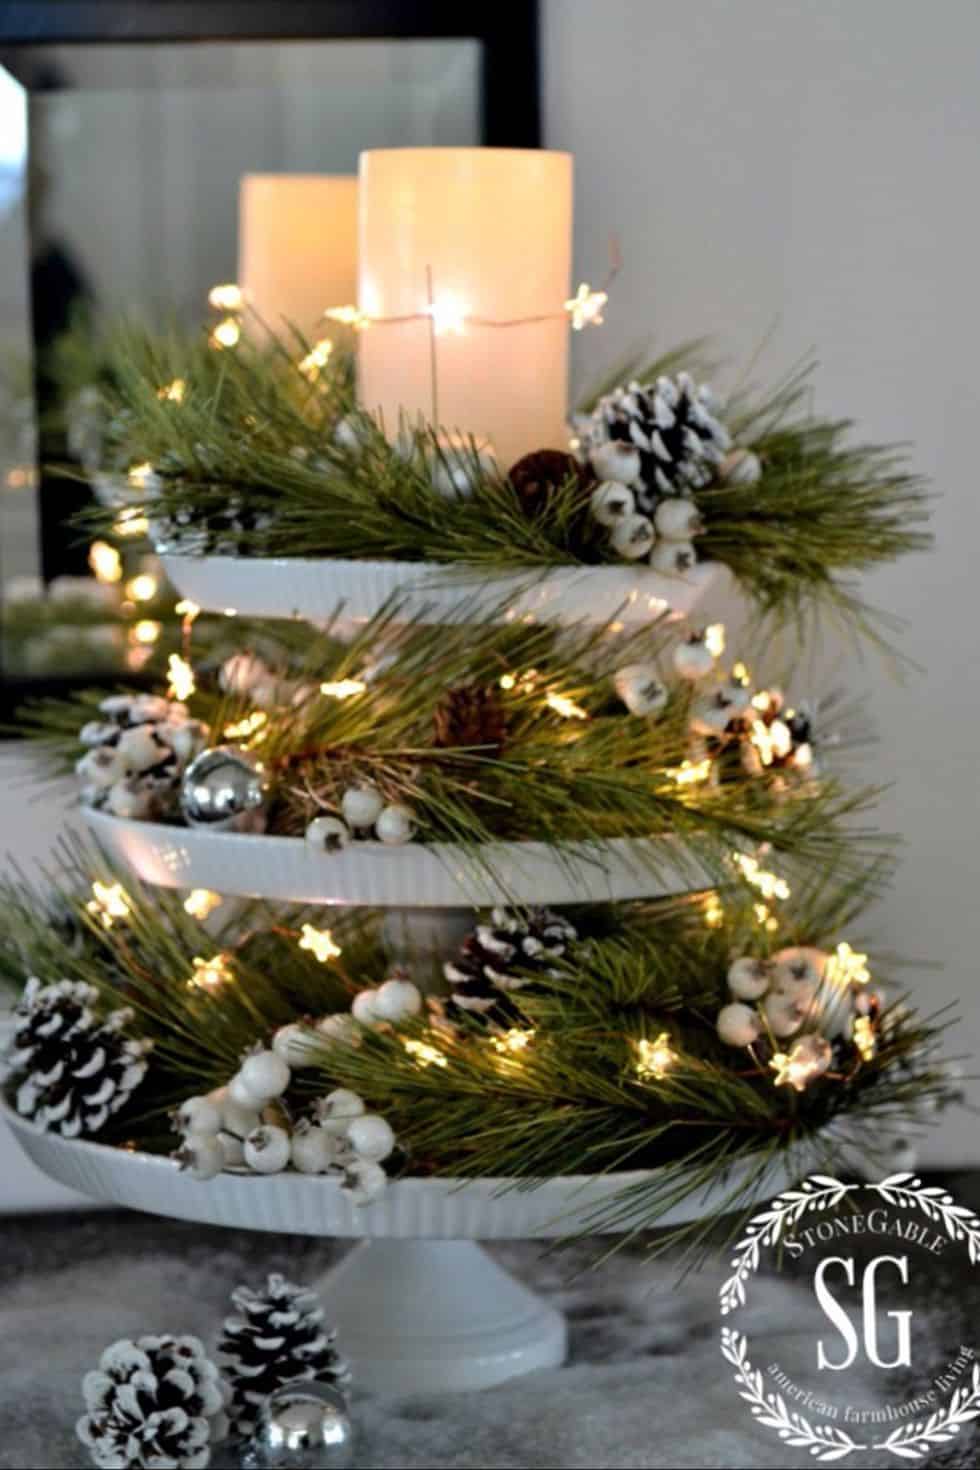
Stone Gable Blog has some beautiful inspiration, especially for the holiday season. Layers of pinecones and garland wrapped around a cake stand. This is an easy DIY to accompalish with items you already have!
35. Candy Cane Hats – Christmas Dining Table Decor
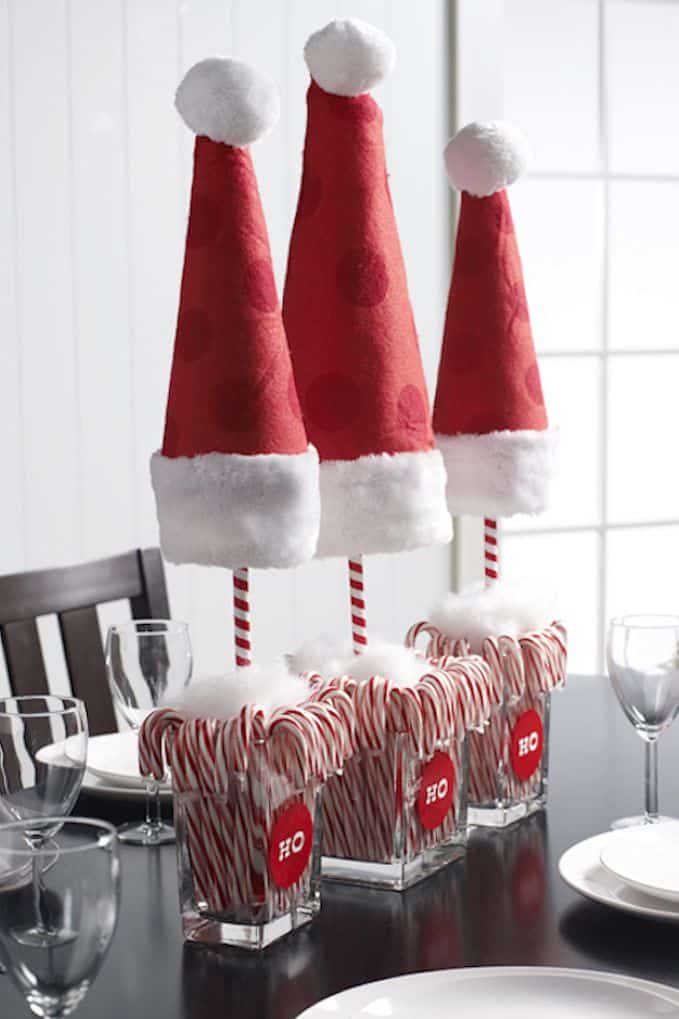
Grab your candy canes and put them to good use like they did at DIY Candy. These Santa hat-topped hats are such a festive and kid-friendly idea.
36. Hanging Ornament Display – Christmas Dining Table Centerpiece
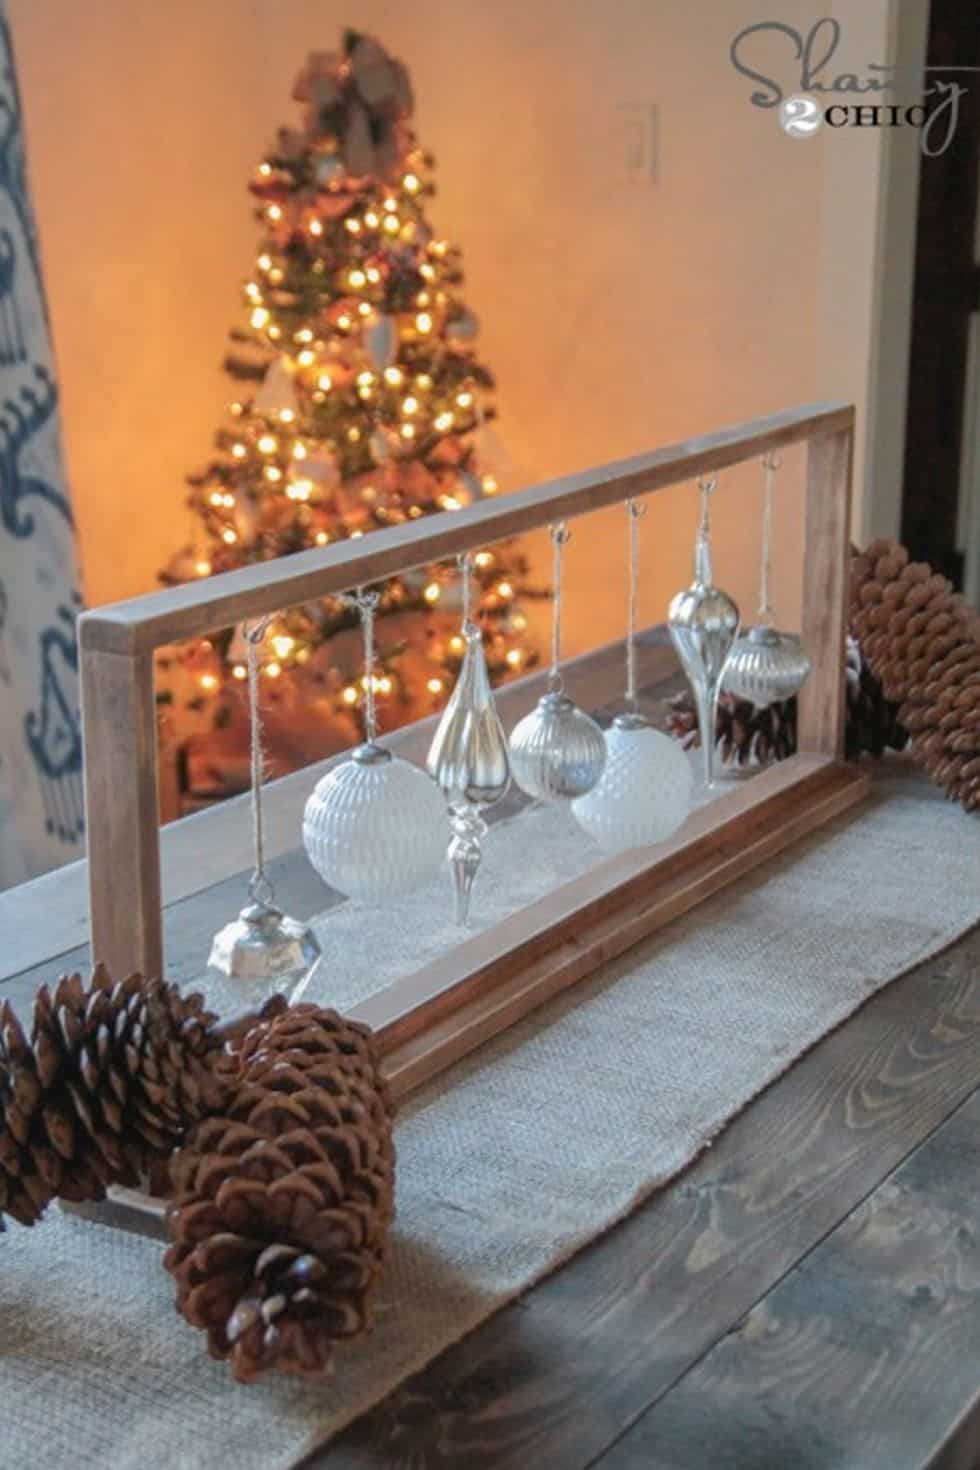
Check out this fun display we found at Shanty2Chic! It’s got a distinctly rustic style but also a DIY vibe that’s endearing and inviting. Personalize your project with colors and ornaments you love.
37. Plaid & Greenery Christmas Table Centerpiece
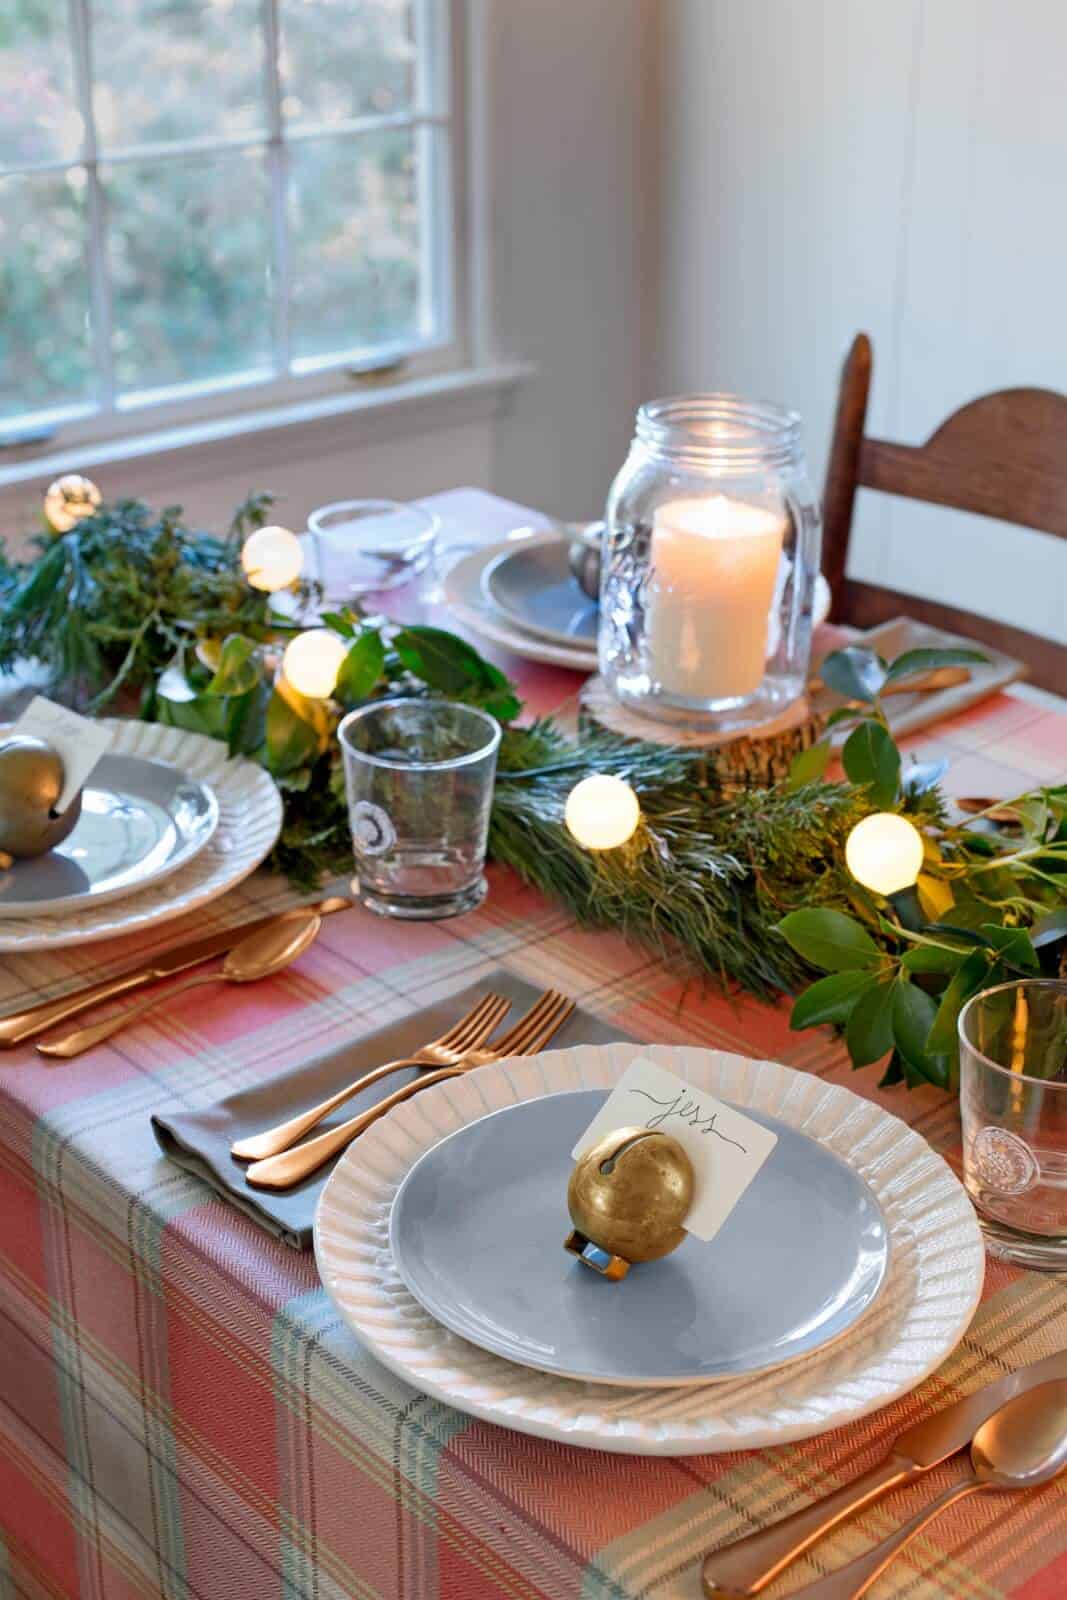
We’re swooning for this tablescape from Country Living. It’s such an easy way to decorate the table for the holidays but packs a punch. Grab some plaid and pair it with some greenery and garland for a festive look.
38. Christmas Runner – Cheap Simple Christmas Table Decoration
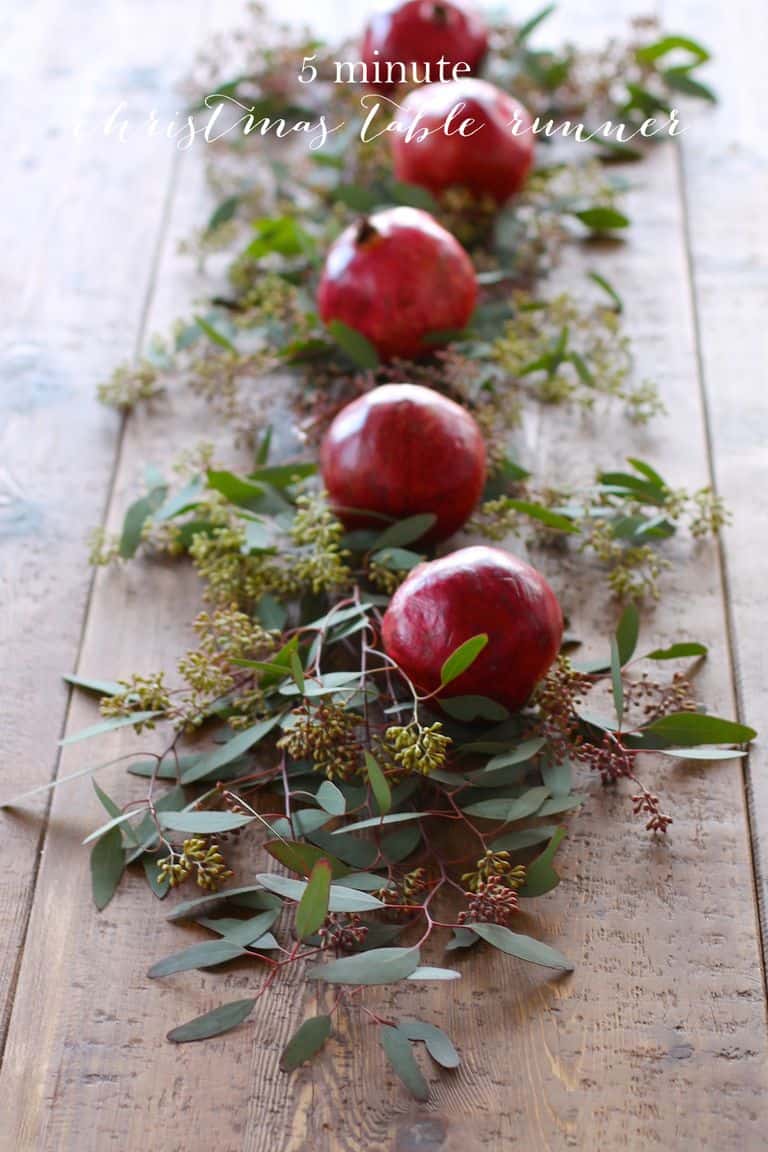
With some eucalyptus and pomegranates, you’ll be able to create this runner as well. Julie Blanner will give you all the know-how behind its makings.
39. Mini Paper Trees – Christmas Decoration Ideas
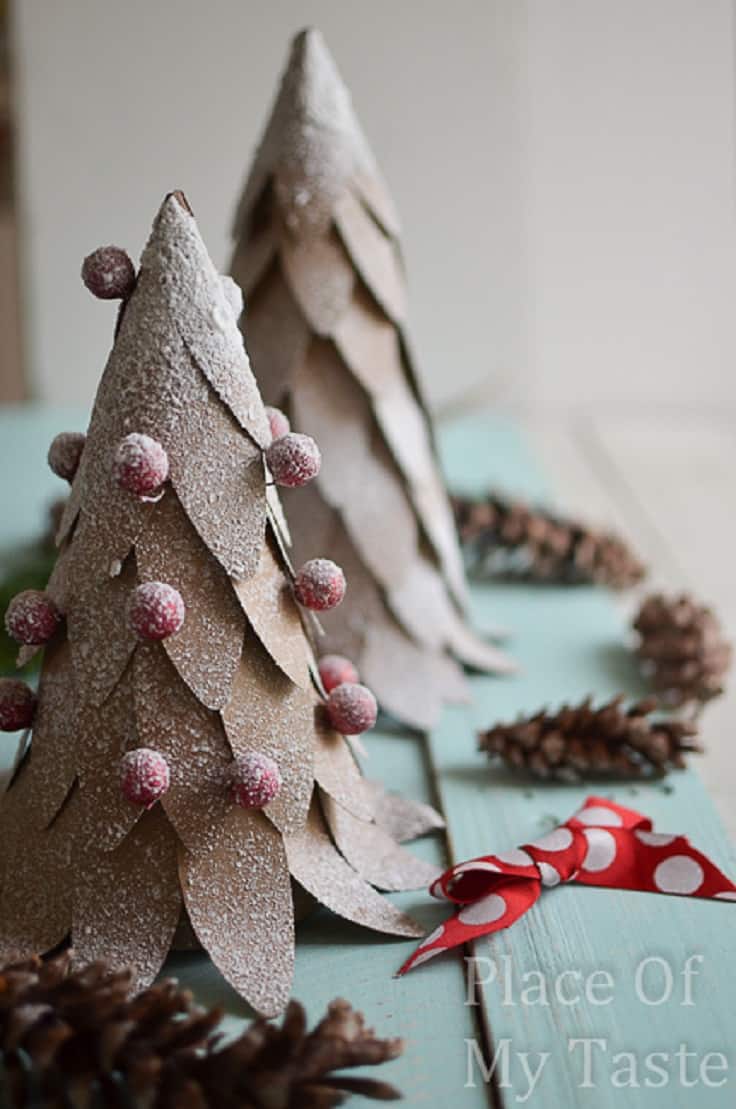
You’ll have a good time whipping up these mini trees. Check out Place of My Taste for all the details behind the construction and the berries too! It’ll be a fun way to spruce up the tables.
40. Hershey Kiss & Seasonal Candies – Christmas Coffee Table Decor
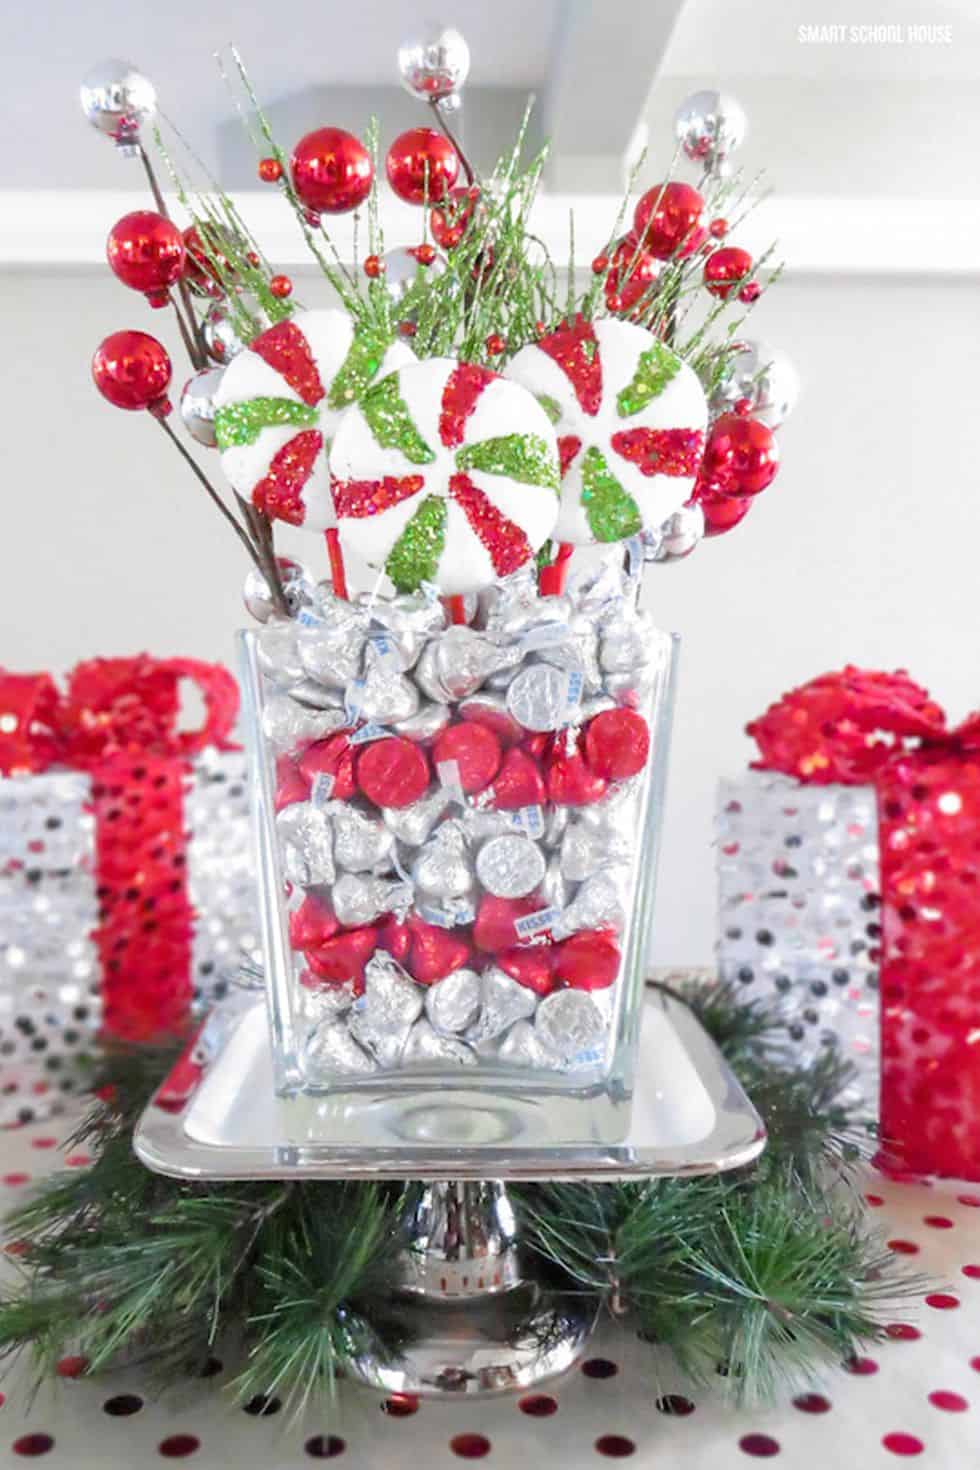
This centerpiece is festive, fun, and the kiddos will want to dive right into the madness. You can utilize your holiday candy to make a piece of decor for the table. Grab the details at Smart School House.
41. Pinecone Arrangements – Christmas Dining Table Decor
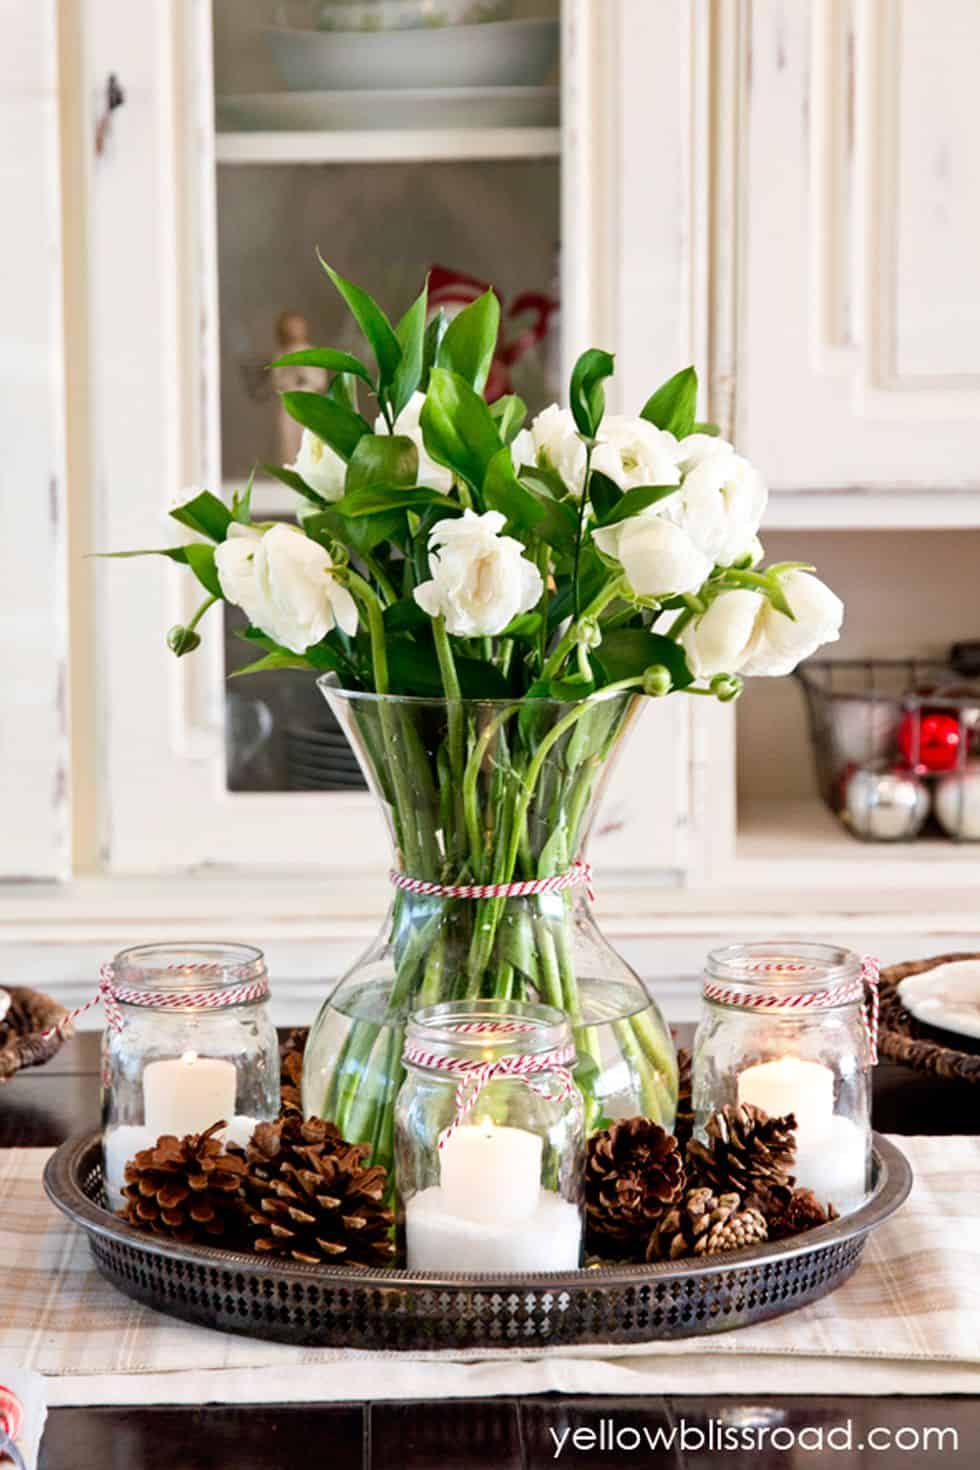
Yellow Bliss Road made a floral arrangement fit for the holidays. Some fresh florals paired with pinecones is the perfect way to breathe Mother Nature into the season.
42. Cranberry Luminaries – Christmas Table Decoration
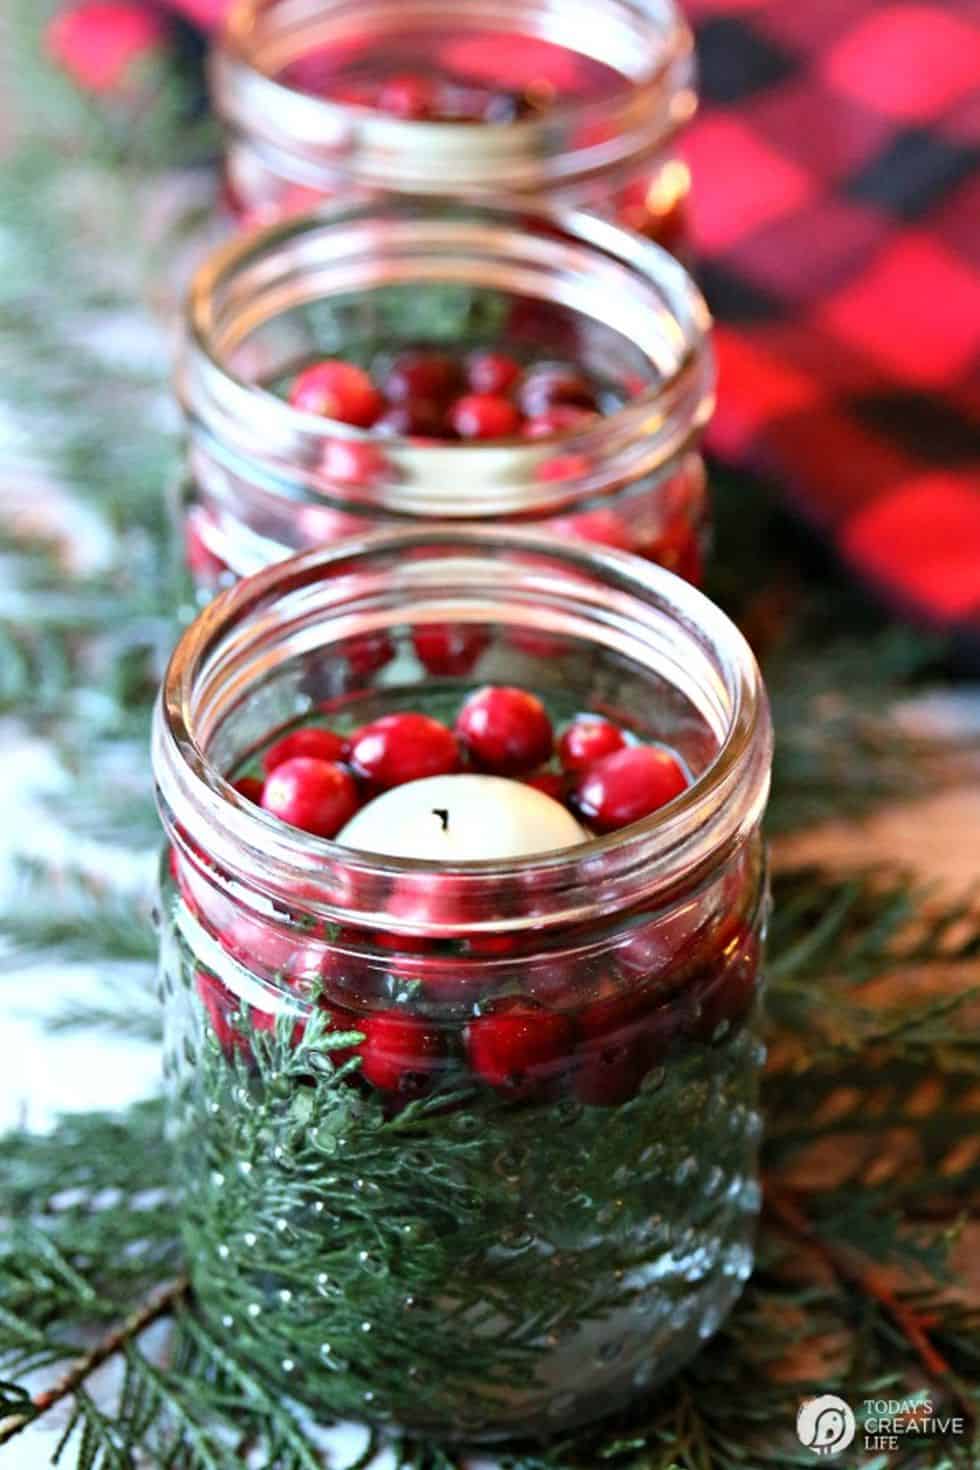
Here’s a more traditional piece of decor that works well on the tables. Visit Today’s Creative Life to grab all the details. They only take five minutes and add beautiful pops of color!
43. Gingerbread House Boxes – Christmas Table Decor
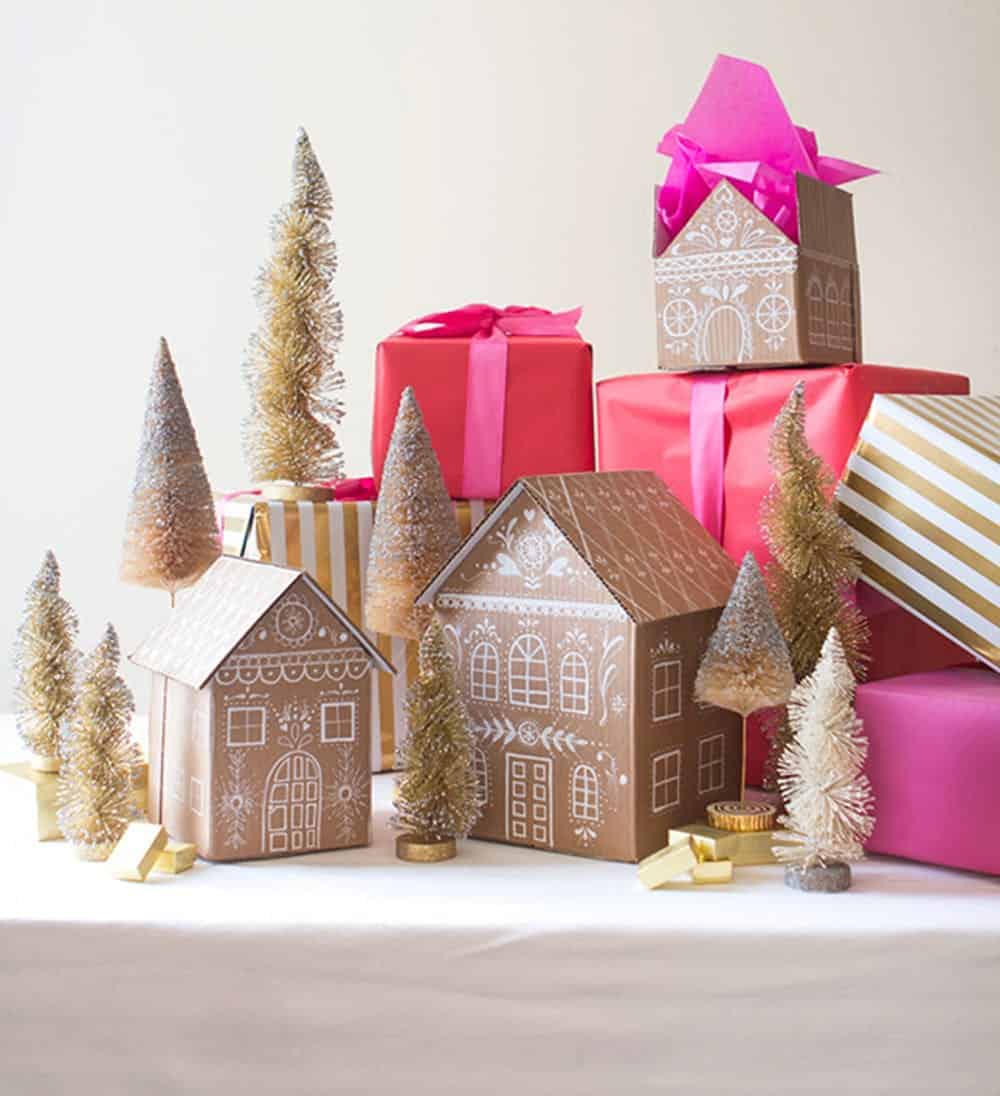
You don’t have to go edible with your gingerbread houses. You can create boxes instead – and still have the kiddos help you! Grab the details at Oh Happy Day.
44. Pastel Bottle Brush Trees – Christmas Decoration
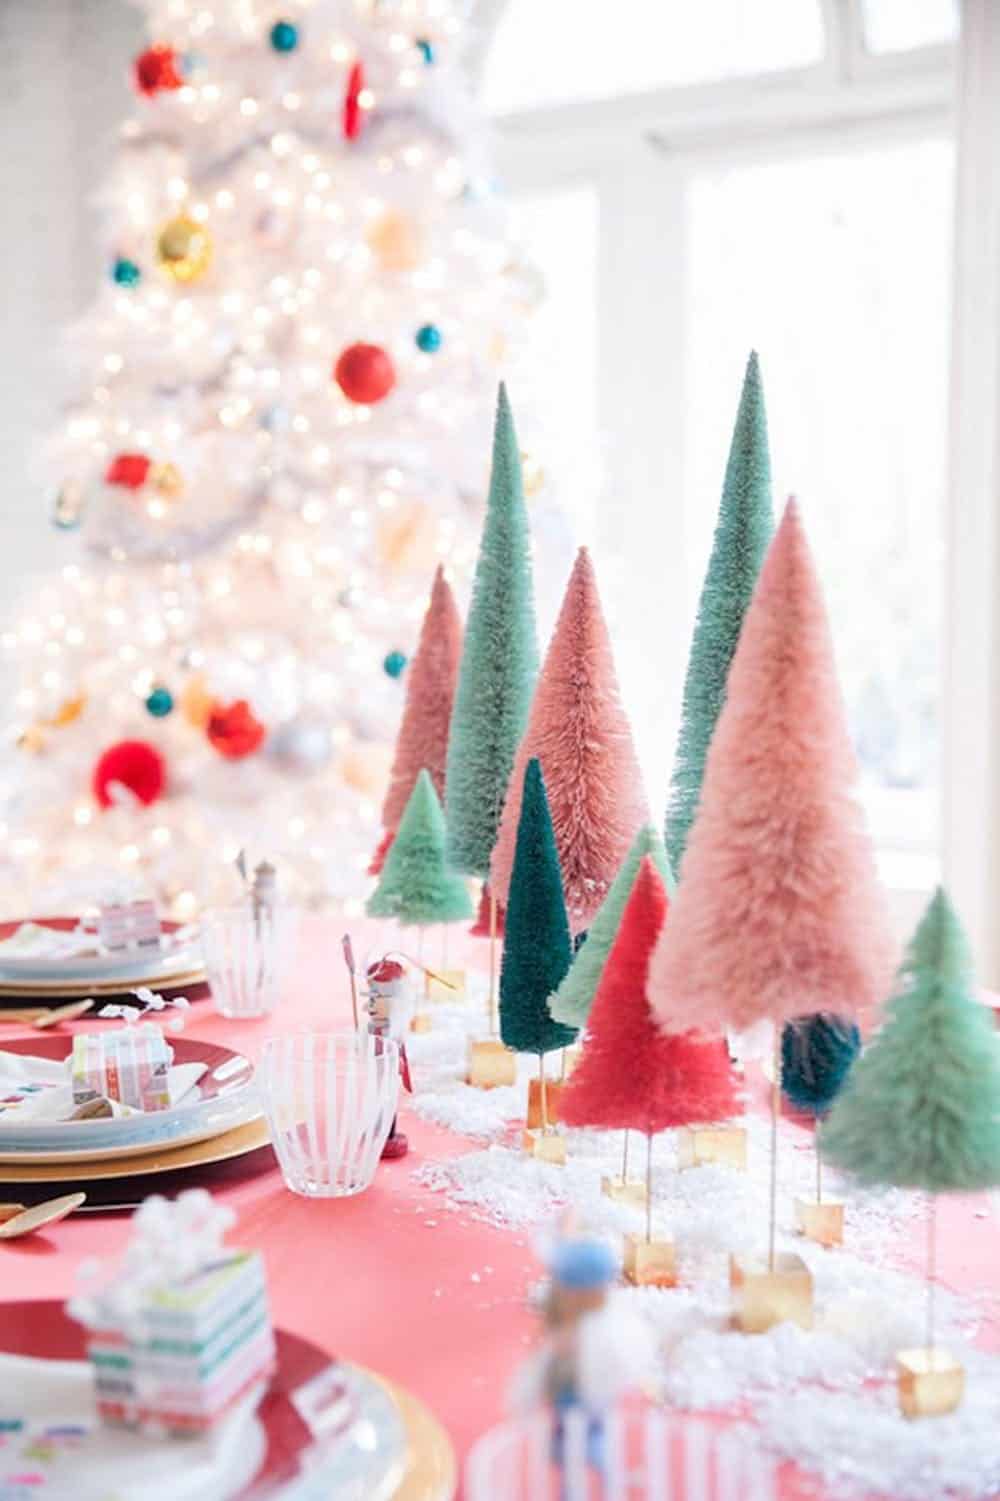
We’re such a fan of bottle brush trees. We’re even more of a fan when they come in pastel shades and have a gilded, retro finish. Check out this one at Coco Kelley.
45. Christmas Tree Confetti Cones – Easy Christmas Table Centerpiece

Sugar & Cloth has the most kid-friendly and fun design of the bunch. This one is easy to create and even easier to set the table with.
Final Thoughts on Christmas Table Decorations
Whether you want to impress your family and friends with homemade Christmas table decorations or give away some gifts that are as thoughtful as they are inexpensive, you should try making these ideas at least once!
By selecting the perfect combinations of materials, colors, and scents, as well as by implementing a variety of DIY techniques (such as crochet and macrame), you can easily come up with impressive Christmas tabletop decorations for any occasion – not just during the holiday season!
Which Christmas table decoration do you like best? Let us know in the comment section below! Also, free free to share original ideas that you feel deserve to be on this list!
The post 45 Christmas Table Decorations To Center Your Holiday Family Dinners appeared first on DIYs.com.

