

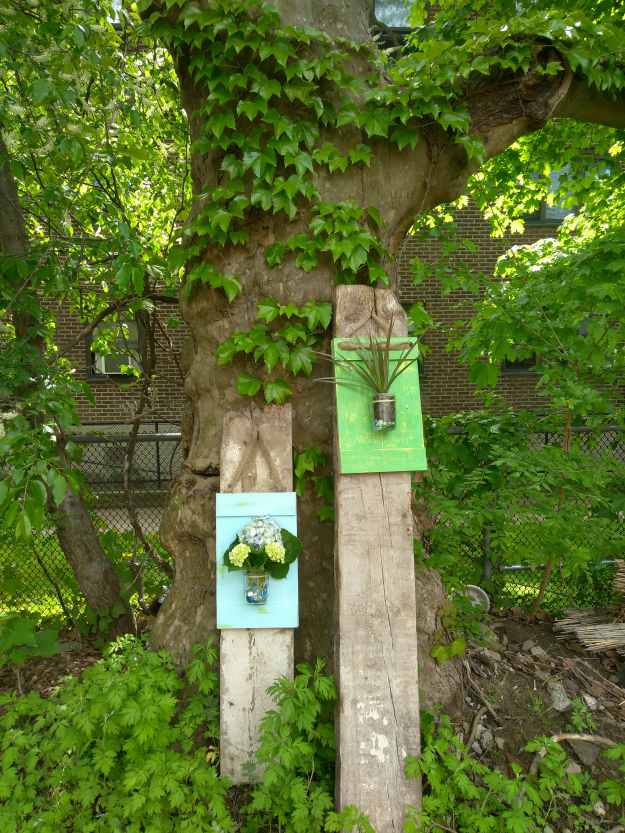
Reversible Reclaimed Wood Wall-Art
Posted by admin on
The whole title of this project would be: “Reversible, spring/fall, distressed reclaimed wood, mason jar flower holder wall art,” but that just gets unwieldy!
Reclaimed Wood Wall-Art: Easy and Versatile
I wanted to do something that could conceivably be done on an afternoon or a weekend, with minimal tools and supplies, and that would still wow your friends. I saw some things similar online, but I'm always asking myself, “how can I make that idea better?” And this is what I came up with!
Supplies needed:
- A pallet or other reclaimed wood
- Paint
- Sandpaper
- Nails
- Burlap (or any rustic looking fabric)
- Twine
Tools needed:
- A saw
- A hammer
- A drill
- (Wonder bar or crowbar recommended)
Pretty simple, right? Let’s get started!
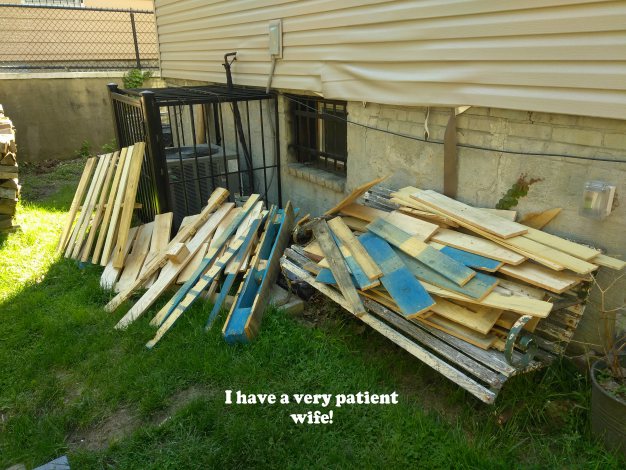
Step #1: Get supplies
The way I like to work is to find out what type of materials are available to me either for free or for cheap. Then I work backwards figuring out what to do with the supplies on hand. Pallets are everywhere. You can find them outside of any big-box store, grocery store, or factory. Many times, they pay people to take them away for them. So finding a pallet or two shouldn’t pose too much of a problem. It’s free wood, just sitting around! Only, most people don’t want to or don’t know how to work with it. With that in mind, feel free to use any type of reclaimed wood. I just like the texture that pallet wood brings as well and “free” is my favorite cost. Obviously, try and find the pallets with the least damage.
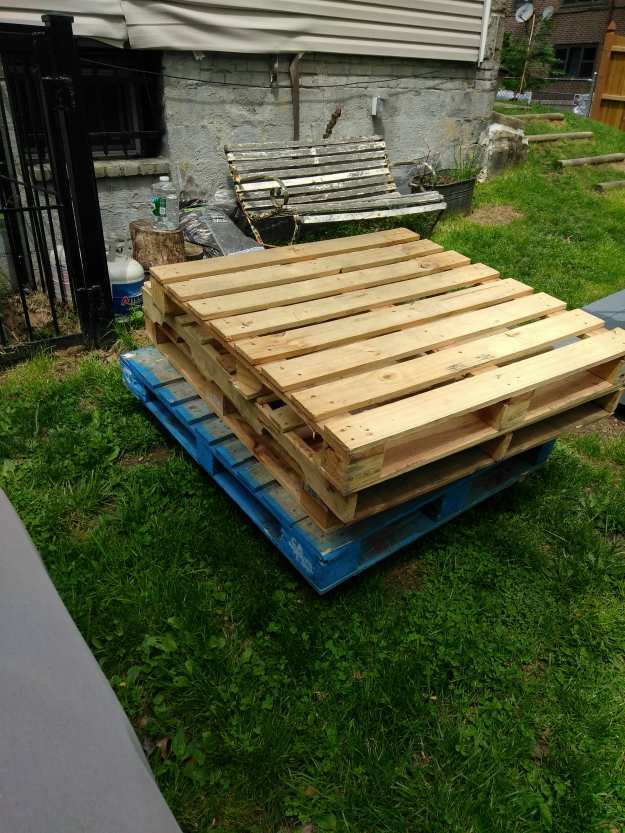
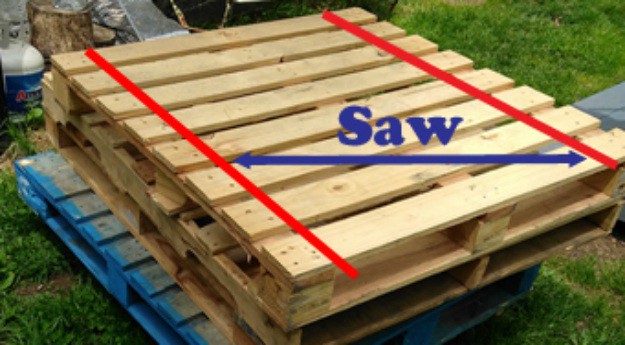
Step #2: Break down the pallet
There are many ways to do this. Though you could just use your hammer and a saw, a wonder bar and circular saw will aid you greatly.
Step #2a) Saw off the edges
I used a circular saw but you can use a saws-all or even a hand saw, as the pallet, reclaimed wood is very soft. Absolutely make sure that there are no nails that you might run into. Even then, make sure that you have gloves, and eye/face protection. I ripped up one side, then went down the other. Then I flipped it over and repeated everything.
Step #2b) Pry up the boards
After you remove the sides, stick your wonder bar or hammer underneath the middle part of the board and try to loosen it up. Work the board back and forth, being careful to not split it. Pry it up or remove the nails. You can also try a combination of both.
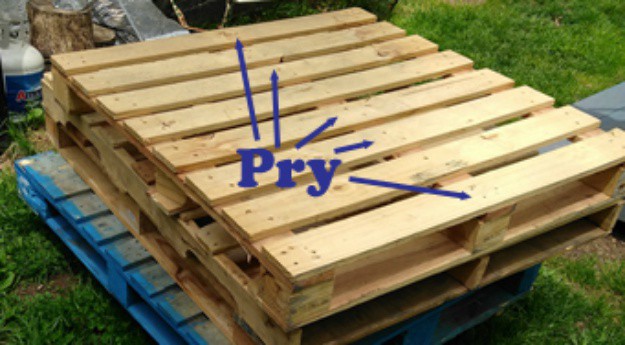
Once you’re done with middle boards, go back and remove all the nails and pieces of board from your edges. I divided up my piles into top boards and edge boards, as they were different lengths and materials.
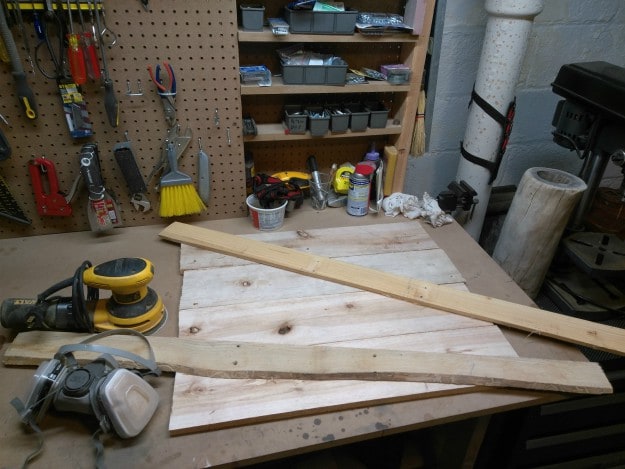
Step #3: Choose your wood
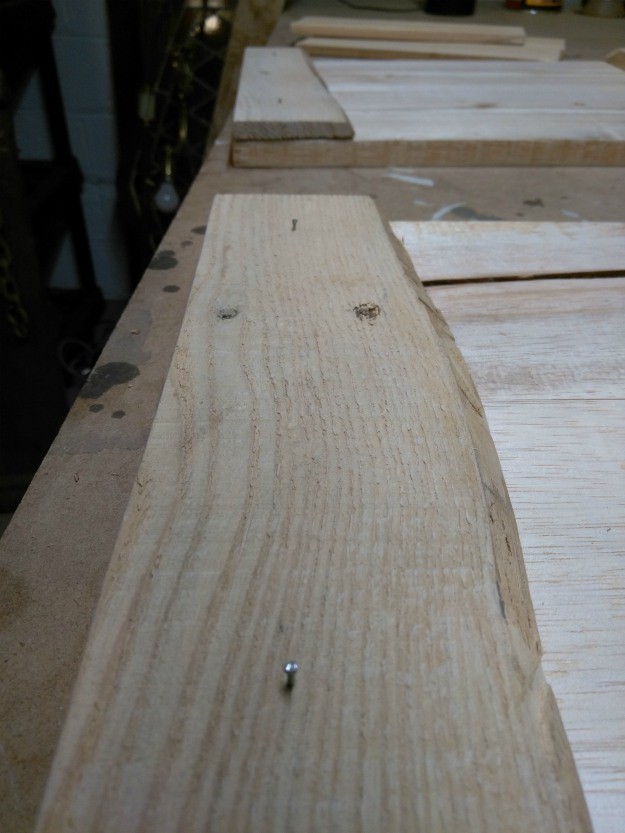
Decide what look you are going for and what wood you need for it. I wanted a barn feel, so I wanted wide boards with a thinner cross piece. I also wanted some character, like knots, divots and nail holes. But I also didn't want to distract from the finished piece. Each piece of reclaimed wood also has a “top,” “bottom,” “front” and “back.” Make sure to spin the wood around and look for the best sides and orientations.
Step #4: Cut the reclaimed wood to size
I measured out and decided I wanted 18” tall finished pieces. Instead of measuring from one side of the board or the other, where there could be nail or saw damage, I took the middle of the boards. This was the spot where the boards were in the best shape. Basically, I found the center line and measured out 9” on either direction. I wanted to make sure that I had the same exact cut on each board, so I clamped them together and fed them through my table saw.
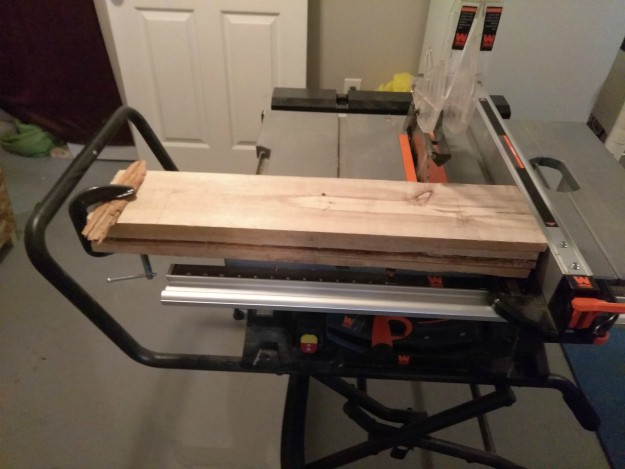
After those boards were cut, I placed them next to each other and measured to find the length of the cross pieces. Since it was going to be reversible, I had to cut 4 for each piece.
Step #5: Sand and attach the wood pieces
While you want to keep the texture that makes reclaimed wood popular, you don’t want people getting splinters or bits wearing off. I used a 150 grit to get the biggest rough spots smoothed down and finished up with a 220 grit. It’s up to you how rough or fine you want it to be, and I encourage you to experiment.
After that, I attached the cross pieces with small brads. You don’t want them higher than the surface and you don’t want hammer marks on the wood. I used a nail punch to sink the brad in below the surface. But you know what else works in a pinch? Another brad! The old nail holes add character to the wood, so I wanted to leave them as is and made new holes.
Step #6: Paint, paint, and more paint
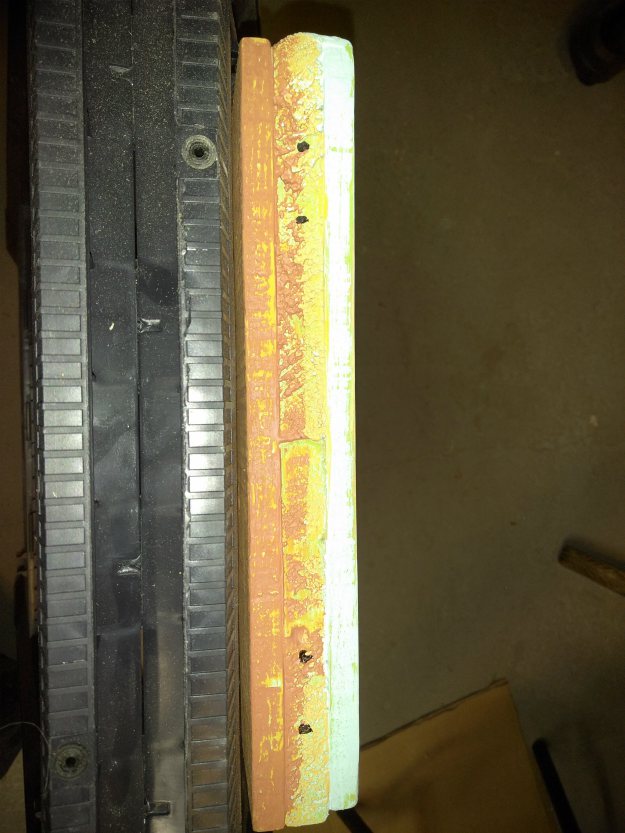
This is where the project can be as short or as in depth as you want. If you just are going to show one side, with one color, then you only need two colors. I knew I wanted a dual-tone, distressed look with another color underneath the top coat. So now that means four colors. Since I want to make it reversible, I had to double the recipe to eight separate, distinct colors. It’s up to you how far you want to go. Whatever you decide, with each color do at minimum two coats (but I recommend three). My 24 coats of paint are what held up the project the most, but I knew it’d be worth it in the end.
For spring, I needed bright and colorful hues, so I used two colors of green, a pale blue, and bright yellow. For fall, I wanted more muted, earthy tones. I chose a barn red, beige, orange, and dark yellow.
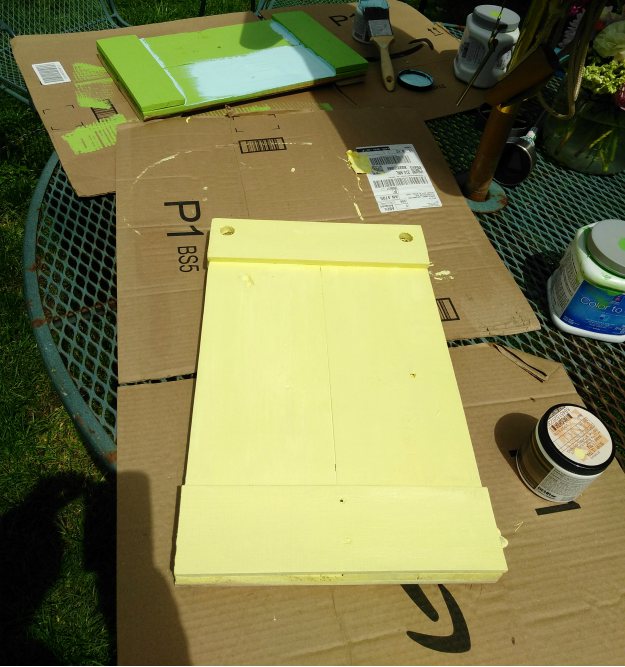
The undercoat colors of the spring side.
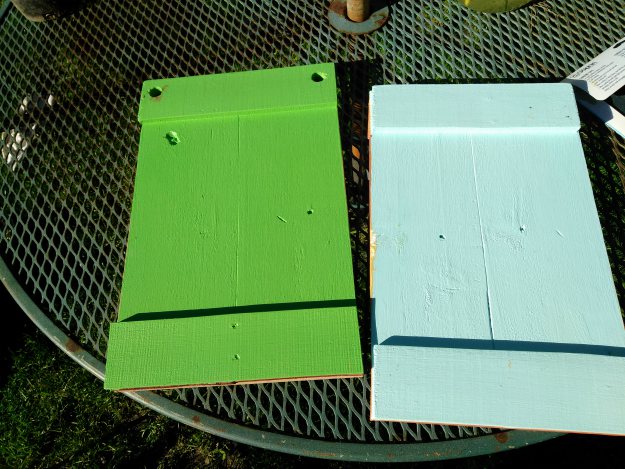
The top coat colors of the spring side. This green is a different green that the first picture; it’s just not as easily seen in photos.
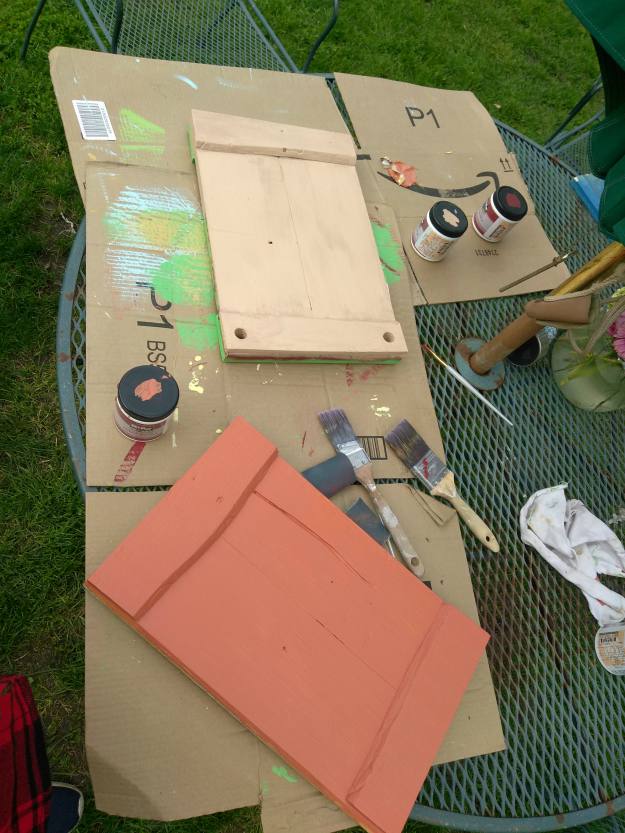
Top coat of fall side.
Step #7: Distress, distress, distress
The purpose of distressing is to make it seem like the reclaimed wood has really been weathered over time. Weathering is never even, nor does it make sense. Maybe a tree branch rubbed up against one area. Maybe a piece of farm machinery kept bumping on one section a lot. The point is, the only “wrong” way to distress is to do it symmetrically. This is also one of the reasons I wanted to leave texture on the boards; it makes the weathering have interesting patterns.
I used an orbital sander to speed up the process, but you could do it just as easily with sandpaper while binging on the latest Netflix show.
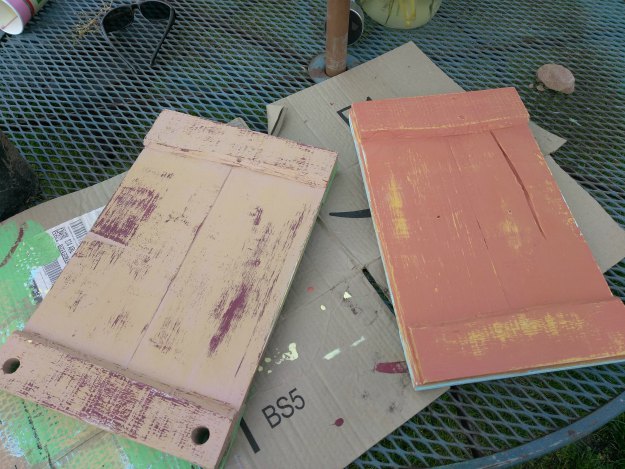
Distressed fall side.
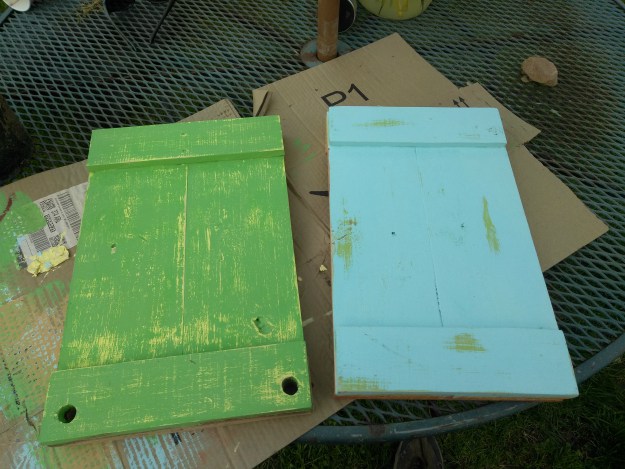
Distressed spring side.
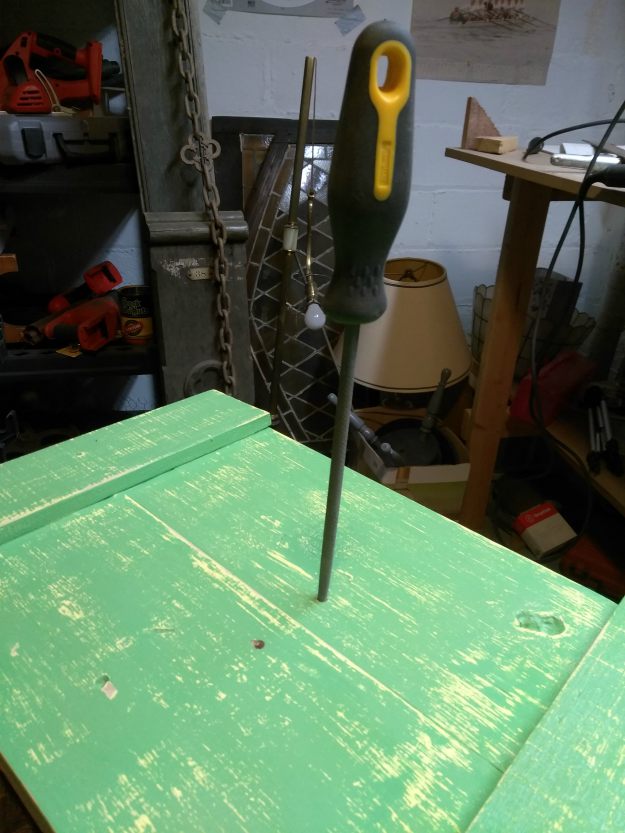
Set #8) Drill holes to attach mason jars
Choose where you want to put the jars, height-wise. I set it lower than halfway, so the flowers would have space to be tall. On either side of the mid-line, I measured out an inch and made my holes. I wanted to clean up the holes a little (totally not necessary), so I used my round file to smooth it out a bit.
Step #9: How’s it hanging?
Since it was going to be double sided, I struggled with how I was going to hang it. If it’s only one sided, you could use any standard hanging hardware like picture wire or a nail into the wall. But since you would see both sides, 1) I had to figure out a way that would look similar to each side without damaging it or taking away from it, and 2) since it was going to be seen, it had to fit in with the motif.
After calling my mom for inspiration, I got some ideas and figured out what I wanted to do. First off, I didn’t want them to be fastened or hung in the same way. It adds visually to something when two things are “of a piece” but have slight differences as well.
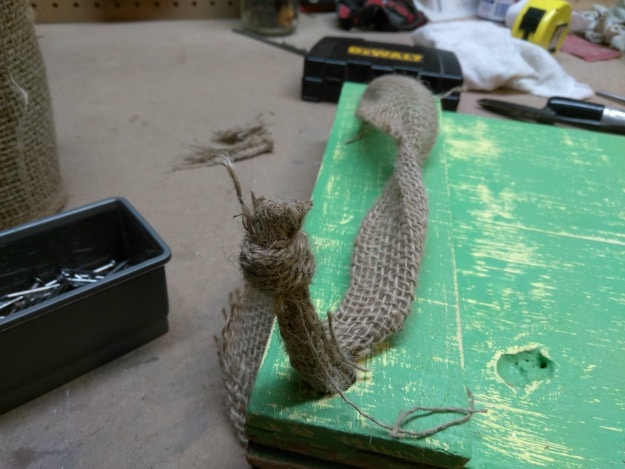
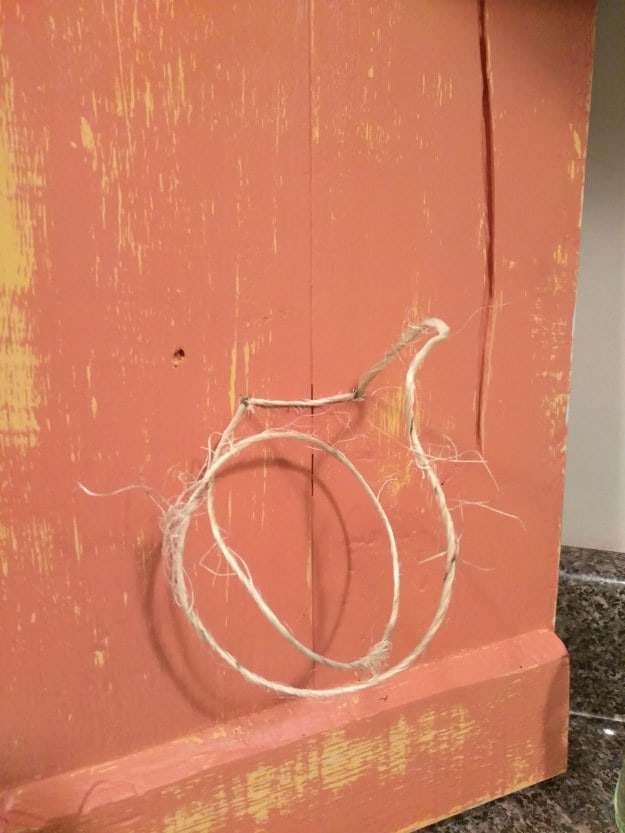
I decided to use burlap that I had from another project, as I felt that it worked with both spring and fall and “rustic-ness.” But I needed to figure out two different ways to use it and hang them.
You may have noticed holes in one of the pieces.
I used a ¾” bit and drilled holes in the top of one of the pieces. When it was time to attach the burlap, I ran it through the holes and made a knot on each end, so it would come loose.
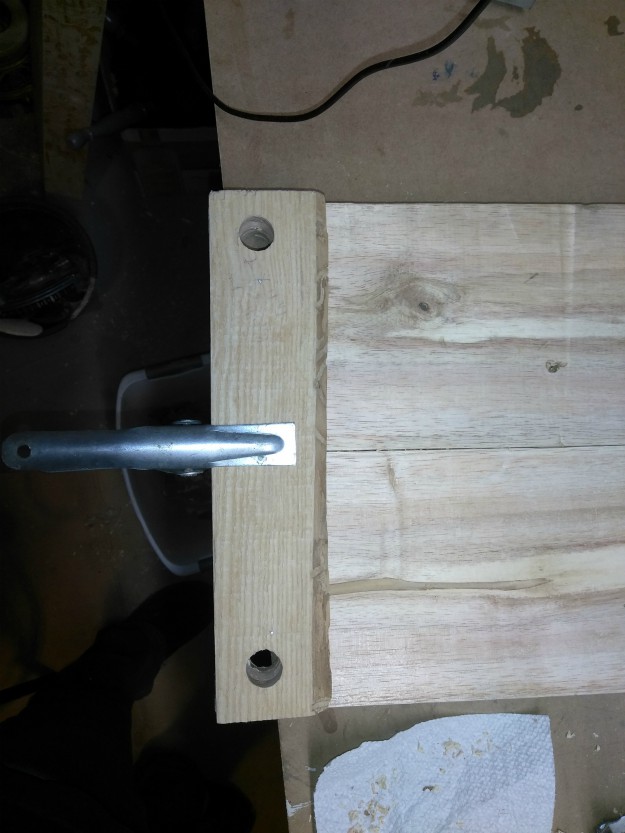
For the other one, I went back to my discard pile when I was breaking down the pallets. Here were some old looking nails with character! I could use these somehow…
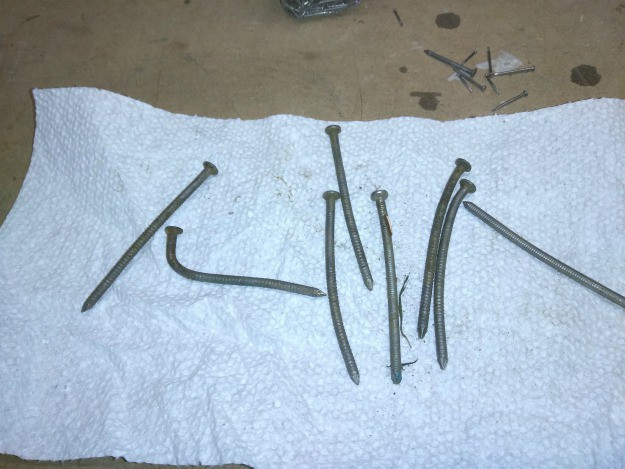
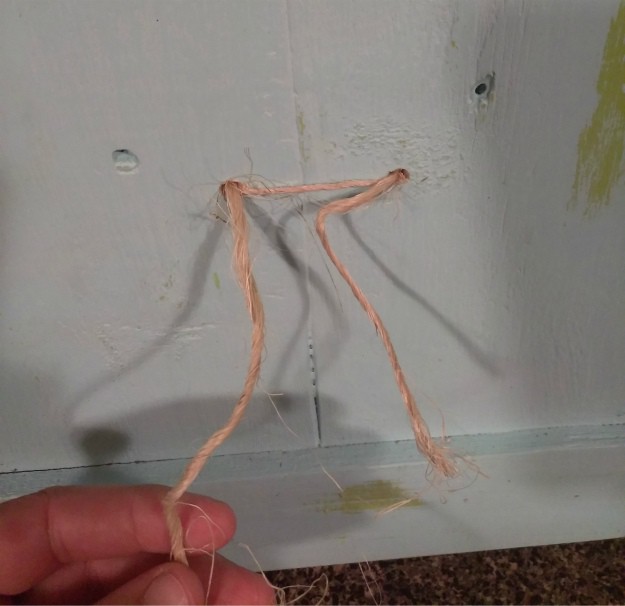
I basically came up with an improvised eye hook that I made with bent nails. I marked where on the piece I need to drill some holes. I chose a bit that was as close as I could get to the size of the nails, which was just a bit too big, which is great.
After drilling the holes, I rolled the bottom of the nails in wood glue and inserted them in. Just make sure to wipe up the excess glue.

Then, I strung some burlap between them and knotted each side.
Step #10: Tie on the mason jars
I used mason jars, not only because they add to the country feel, but because they have a lip on them that allows them to “hold on to” the twine.
Now, I also used twine for that country feel, but you could use any string, wire or ribbon that you like.
Cut a piece about 15” long. Run it through one hole, into the second hole and back through the first hole again. Run the twine back through the second hole one more time, but leave all the excess. Make a double loop, as you’ll want to wrap the twine all the way around the jar and come back almost a full second time.
Remember that I made the holes only two inches apart, much less than the diameter of the jar? This way, as you tighten it, it pulls the jar towards the center making it more stable.
Front.
Back.
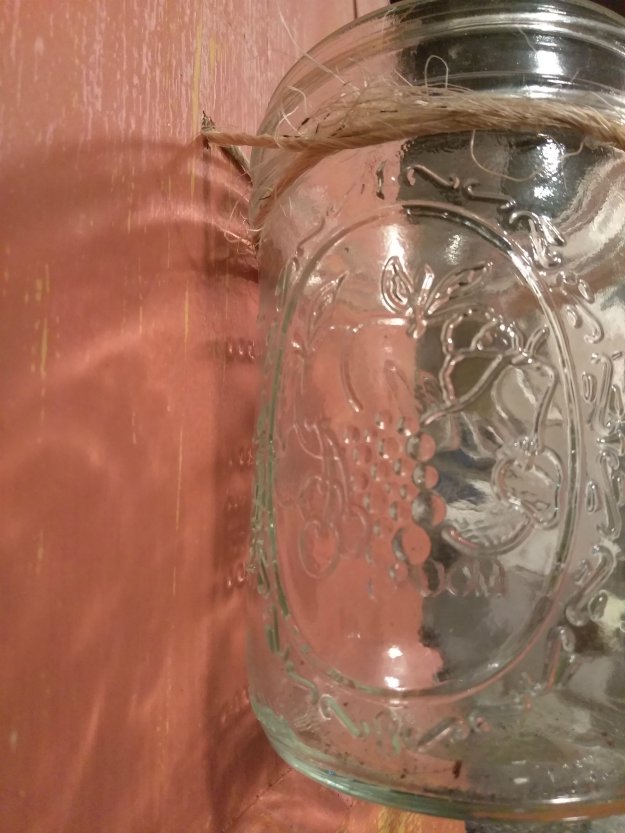
The lip keeps it tight.
When you change seasons, you simply untie the twine, flip the piece over, retie the twine as you add the jar, and you’re good to go!
Step #11: Add your choice of flowers, plant or dried arrangements
For the spring side, I added some springy colored marbles in the bottom. I wanted one to have cut flowers, so I chose the blue side with the blue hydrangea as the focus. I also added some yellow and green accent colors to play off the yellow-green paint underneath.
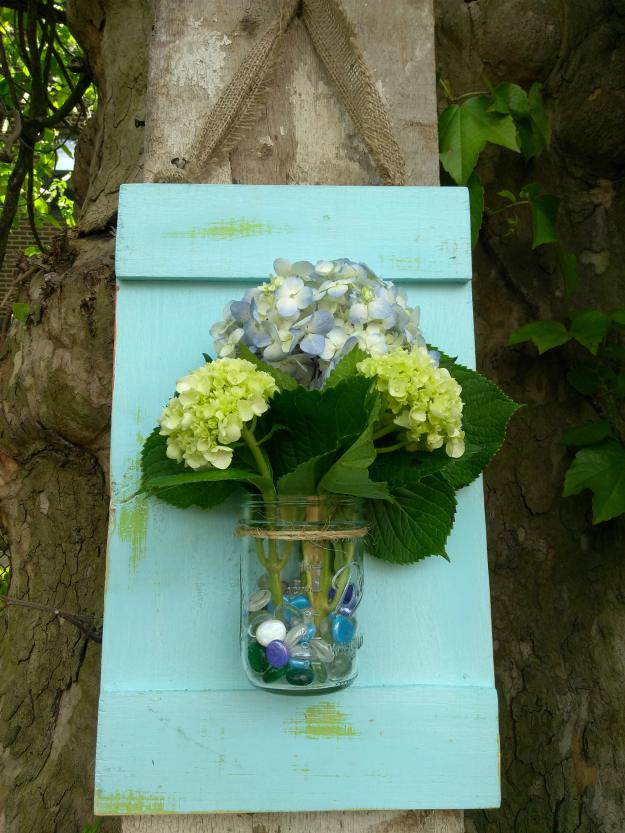
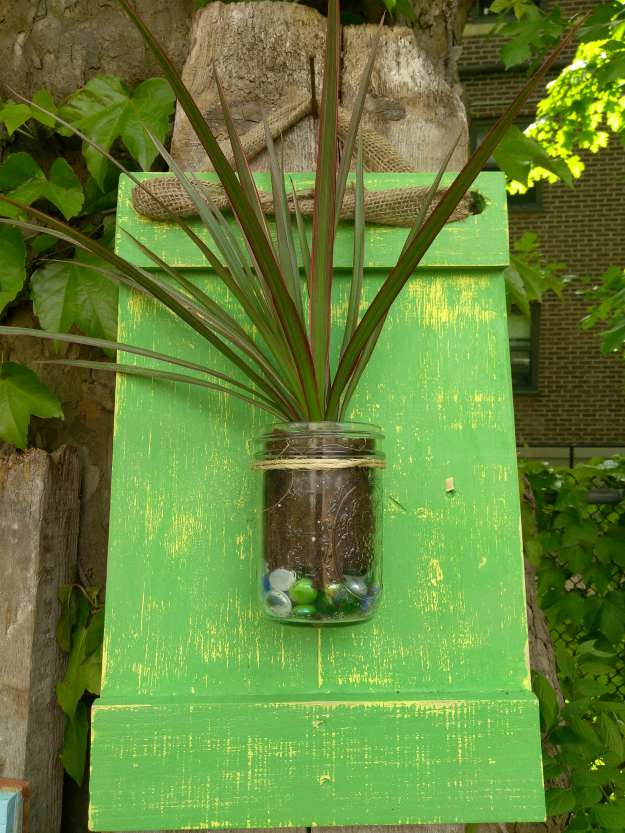
For the other spring piece, I wanted a live plant, so I chose a baby dragon plant. I loved the variegated coloring on the leaves, adding yet a third color to the mix. Plus the spikey texture and the outward pointing lines gave a good balance to the more rounded hydrangea piece. All flowers and plants were provided by Robin at Flowers & Favors in Jersey City.
For fall, not only did I need to use different colors, but I also needed different types of plants. One piece I wanted more autumnal and one more wintery. On the fall one, I used dried pussy willow, eucalyptus, dyed grass, and cattail plants. I also added fall-colored beads with some leaf cut outs that I had saved from my awesomely decorated Thanksgiving dinner!
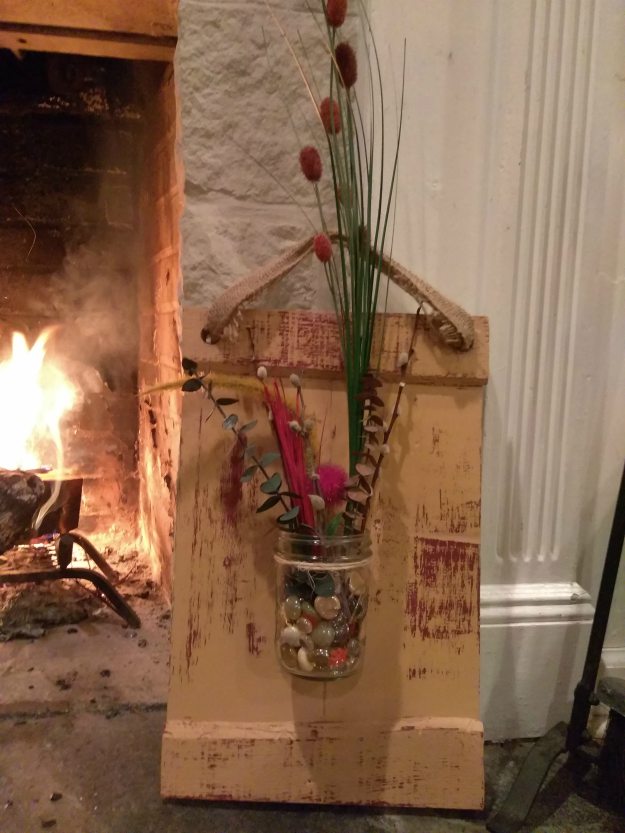
For my winter piece, I filled it up with pinecones. Then I added some berry branches from Michael’s, a snip of evergreen from a tree outside, and a tall piece of grass for height.

You're finished!
That’s it! 11 easy and cheap steps to build your own wall art for every season!
What went wrong:
This project went pretty okay, not too many issues.
The two brads in each cross piece weren’t enough, and they started to come loose with vibrations. I just added a little Elmer’s wood glue and squeezed it back together.

I also broke a few nails trying to bend them. But since I had dozens, I wasn’t too worried. What worked best was actually not bending them with pliers, but instead nailing them partway into something and then hitting them with the hammer at an angle. I’m guessing this worked better, because it spreads the stress points in the bending into multiple points and not just where you’re torqueing the nails with the pliers.
Also, for the blue, spring side, I only did one coat of green for the undercoat. Mistake. It didn’t let me sand but a micron before raw, reclaimed wood was exposed. You’ll notice that the blue side has much less weathering than the other pieces.
Have you done a similar project with reclaimed wood? How did these modifications work for you? Let us know in the comments below!
Looking for some hacks when it comes to small spaces? Check out this guide on making an outdoor storage bench seat for small yards!
Stay connected with us on Facebook, Twitter, Pinterest, and Instagram!