55 Christmas Lawn Decorations to Light Up Your Yard
Posted by admin on
Well, the weather’s getting more pretentious by the day, and although the snow is yet to appear (hopefully), we can all agree that the Christmas vibe is already seeping into our lives.
You might have already decorated your flat with tinsel and fairy lights, or even gone around the city to get that perfect Christmas tree.
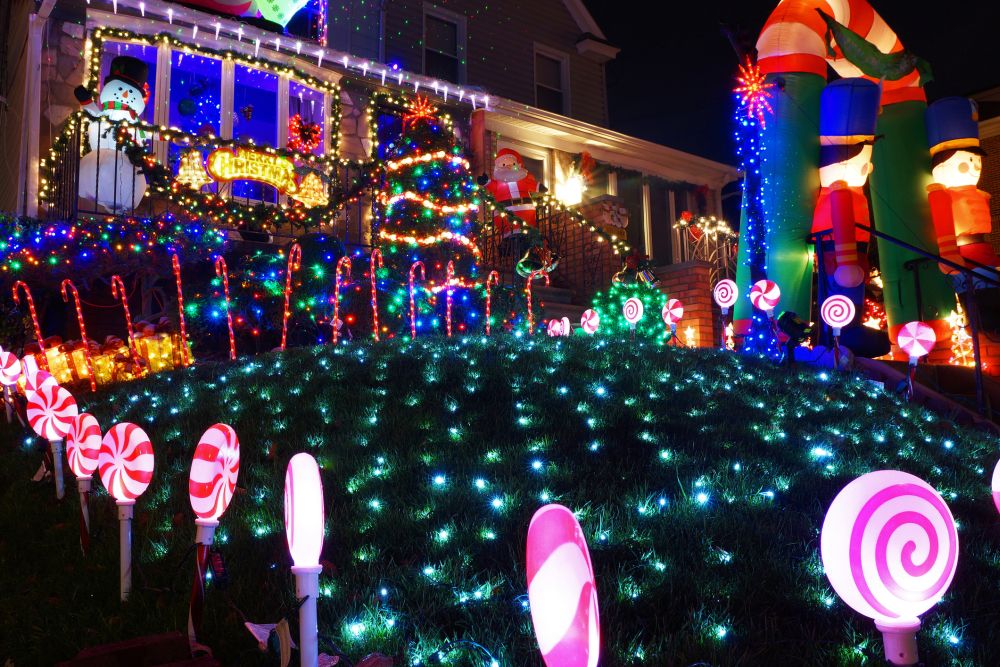
If not, then perhaps it’s time you did. Most people seem to be in a mad rush at this part of the year trying to find Christmas gifts for their loved ones.
However, we’re not here to discuss gifts just yet. Instead, we’re gonna focus on things you have to think about if you’re serious about embracing Christmas body, soul, and house.
In this guide, you’ll find a lot of Christmas yard decoration ideas that you can easily do on your own, as opposed to buying from your local store.
Christmas Yard Decoration Ideas
Here’s the thing: we all love Christmas decorations, whether they’re inside our yards, on our doors, our walls, or just hanging on our Christmas trees.
However, businesses have quickly picked up on that, so you end up spending a lot more than you planned on stuff you just showcase for a couple of weeks each year.
And that goes especially for yard decorations because they’re generally more expensive than, say, Christmas tree ornaments.
But this doesn’t mean that things should be this way; instead of buying a lot of expensive Christmas yard decorations this year, why not craft some of them on your own? It’s not hard at all, more so if you have a trustworthy guide you can follow.
Christmas Yard Decorations You Can Make

Of course, crafting your own Christmas yard decorations doesn’t necessarily mean that you can make them appear out of thin air or just use candy wrappers or takeaway trays to create them.
You’ll still have to buy some items, but by the time you finish crafting you may realize that you saved quite a few bucks this year on Christmas decorations, and you’ll also have that sense of accomplishment that you created beautiful things for people to admire.
A few examples of things you may have to spend some money on include Christmas lights, plastic balls, balloons, wire, and even cement bricks in some cases.
In this guide, we’ve covered quite a few Christmas yard decorations, sorted by category, as follows:
- Christmas Lawn Decorations
- Christmas Lawn Lights
- Wooden Christmas Yard Decorations
- 5 Christmas Yard Decorations You Can Buy
Christmas Lawn Decorations
These decorations are usually larger and, therefore, heavier, since they’re mainly placed on the ground instead of hanging around.
Thus, you don’t need them to be light so that they don’t collapse, and you also want them to be larger so that they can be easily noticed by passersby, neighbors, and loved ones.
Not incidentally, this is also one of the reasons why Christmas lawn decorations are more expensive: they’re larger, and therefore they need more material to be made.
Check out some of our best suggestions for Christmas lawn decorations you can make on your own.
1. DIY Concrete Outdoor Christmas Tree – Lawn Decorations
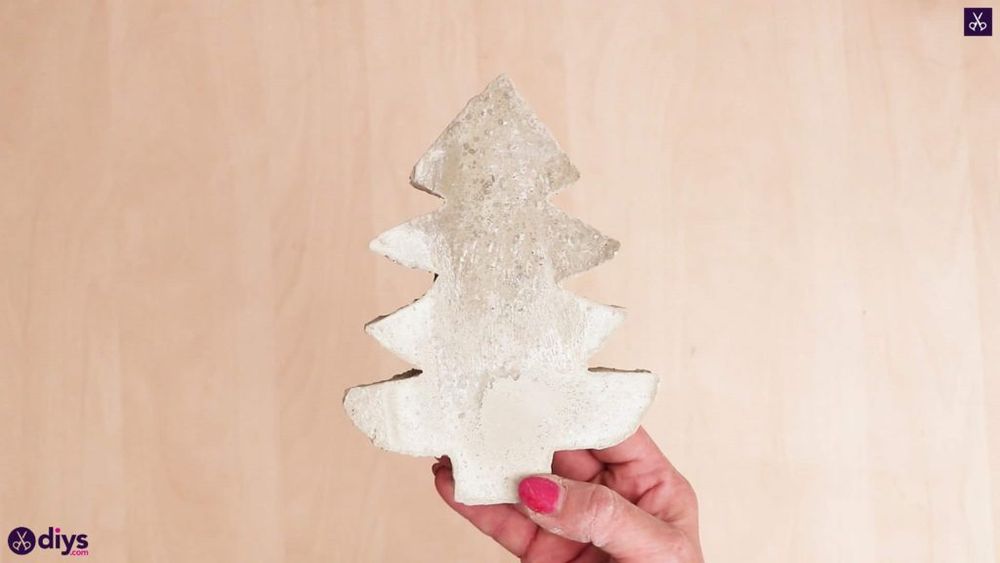
This is a great idea if you want something that’s both large and permanent in your yard. The Christmas tree is made out of concrete, so it’ll definitely last through all the weather conditions.
In fact, it can easily become a part of your yard as a permanent decoration that you don’t have to take down.
It’s not too hard to make it either; all you need is some leftover concrete mix and a shape to pour the concrete mix into and let it dry for a while. Check out our tutorial if you want more detailed instructions.
You can make the Christmas tree as large as you want by simply choosing a larger mould or container.
Last, but not least, it would be a wise thing NOT to place the faux Christmas tree upright, especially if you’re gonna make a large one, to avoid it falling and hurting someone.
Instead, you can turn it into a stepping stone of some sort or a place where you gather outside and do all kinds of Christmassy activities, such as drinking a cup of egg nog, or mulled wine, or place gifts.
2. Plastic Pumpkin Snowman – Christmas Lawn Decoration
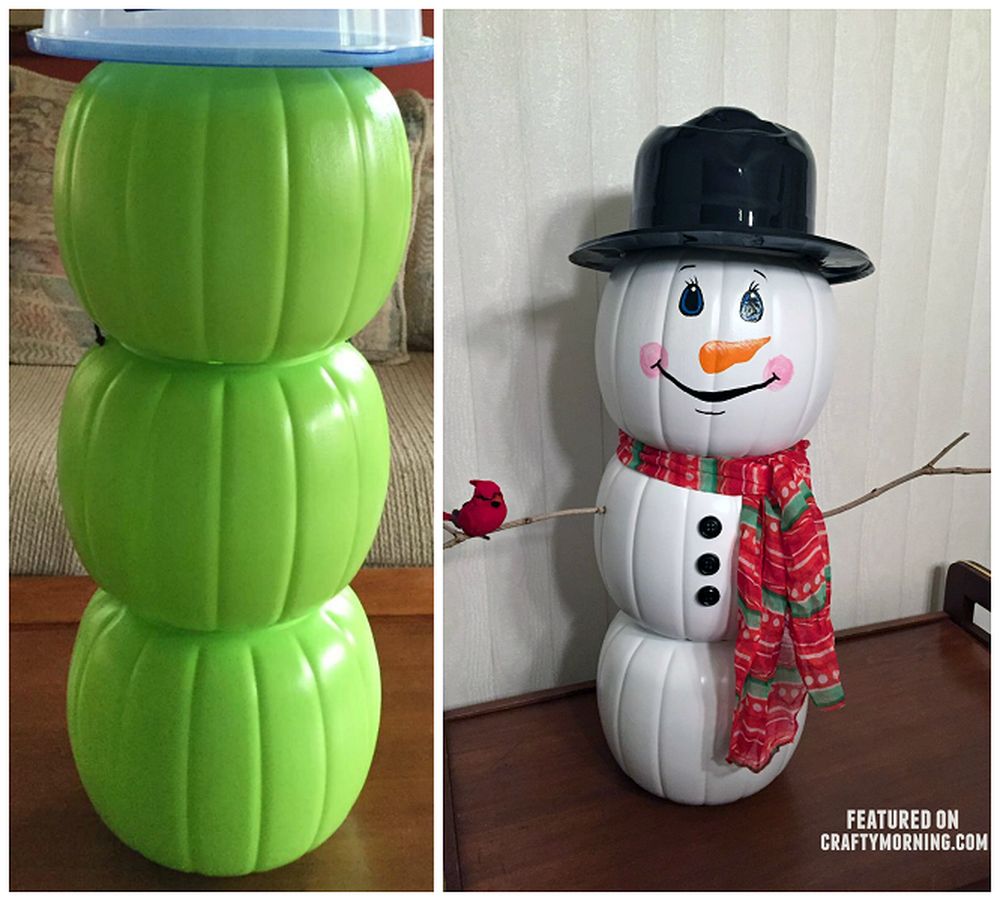
This is a great Christmas lawn decoration idea from Crafty Morning because it doesn’t have to be permanent.
In fact, you can even create different designs every year so that next year your yard feels new and refreshed from the inside out.
We suggest you use small plastic pumpkins for the hands and head, which you can paint with white spray paint; choose black spray paint if you want to make the eyes, buttons, mouth (a triangle shape), and pupils.
It’s possible that you can use real pumpkins for this project as well, but don’t expect them to last for very long, and they also require some clean-up after the holidays are over.
You should also get some yarn or twine to make his scarf, while an old sheet will do just fine in making his hat.
Last but not least, put Rudolph’s nose on top of one of the pumpkins; there are two ways in which this can be done.
You can either use a red pom-pom, or you can cut out a circular shape from red construction paper and attach it to the pumpkin with some glue.
3. $1 Bouncy Balls Giant Ornaments – Christmas Lawn Decorations
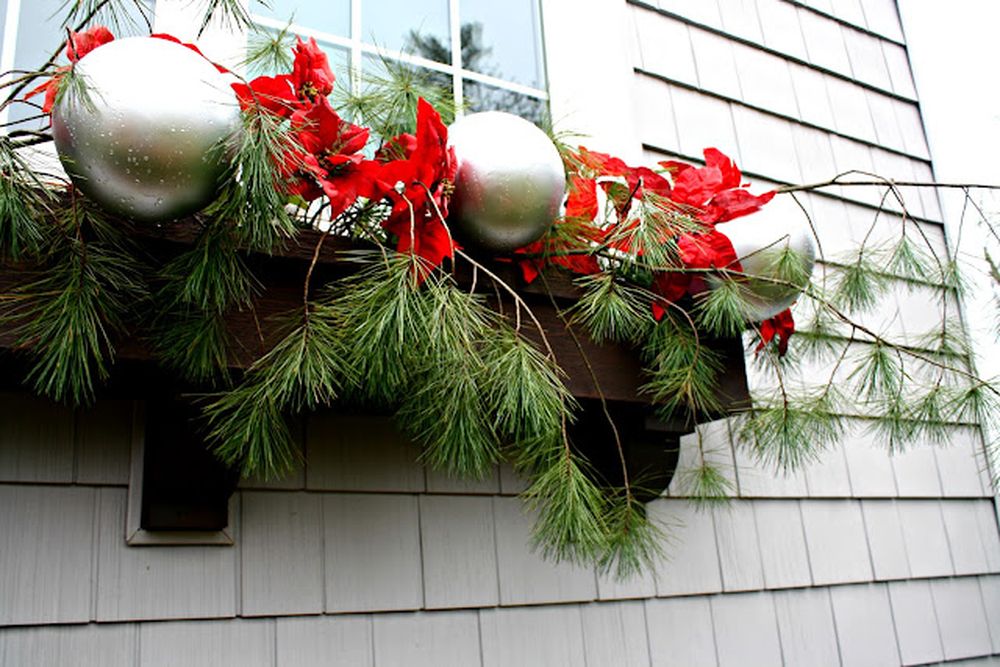
Using $1 bouncy balls as giant ornaments is an excellent Christmas lawn decoration idea if you want something that actually bounces around. This Christmas lawn decoration idea is inspired by The Lilypad Cottage’s blog post.
It’s made out of plastic bouncy balls, which are quite easy to find and pretty cheap as well; so it’s not likely that you’ll spend too much time making them or money buying them.
As for painting them, you can easily do this by taking some acrylic paint (in white or yellow) and using a brush to paint your bouncy balls.
You can later bundle them up with some thread and hang them on your Christmas tree or anywhere else in the house, where there’s enough space for them to bounce around.
To make the bouncy ball light up, cut off the top of a plastic bottle of any color, then glue the lights inside each bouncy ball with some hot glue.
Don’t worry about the glue oozing out on the outside of your bouncy balls; this will happen anyway since they’re round in shape and their surface is smooth.
4. Giant Paper Plate Lollipops – Lawn Decorations
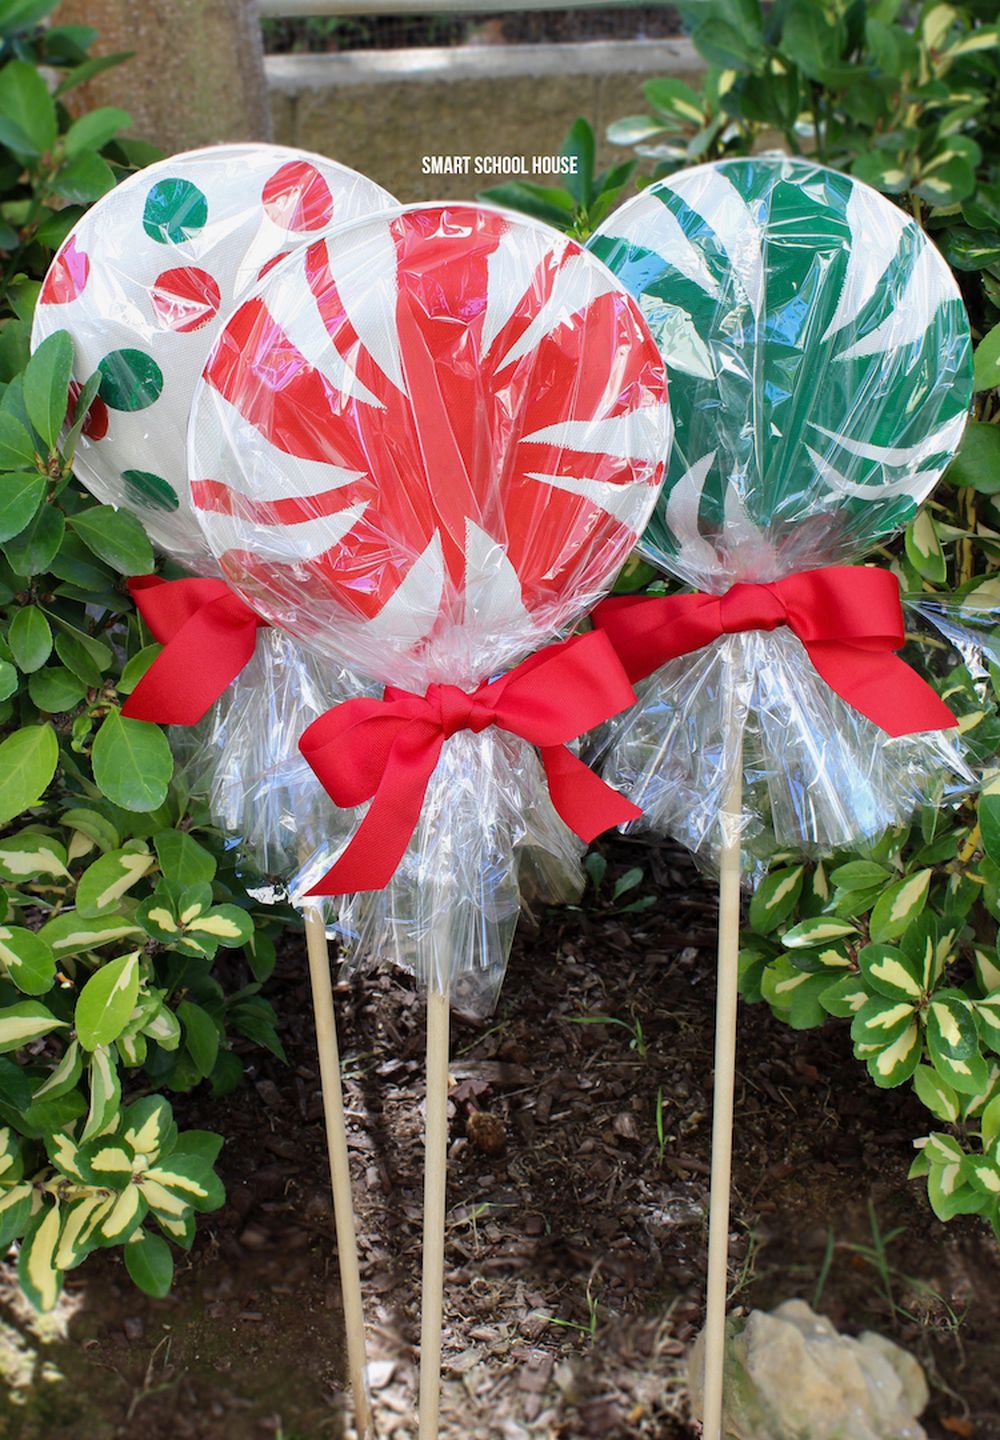
Smart School House provided us with a really great idea to make your yard look cool and festive because it’s quite easy to make, cheap as well, and you’ll also use a lot of supplies that you probably already have at home.
All you need to do is take some paper plates and paint them in various colors so that they resemble giant lollipops.
Once they’re dry, you can then cut out a small hole in the center of each plate and thread some curling ribbon through it.
The ribbon will be used to hang your lollipops, but you can also place them on the ground by sticking them onto some sticks (although wooden dowels work best).
After this, paint them in bright colors so that they resemble tasty lollipops. We all know that the more colorful a lollipop is, the more tasteful it is, so go crazy with the drawing and painting.
5. Festive Porch Light – Front Yard DIY Outdoor Christmas Decorations

If you want to add a festive touch to your porch light, then Thrifty Decor Chick has inspired us to find the perfect solution for you.
This Christmas lawn decoration is very easy to make and all you need are some battery-operated lights, some fake garland or ivy, and an old wreath.
The first thing you need to do is wrap the fake garland or ivy around the light so that it’s covered entirely.
After this, take the old wreath and cut it into several different pieces; these pieces will be used to cover up the light bulb area.
Last but not least, hot glue the wreath pieces onto the fake garland or ivy.
It’s as simple as that! You now have a festive porch light that will definitely add some Christmas charm to your home.
6. Candy Cane PVC Poles – Christmas Yard Decoration Ideas
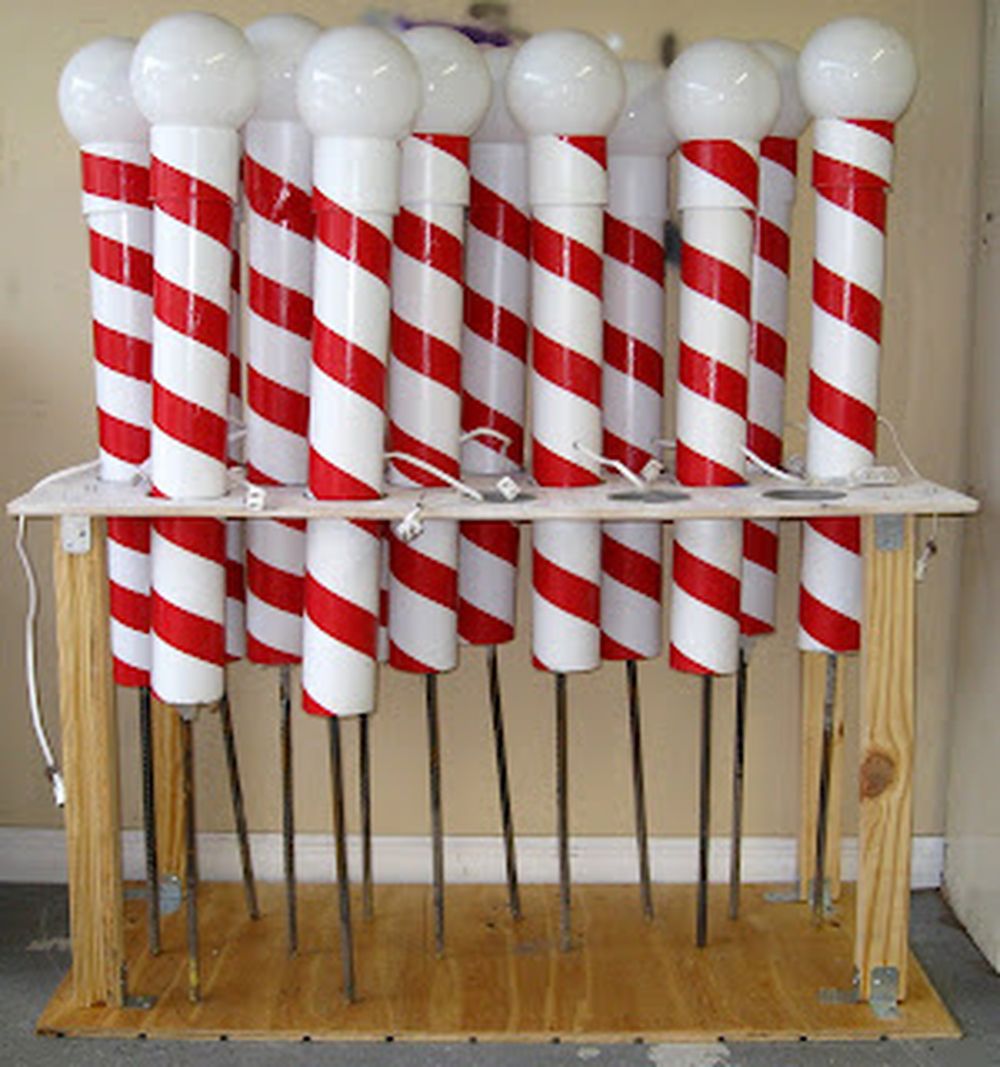
Are you looking for some creative outdoor Christmas decorations that won’t cost you too much? Well, Copeland Christmas has got the perfect solution for you with its candy cane PVC pole.
All you need is a few pieces of PVC pipe and connectors, some spray paint (optional), and your choice of base (for example, an old bucket).
Once you have all of the supplies, it’s time to get creative. You can either paint your PVC pipe in red and white stripes, or you can leave it as-is for a more natural look.
After this, all you need to do is connect the pieces of PVC pipe together and form a candy cane shape. You can vary the height of your candy cane poles, so do whatever looks the best for you.
Once this is done, place each pole into any type of bucket or planter to use as your base, and there you have it! These candy cane poles are very easy to make but they really add some festive charm to your yard.
7. 3D Starburst Orbs – Christmas Lawn Decorations

Here’s another idea for DIY outdoor Christmas decorations that don’t cost much at all: starburst orbs. You’ve probably seen them already almost everywhere and deemed them as fancy, expensive, or even difficult to make.
Furthermore, you probably never realized that you can make them on your own without breaking a sweat.
All you need is some styrofoam balls, a hot glue gun, skewers (or plastic straws), and some acrylic paint.
After this, you’ll have to do nothing but stick the skewers or straws inside the styrofoam balls until you form the actual bursting star.
The instructions are quite simple; the only hard part is making sure that your orbs turn out round!
Once they’re all done, you can either leave them as-is or give them a nice paint job. We recommend some metallic gold or silver to really make them shine during the Christmas season.
If you’re not entirely clear with how to create these amazing Christmas lawn decorations on your own, make sure to check HGTV Handmade’s instructional video.
8. Easy Ornament Topiary – Christmas Lawn Decoration Ideas
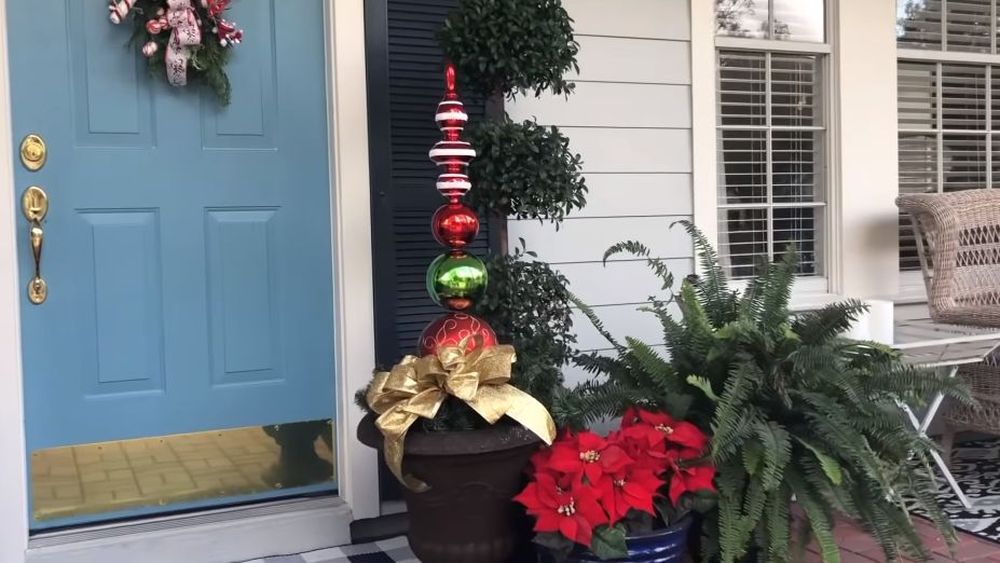
If you’re looking for a simple, yet elegant, outdoor Christmas decoration, then this ornament topiary is perfect for you.
All you need is a styrofoam cone, some ornaments (of different sizes), a hot glue gun, and a wire hanger.
Start by attaching the ornament at the top of the styrofoam cone with some hot glue. Work your way down the cone, adding more and more ornaments in between each one.
When you reach the bottom of the cone, make sure to use a lot of hot glue so that the ornaments stay in place.
Last but not least, bend the wire hanger into a circular shape and attach it to the bottom of the styrofoam cone.
This topiary is so easy to make and it really adds a touch of elegance to your porch or lawn. You can make it in any color or style you want, so don’t be afraid to get creative!
If you want, you can even add a small bow or other festive decoration to the top of your ornament topiary. Or better yet, you can make two of them and place them on each side of your front door!
Check out Hometalk’s helpful video that will help you craft this Christmas topiary without significant effort!
9. Christmas Outside Planter – Lawn Decorations
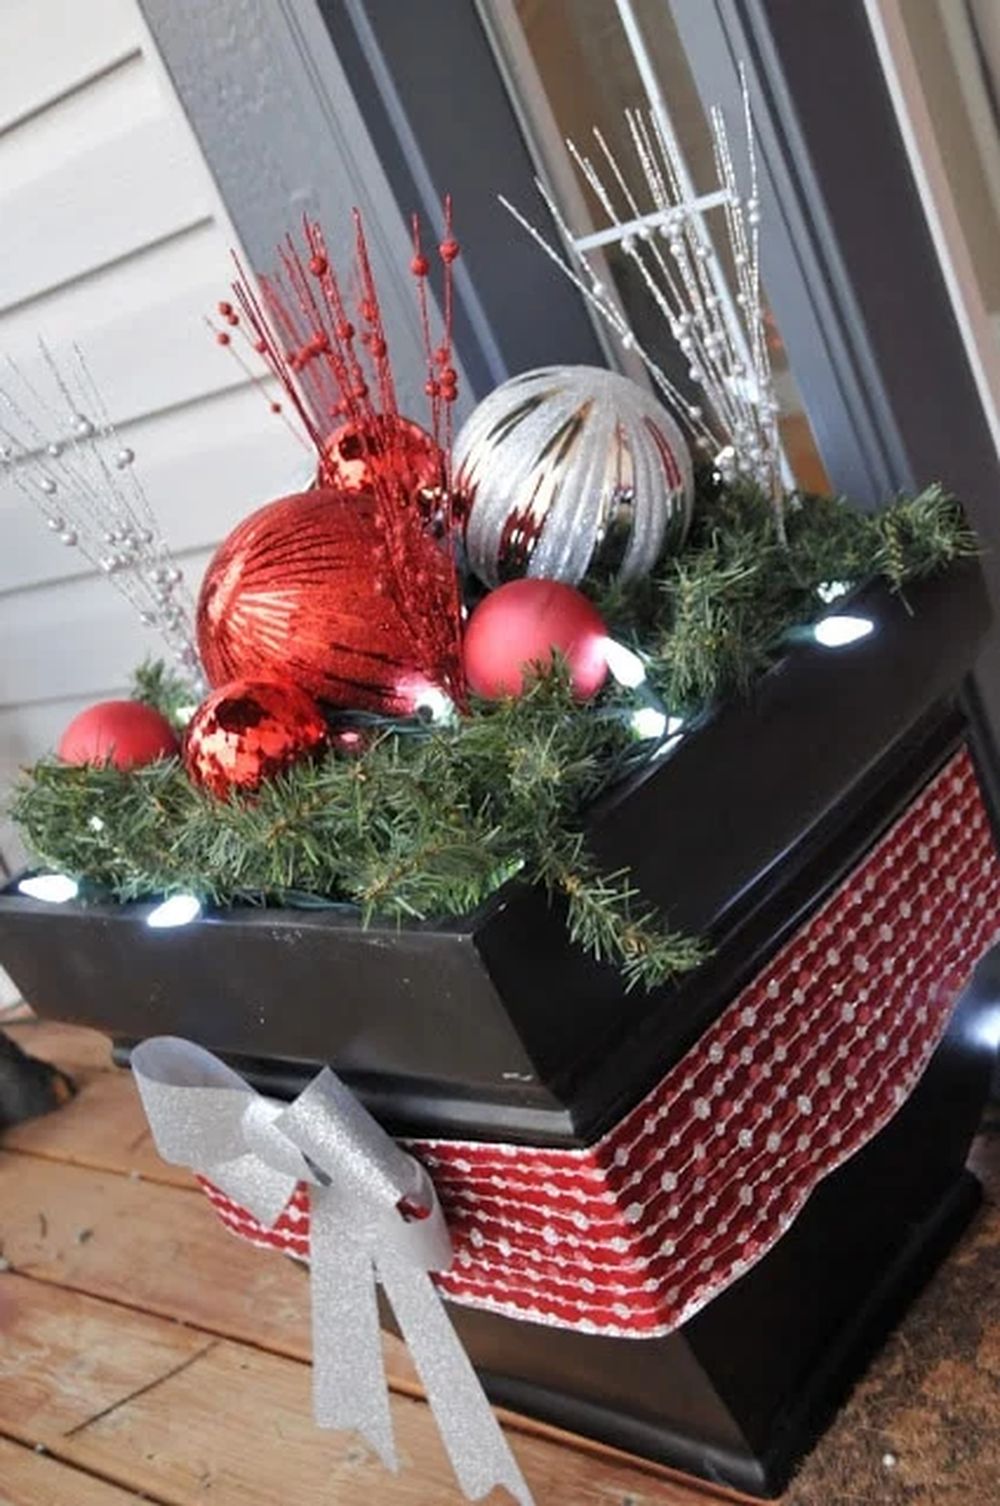
Everyone knows that a beautifully decorated front yard is a sign of the holidays. If you want to make sure people know you’ve been good this year, then add some ornament topiaries and candy cane PVC poles to your garden.
But what if there’s no space for these lawn decorations?
Don’t worry! Christmas outside planters can fix your problem in no time. They’re super easy to make and they even add a touch of elegance to all kinds of planters, from simple terracotta pots to aged concrete ones.
All you need is some floral foam, rope light (if you want), and most importantly: ornaments! You don’t necessarily need an exact number for this project; just fill up your chosen planter with as many ornaments as you please.
We recommend going for a classic look with green and red ornaments, but feel free to get creative with this one. Gold and silver snowflakes would look wonderful against a black planter, for example.
Once your Christmas outside planters are all filled up, just plug in your rope light (if using) and enjoy the festive glow.
Check out A Pretty Life In The Suburbs for more information on how to make this beautiful and easy lawn decoration!
10. DIY Gift Boxes Christmas Topiaries – Christmas Lawn Decorations
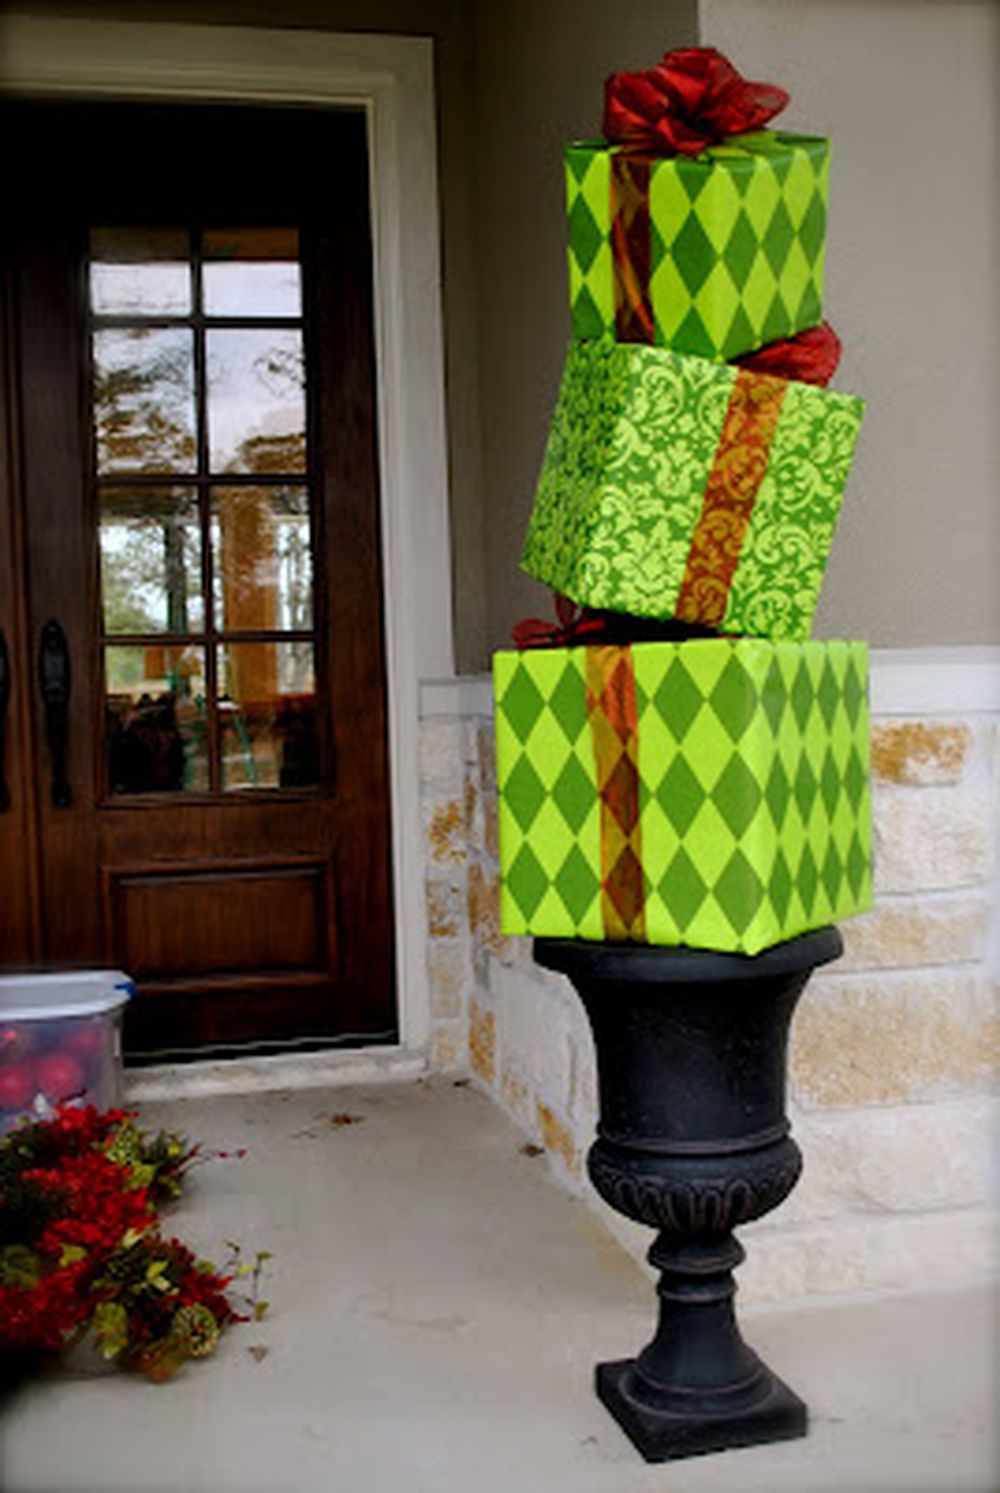
If you want your festive lawn decorations to be a little more involved, then this project is for you. This DIY gift boxes topiary only looks complicated, but in reality, it’s super easy to make!
You can make two or three of these and place them all around your porch or garden.
What you need: styrofoam cones, gift boxes, ornaments (see the ornament section of this article for more ideas), a hot glue gun and glue sticks, scissors, Christmas lights.
Start by placing a small amount of hot glue on top of your styrofoam cone.
Place the gift box on top of it and hold it in place until the glue is nice and dry. Repeat this step until all four sides are covered with gift boxes.
Next up: ornaments! Fill up your gift box cones with as many ornaments as you please – we recommend going for different sizes to make them look as natural as possible.
Last but not least, plug some Christmas lights inside your topiary and enjoy the festive glow.
Check out That Village House for a more detailed explanation on how to make this adorable and easy topiary.
11. Giant Christmas Ornaments – Christmas Yard Decoration Ideas

If you’re looking for a show-stopping Christmas yard decoration, then look no further than giant Christmas ornaments. These beauties are sure to grab everyone’s attention and they’re so easy to make!
All you need is some kid’s play balls from Walmart and a large plastic container. We recommend using a storage container or trash can with a flat bottom – this will make your life a lot easier.
Start by spraying the balls with some festive Christmas colors. We went for a red and green theme, but you can be as creative as you want with this step.
Once the balls are dry, it’s time to assemble your ornament. Place the largest ball in the center of your container and use the glue gun to secure it tightly against the container.
Once you’re happy with the way it looks, hot glue the top of the ornament shut. Before you do this, make sure to drill a hole through the container, so that you can thread some ribbon through it.
Lastly, use some ribbon or twine to hang your giant ornament from your porch or tree.
We recommend watching Tanya Memme’s video above for a more in-depth explanation of how to make this easy and festive yard decoration.
12. DIY Vintage Wooden Sled – Christmas Lawn Decorations
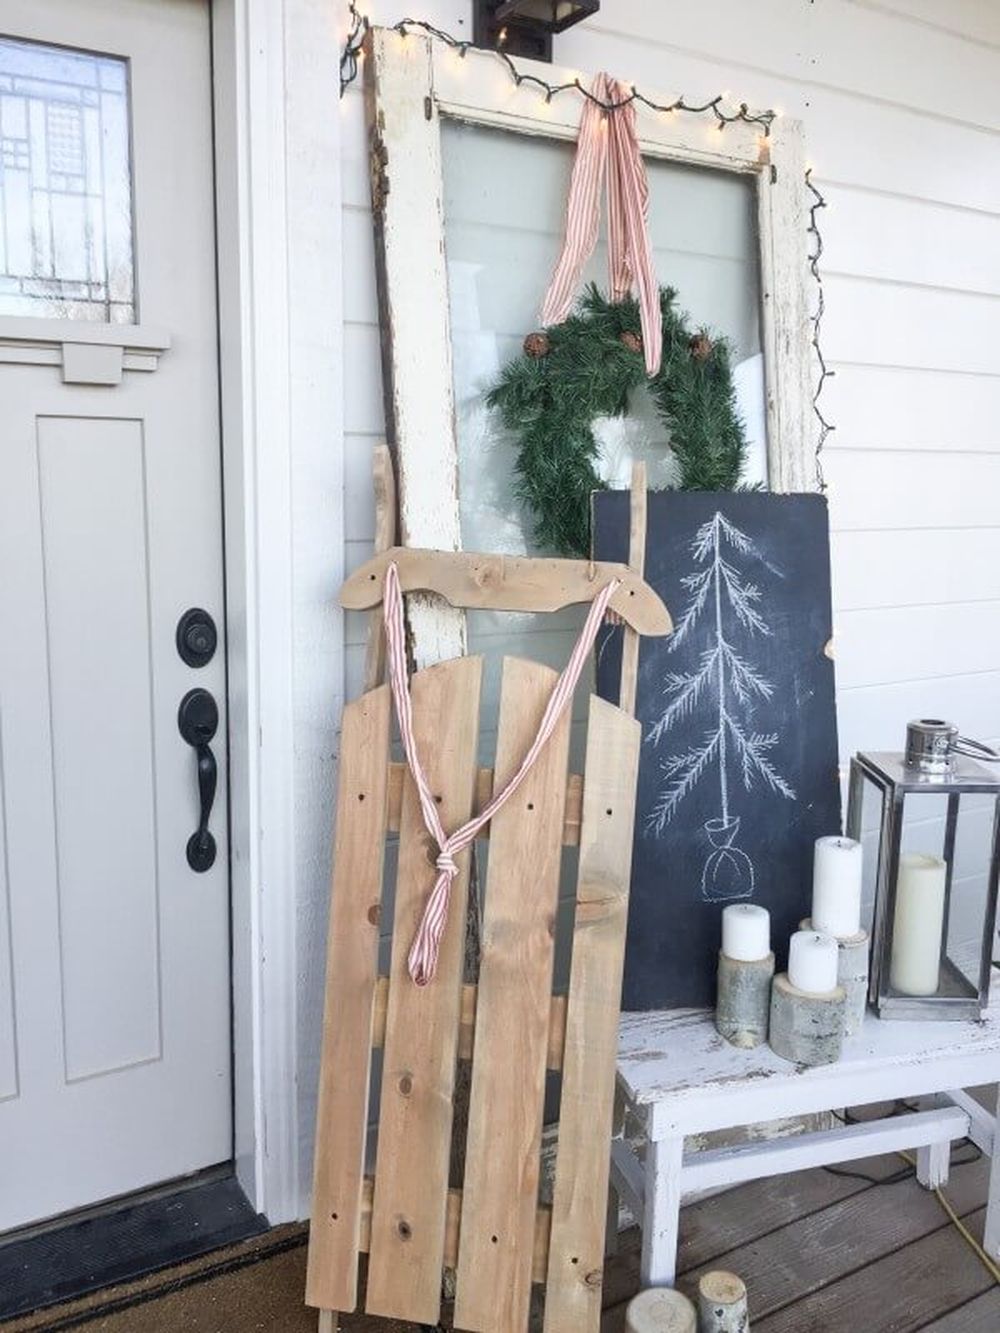
This vintage-inspired wooden sled is perfect for making your Christmas lawn decorations both classic and stylish.
However, it requires that you have at least some experience with woodworking or power tools.
You can keep this one simple by painting it white, decorating it with some winter foliage (think pine cones, berries, etc.), and hanging a few of your favorite ornaments off the side.
For an extra special touch, you could also paint the names of everyone in your family on the back of this DIY sleigh – gives it more of a personalized feel!
Check out Twelve on Main for more information on how to make this easy yard decoration.
13. Giant Christmas Ornaments From Old Tires – Lawn Decorations
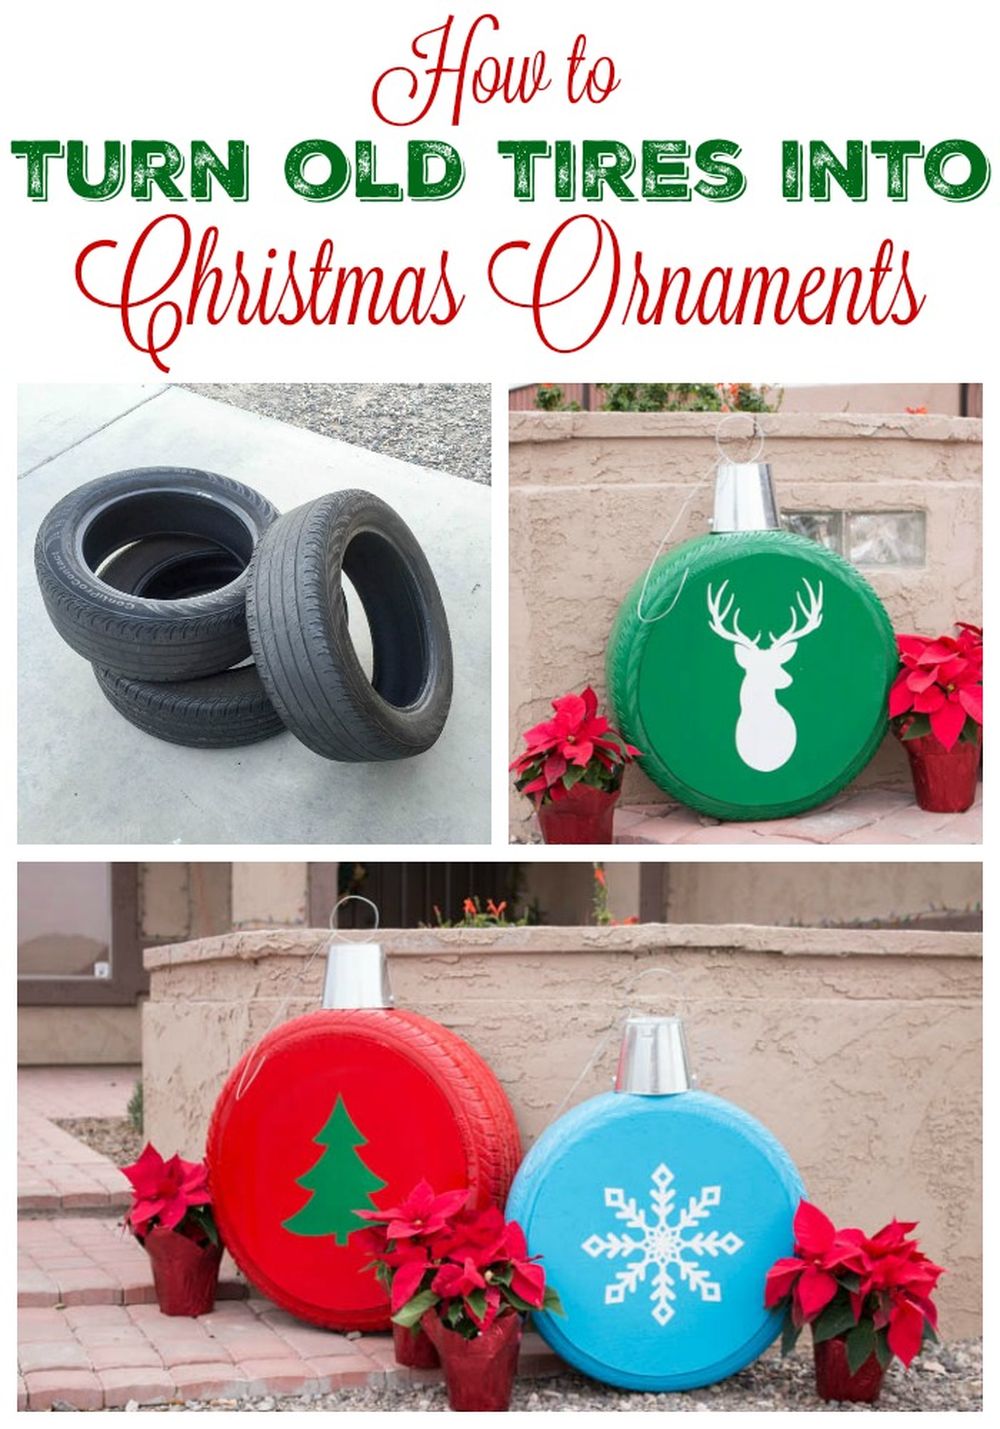
If you’re looking for a rustic and eco-friendly way to decorate your lawn this Christmas, then look no further than giant Christmas ornaments made from old tires!
Not only are these ornaments easy to make, but they’re also really cheap – perfect if you’re on a budget this year.
All you need is a few old tires (check with your local recycling center), some paint, wire, and an extra set of hands.
Start by spray painting the tires and let them dry. After that, you can paint on any decorations or patterns you like.
For instance, you can choose a snowman and star design for this tutorial, but feel free to be as creative as you want!
Once your paint is completely dry, drill holes through the top of each tire and thread wire through it. This will allow you to assemble the tire ornaments into a chain.
Finally, hammer in some hooks into your house/tree/garden fence and hang away!
Once you’re done painting and decorating your tires, just hang them from trees or porches for an adorable DIY decoration.
Check out Addicted 2 DIY’s tutorial for a more in-depth explanation of how to make these fun and festive lawn decorations.
14. Painted Christmas Pallet – Front Yard DIY Outdoor Christmas Decorations
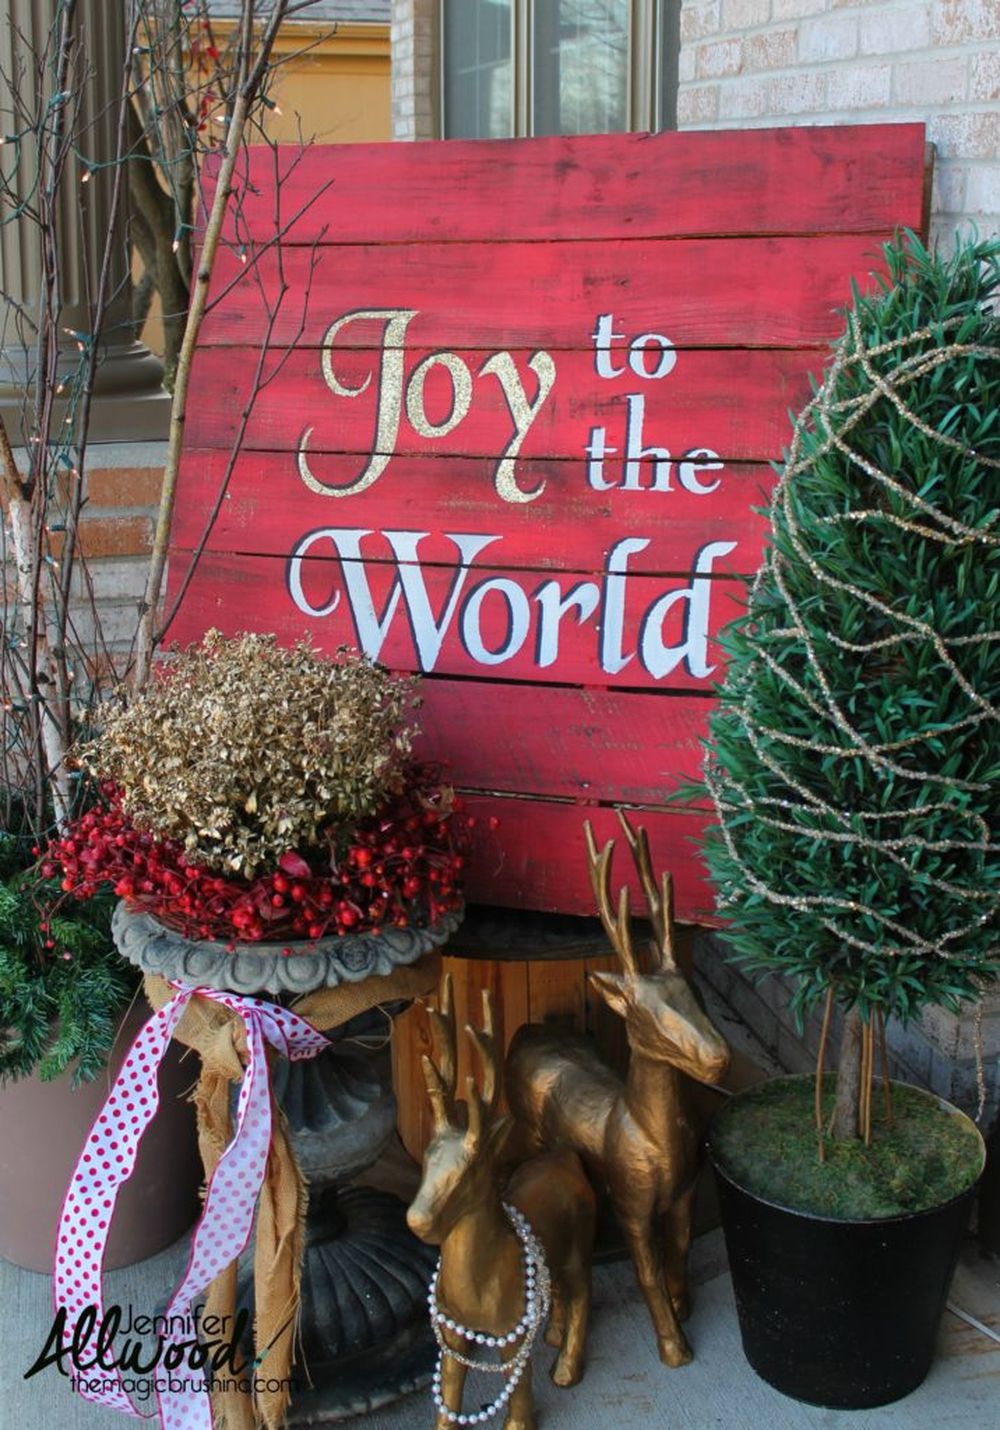
This painted Christmas pallet is the perfect way to add some rustic charm to your front yard this holiday season.
All you need is an old pallet, some paint (we recommend a festive red, green, and gold), and a stencil or freehand design.
Start by painting the entire pallet in your chosen colors. Once it’s dry, use a stencil or freehand design to stamp on your favorite Christmas images – such as trees, snowflakes, or stockings.
You can even add your family’s name or Christmas greetings for a really personal touch.
Once you’re happy with your design, allow the paint to dry completely, and then hang your pallet up on your porch, garden fence, or anywhere you like.
If you’re looking for a simple but stunning DIY outdoor Christmas decoration, then look no further than this painted Christmas pallet.
If you want it to last, you should seal it with a few coats of outdoor sealant/varnish. That way you’ll be able to use it again next year if you want to.
Check out Jennifer Allwood Home for more information and pictures on how to make this easy yet festive yard decoration.
15. Stacked Terra Cota Planter Snowman – Christmas Yard Decorations
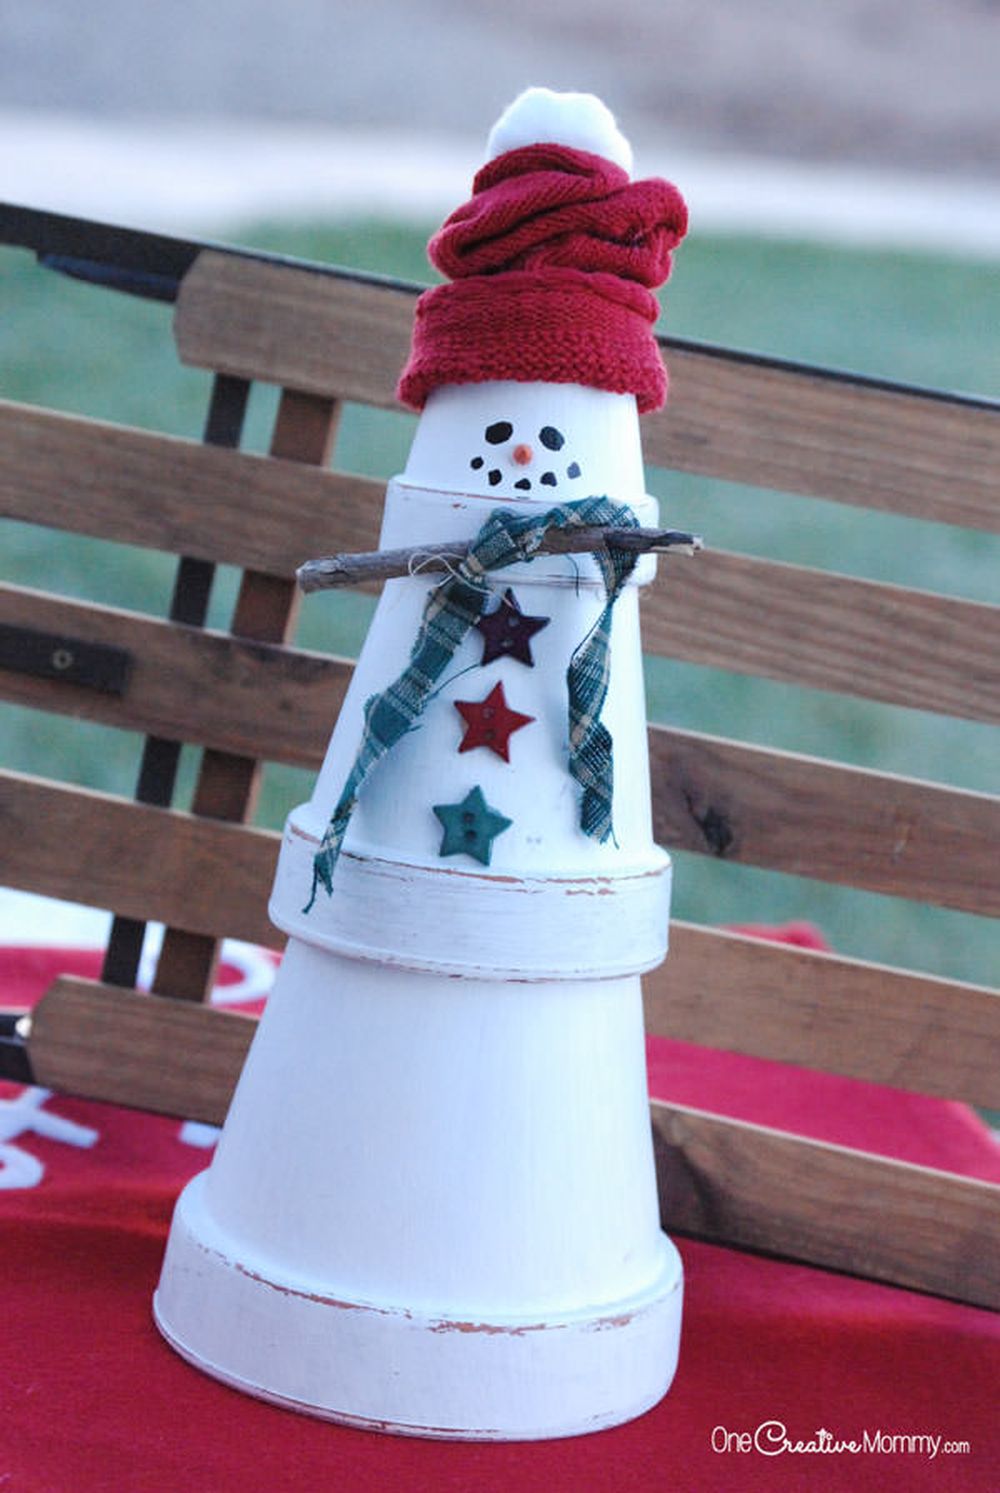
This stacked Terra Cota planter snowman is the perfect way to add some festive cheer to your front yard this holiday season.
All you need are a few pieces of Terra Cotta planters, paint, a small stick, a small sock (toddler-sized), some scrap fabric, a white cotton ball, some craft buttons, a sharpie fine-tipped marker, a hot glue gun, and an orange golf tee.
Start by painting your planters completely white, since they’ll be the body of your snowman. You can smudge some paint off if you want to achieve a rustic look.
You’ll need to let this first coat dry completely before starting on the next one. And don’t forget about adding detail to the eyes and mouth!
If you take a look at the photo above, you might figure out the whole thing and build the snowman on your own.
However, if you’re having a hard time figuring everything out, you may want to check One Creative Mommy’s in-depth tutorial. You’ll find not only comprehensive instructions but also helpful photos to guide you through the end of the crafting process.
16. Giant Christmas Lawn Decorations – Plastic Ornaments
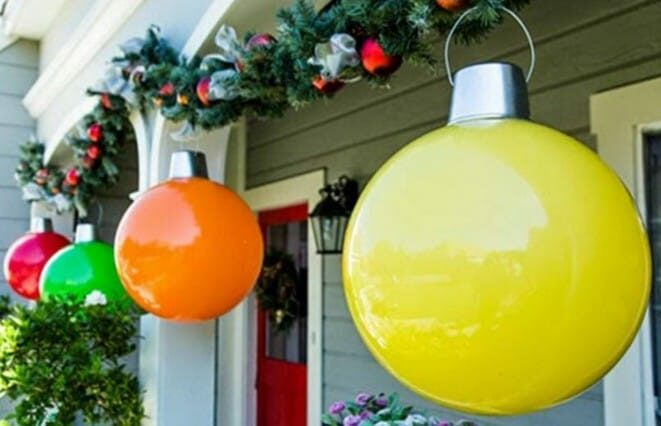
Perhaps we’ve caught your attention with the idea of making things bigger and brighter so they can be seen from the street, but it’s not your lights you’re concerned with?
Well, if what you’d really like to make is something in impressive jumbo size, we’d definitely suggest taking a look at how DIY n’ Crafts used plastic toy balls and metal buckets to make DIY jumbo tree ornaments to hang from their porch overhang!
17. Jumbo Decorations – Christmas Lawn Decorations
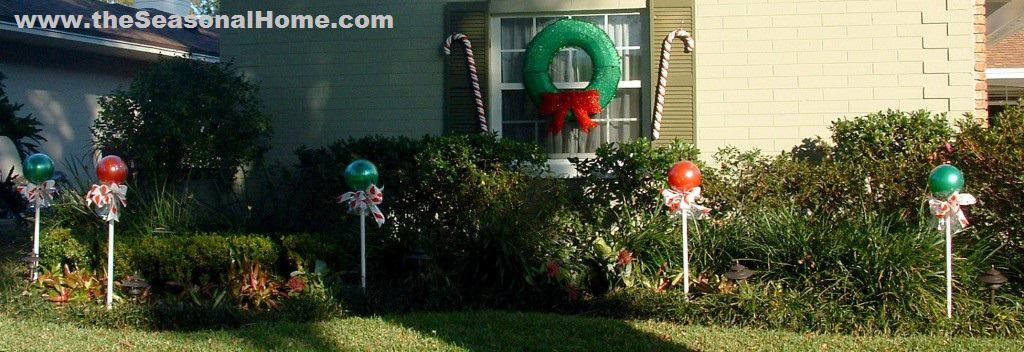
We’ve always been huge candy lovers who adore lollipops all year round. There’s just something about having them at Christmas, however, that seems a little extra festive.
We’re sure you can imagine, then, just how pleased we were when we came across this tutorial from The Seasonal Home that teaches you how to make your very own jumbo lollipops in Christmas colors to stand in your garden!
18. Spiralled Pathway Lollipops – Christmas Lawn Decorations
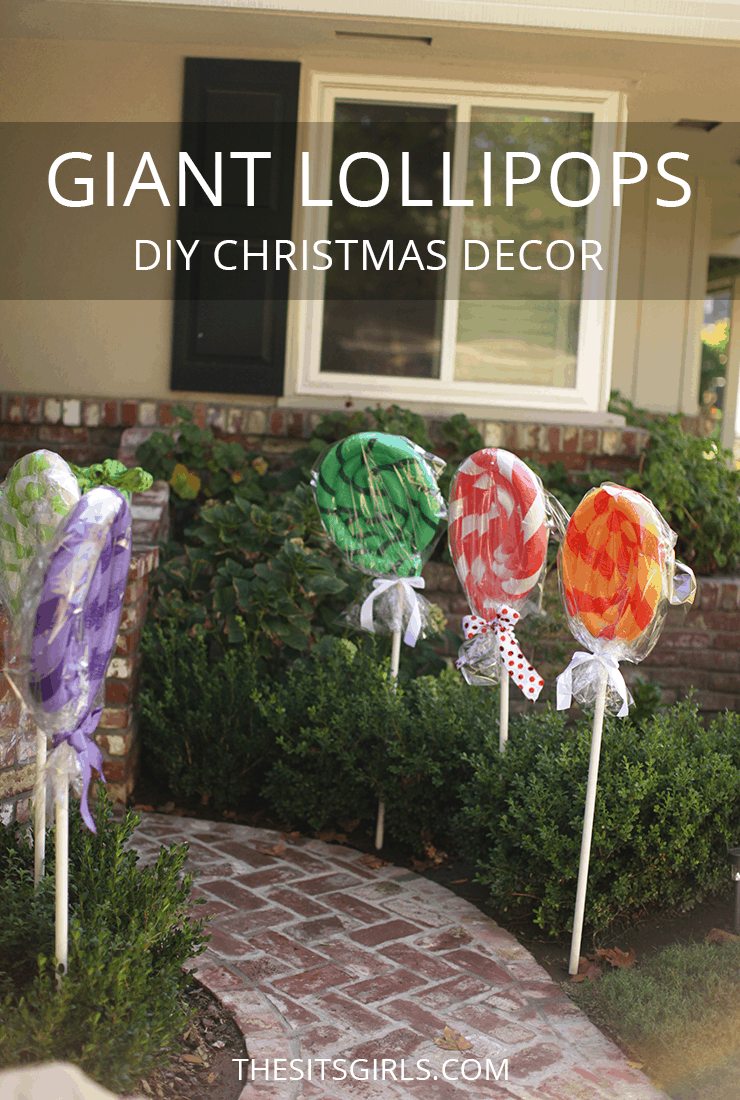
Did we actually really catch your attention with the lollipops idea but you can’t help wishing they were the more classic homemade kind that spirals out from the center because you’ve always enjoyed eating or making old-fashioned peppermint ones around the holidays?
Then you’ll find precisely what you’re looking for in this jumbo pathway lollipop tutorial from The Sway!
19. PVC and Tinsel Christmas Lawn Decorations

We’ll admit it: sometimes we just really like hanging decorative stuff from the trees in our yard and we’ll use just about any holiday as an excuse, particularly if it’s something we can make ourselves.
That’s why we loved this bent PVC and tinsel-covered tree ornament design from H2O Bungalow so much! The process is also a total blast, if you ask us.
20. Colorful Christmas Balloon Marbles – Front Yard DIY Outdoor Christmas Decoration
This awesome holiday yard decor is particularly exciting to make because it actually feels a little bit like a science experiment while you’re doing it!
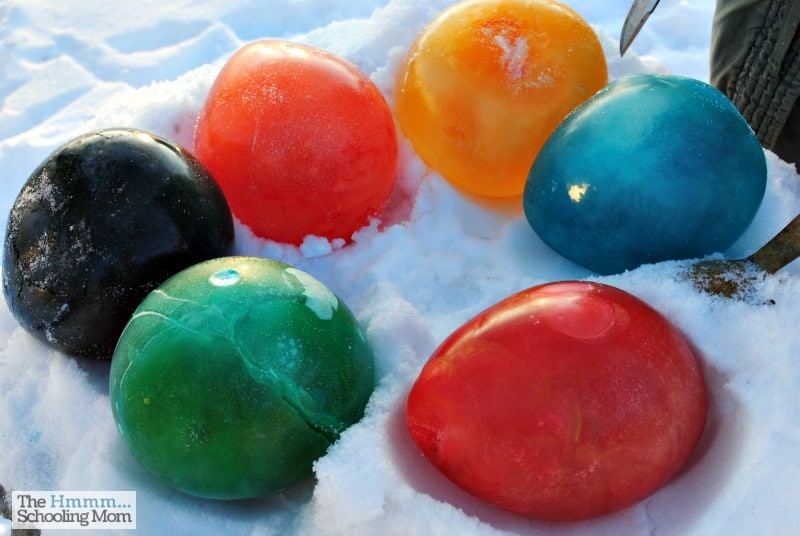
Check out how Chox The Muse made these lovely frozen orbs or giant, colorful ice marbles by filling balloons with water and some coloring and leaving them in the snow until the rubber pops (but be sure to pick up the rubber pieces so it doesn’t make any curious animals sick).
21. Painted Cement Brick Holiday Gift Christmas Lawn Decorations
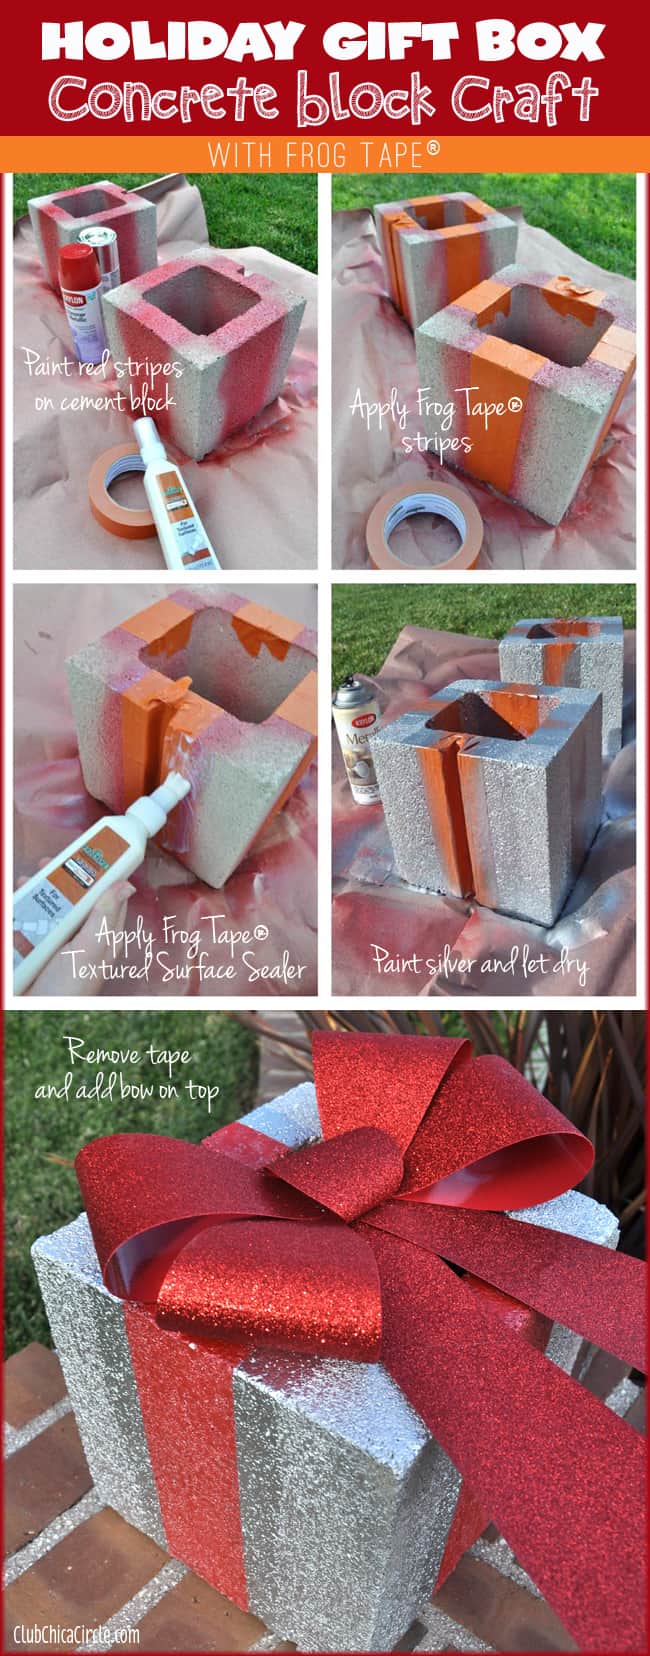
Just in case the large-sized things you mostly have access to in your yard are a little more industrial-inspired rather than rustic and wooden, here’s a tutorial that takes full advantage of things that are a little more heavy-duty!
Check out how Chica Circle created awesome, jumbo-sized, Christmas presents by painting and ribbon wrapping cement blocks.
Christmas Lawn Lights
While decorating your house or front lawn for Christmas, it’s really important not to forget about mixing things up. For instance, if you simply fill up your lawn with fake snowmen, things will get boring pretty fast.
However, if you mix things up and add a Christmas light here and there, a round ornament, or even the occasional reindeer, passersby will definitely be more impressed.
That’s precisely why we’re gonna show you some of the best Christmas lawn light decorations you can do on your own. Furthermore, lights should bring the best out of your non-lit-up decorations, as well.
22. DIY Twine Garden Lantern – Christmas Yard Lights
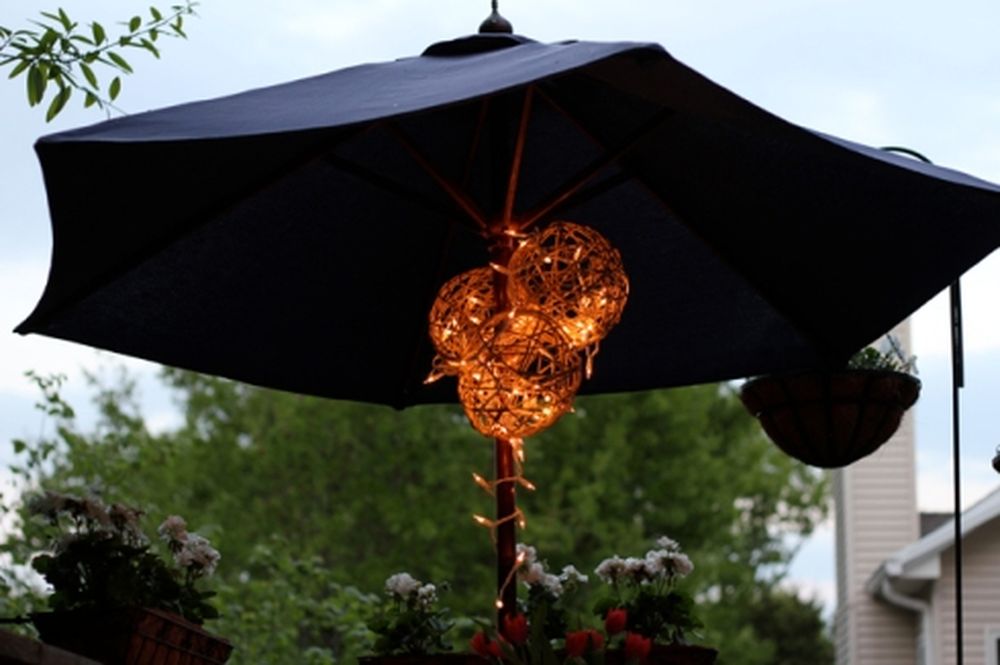
Splash Of Something provides us with a quick tutorial on how to make your very own twine lantern, which will add a beautiful touch to your garden this holiday season.
All you need is some old wire coat hangers, twine or hemp rope, and an old glass jar.
Start by removing the handle from one of the wire coat hangers. Then use pliers to flatten out the open end so you can attach it to a jar lid later on.
After that use a lighter to gently burn off any sharp edges left behind from cutting off the hook part of the wire coat hanger, so neither you nor little ones will get hurt while playing around with this Christmas lawn decoration!
Take your twine or hemp rope and wrap it around and around and around and around and around (and so on) the part of the wire coat hanger that’ll be attached to your jar.
Once you’re done, go ahead and tie a knot. Then attach it to a lid from an old glass jar.
All you need now is some battery-operated tea lights (or candles if you don’t mind burning down your lawn).
You can even add some colorful LED Christmas lights within the jar for extra brightness and illumination!
The next time someone sees your beautiful twine garden lanterns in all their glorious colors, they just might want one of their own!
23. Chicken Wire & Strand Of Lights – Christmas Lawn Lights
You already know how we love using chicken wire in our craft tutorials. And this quick and easy outdoor decoration is no exception! Well, it’s not our tutorial, but we still love chicken wire just as much.
All you need is a strand of Christmas lights, some wire clippers, and something to cut the chicken wire with (wire snips or even a hacksaw will do).
You can wear gloves if you want when cutting through the chicken wire.
Once your strand of Christmas lights is completely wired up, attach it to the chicken wire by twisting them together. Then add some zip ties for extra security.
The next step is attaching your DIY Christmas lawn ornament to a tree. If you’re going to use a live tree in your front yard, be sure to put it on the side where people won’t walk into it and ruin your hard work!
You could also use a metal stake to attach it to the ground if you’re using a fake tree or don’t have a live one.
Miss Information Blog has got you covered with this detailed tutorial, complete with photos for each step!
24. Mason Jar Christmas Lights – Christmas Yard Lights You Can Do On Your Own
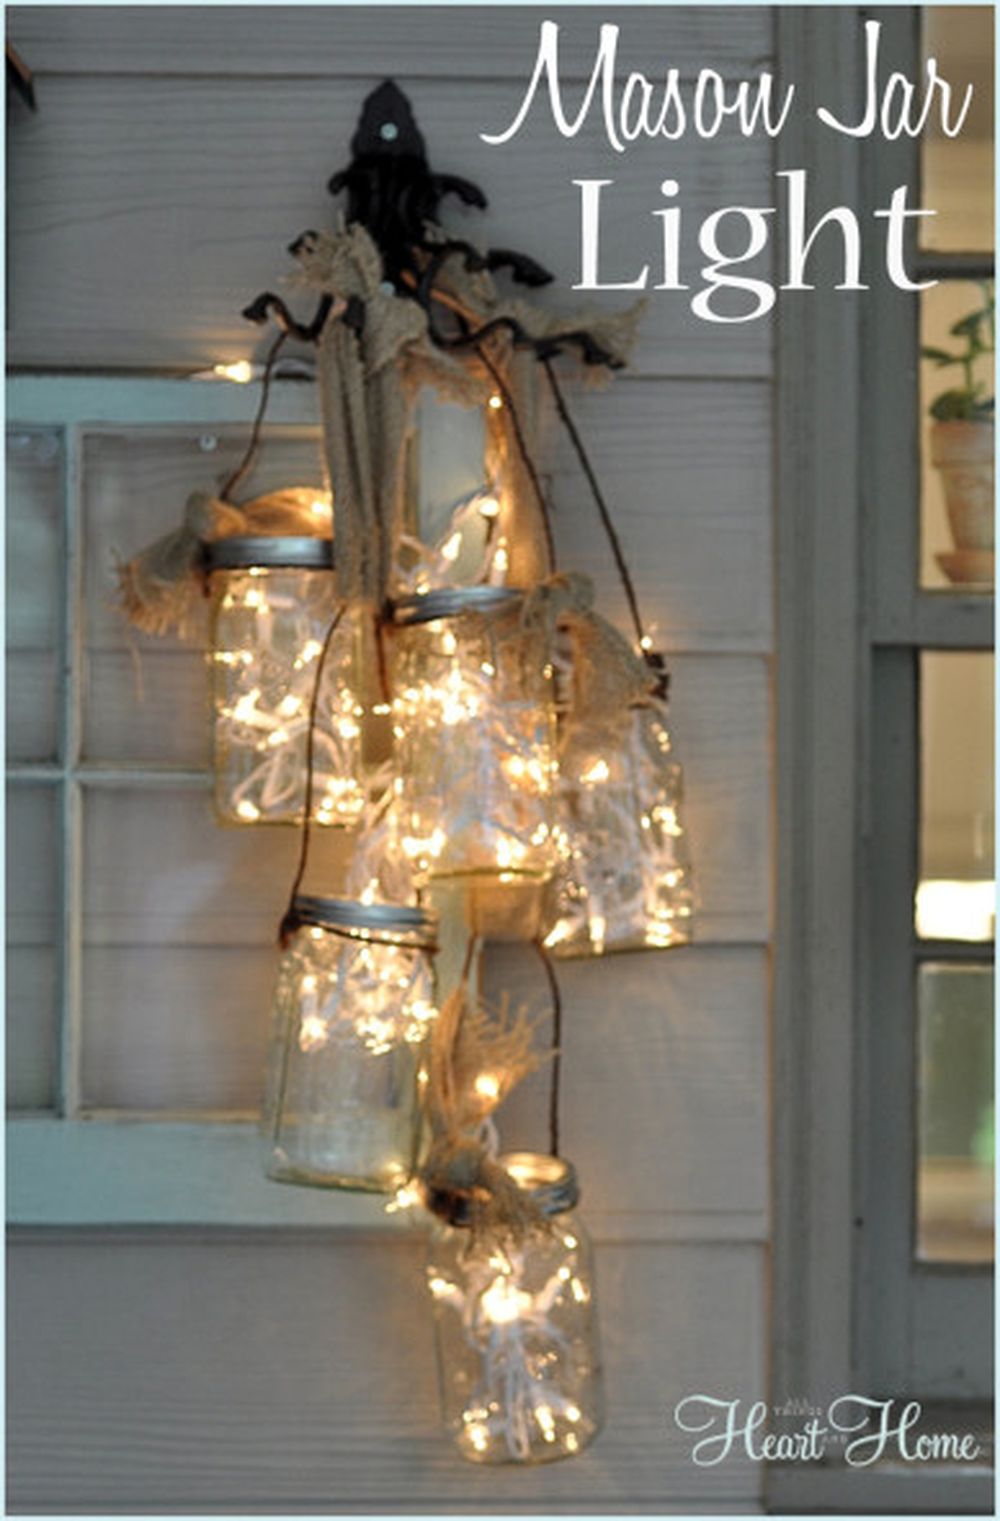
If you’re looking for a beautiful and easy way to light up your porch or yard this Christmas, look no further than these mason jar lights!
The first thing you’re gonna need is a large pack of Mason jars. You don’t have to pay attention to the size, since they’ll all work for this particular DIY Christmas lawn decoration!
After that, grab some twine or hemp rope. Then cut either one into small pieces so you can tie them around each of the jar lids.
Don’t forget the lid rings, either! They’re great for hanging your Christmas lights on trees or metal stakes in your front yard.
Once you’ve got everything ready, attach the lid ring to the lid and place it over your strand of Christmas lights. Tie some more twine around it to make sure everything stays put throughout December.
It’s pretty easy once you get started, and the end result is beautiful! Check out All Things Heart And Home’s tutorial if you want to learn more about this awesome craft!
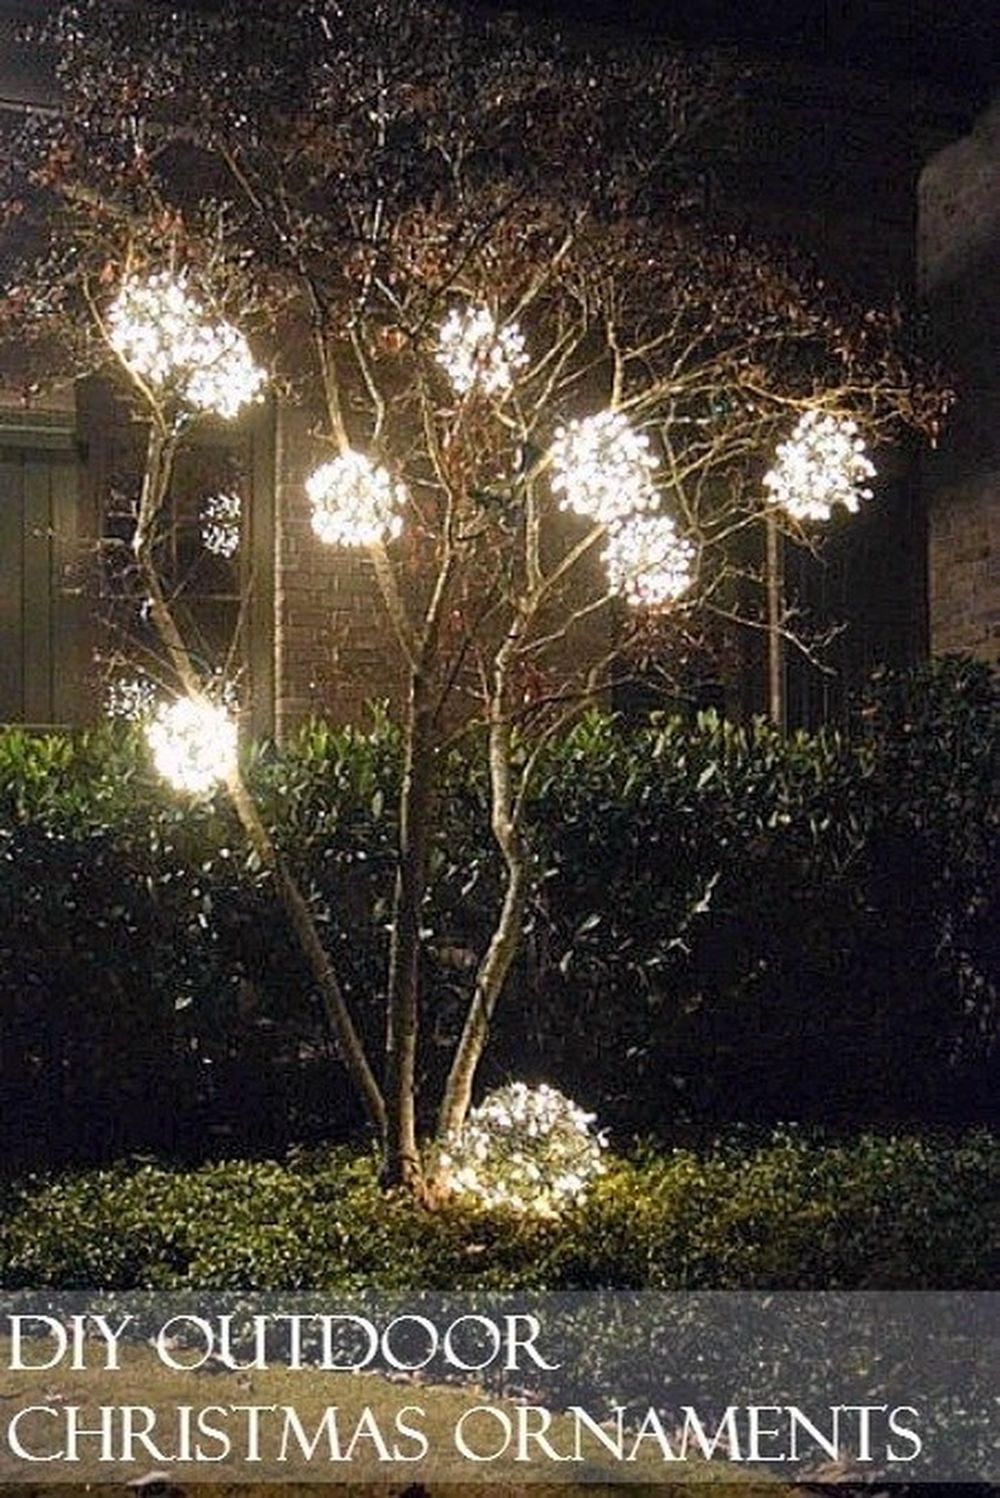
25. Christmas Light Balls – Christmas Yard Lights
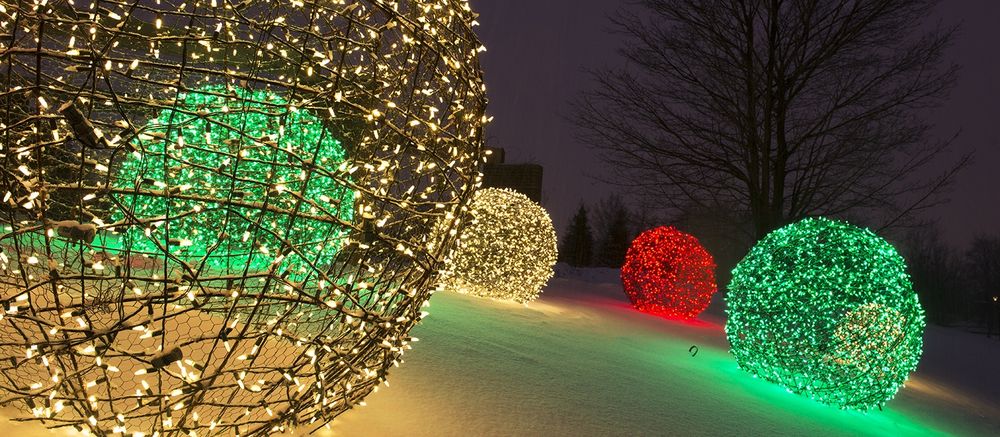
Every Christmas, people all over the world decorate their lawns with outdoor Christmas lights. But is there such a thing as too many Christmas lights?
Some people might say yes, but we definitely don’t agree! This is why we love this DIY Christmas lawn decoration so much! It’s simple, it’s easy, and the end result is breathtaking!
You’ll need to create a cylinder shape out of chicken wire, then shape it into a ball. Once you’ve finished shaping the chicken wire ball, you can start covering it with Christmas lights.
Don’t forget to use a strand of LED lights as well, since everyone knows they last the longest!
It might be helpful to attach some paracord around the chicken wire before you start sticking your Christmas lights inside. This way you’ll avoid losing all those little bits and pieces that tend to fall through the gaps in between wires.
Once your light ball is completely covered with Christmas lights and cords, let it hang from a tree branch or something similar! If you’re good, you could create an entire set of light balls for under $20.
Be sure to check out Christmas Lights Etc’s detailed tutorial on how to make these amazing DIY Christmas lawn decorations!
26. DIY Tomato Cage Christmas Tree Lights – Front Yard DIY Outdoor Christmas Decorations
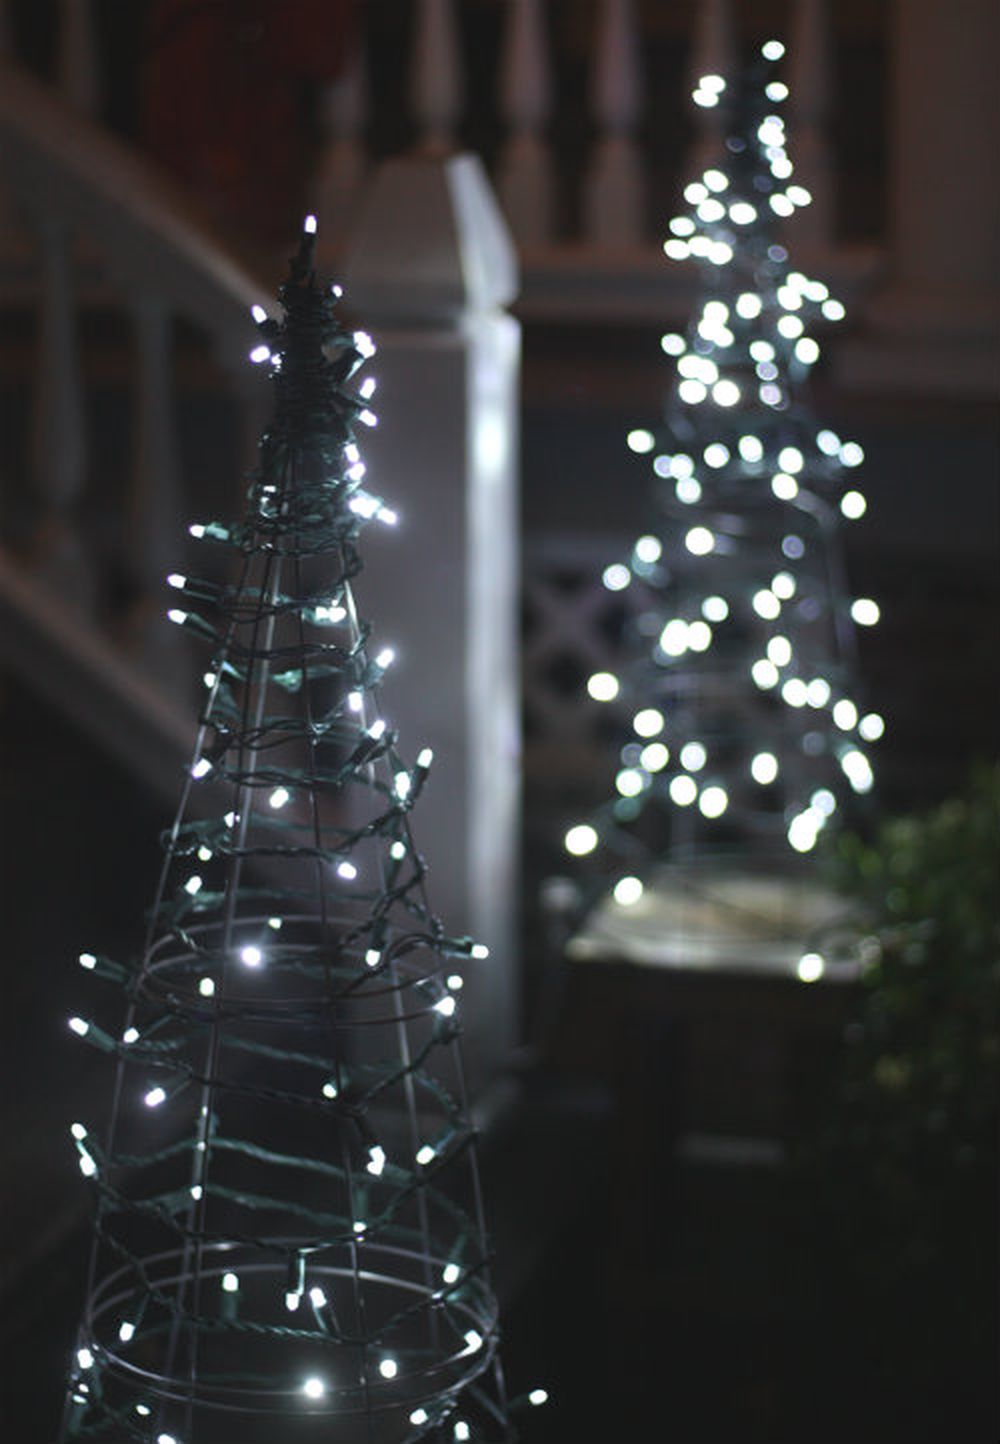
Who says you need a real tree to have a beautiful Christmas display in your front yard? This DIY tomato cage Christmas tree is the perfect alternative!
All you need is a metal tomato cage, some garland, and a bunch of lights. You could even use fake snow or cotton balls to decorate it further!
Start by shaping the tomato cage into a tree-like shape. If it’s too difficult to do on your own, get help from a friend or family member. It shouldn’t take more than 10 minutes to put it together!
After that, just start wrapping the garland around the tomato cage until it’s completely covered. You might need to use some hot glue or wire to keep everything in place.
Finally, add your lights! We recommend using LED lights if you want them to last for more than a week or two.
Be sure to check out the full tutorial on 17 Apart’s website. It’s really easy to follow and doesn’t take long at all!
27. Swedish Snowball Lanterns – Christmas Yard Lights
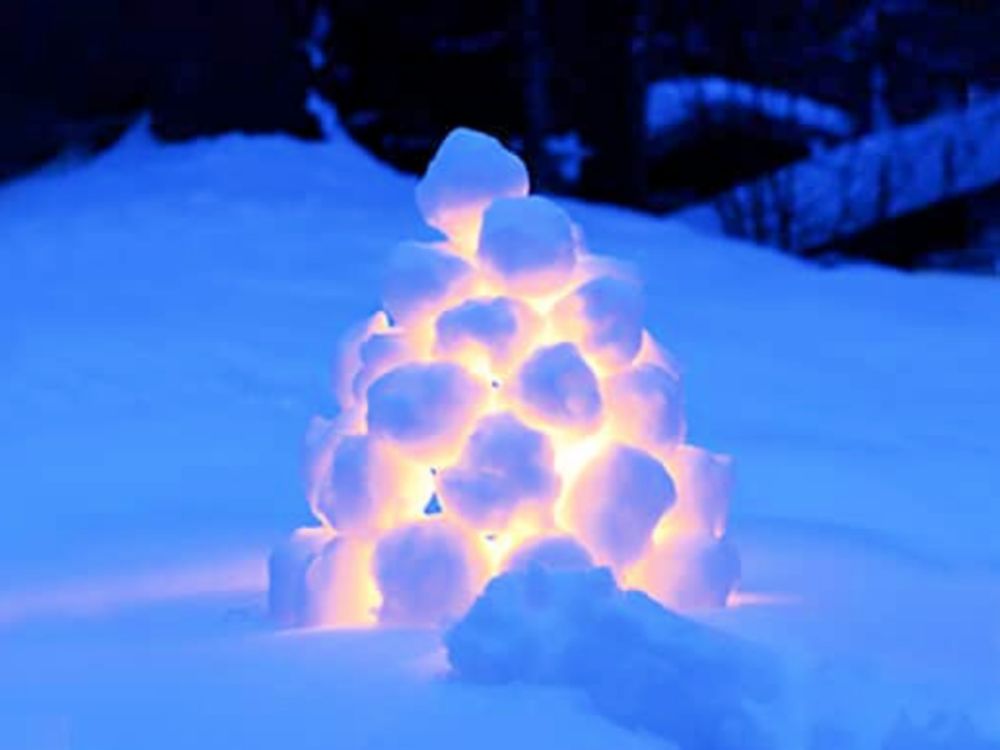
These beautiful Swedish snowball lanterns are the perfect way to light up your front yard this Christmas!
They’re really easy to make, and all you need is some white tissue paper, a hot glue gun, and a wire hanger.
Start by cutting the tissue paper into small squares. It’s helpful to use a template or ruler so they all end up being the same size.
After that, start hot gluing the squares together until you have a big ball of tissue paper. Make sure it’s tight and compact, otherwise your lantern will look weird and won’t hang properly.
Once you’ve created your snowball, use the wire hanger to create a loop on top. This is where you’ll hang your lantern!
On the other hand, if the snow is here to stay, you could replace the tissue-made faux snowballs with real ones. Just make sure to place battery-operated tealights inside the snowball bundle, or else everything’s gonna melt right away!
Be sure to check out Artful Parent’s full tutorial for more details and even better illustrations!
28. DIY Outdoor Wooden Lighted Stars – Christmas Yard Lights
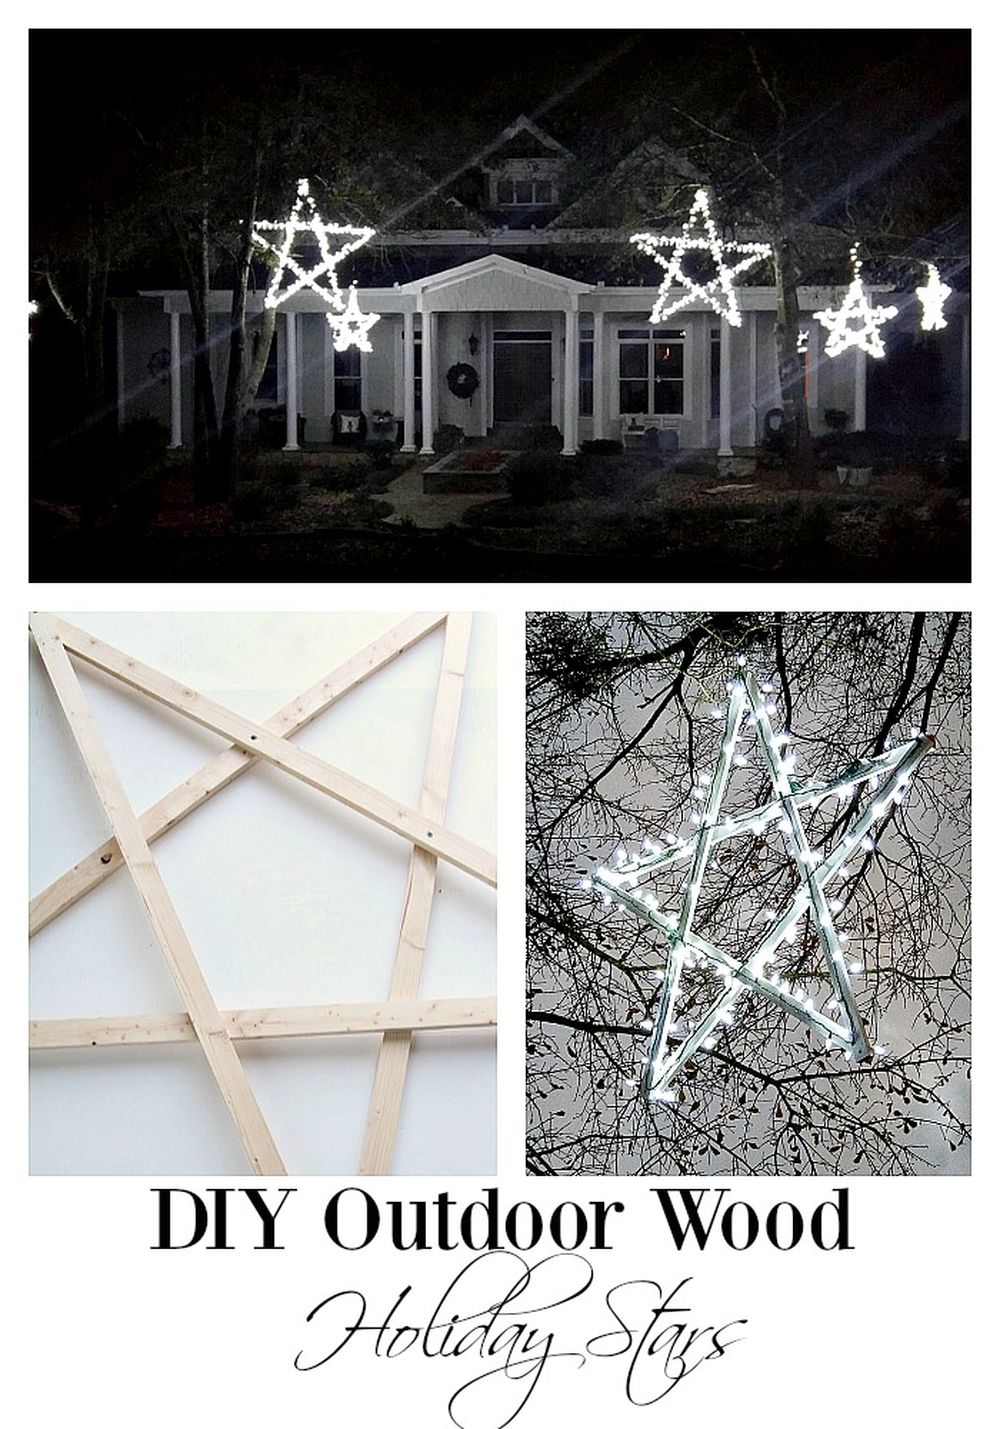
Who says Christmas lights have to be made out of string? These wooden lighted stars are a gorgeous alternative, and they’re much simpler to make, too!
All you need is some wooden planks in the shape of a star, two different types of paint, and a bunch of rope.
Start by painting each one of your wooden stars in different colors. We recommend using light and dark colors to create a cool effect.
After the paint has dried, use the rope to create a hanging loop on each star. Make sure it’s sturdy so it can hold the weight of the star!
Once that’s done, hang the stars from trees or anything you have hanging in your yard. Make sure not to put them too close to each other, otherwise, they’ll start to look weird!
Last, but not least, place the lights on your stars. You can use battery-powered ones if you want to skip the hassle of dragging cables all over the place.
Now all you have to do is plug them in (or flick the switch) and enjoy a magical star-lit Christmas scenery in your own yard. Not only will it look gorgeous, but you’ll also have that sense of accomplishment that you did it all by yourself.
Check out Duke Manor Farm’s full tutorial for more step-by-step instructions and photos. It’s really easy to follow and the end result looks phenomenal!
29. Shooting Stars – Christmas Lawn Lights
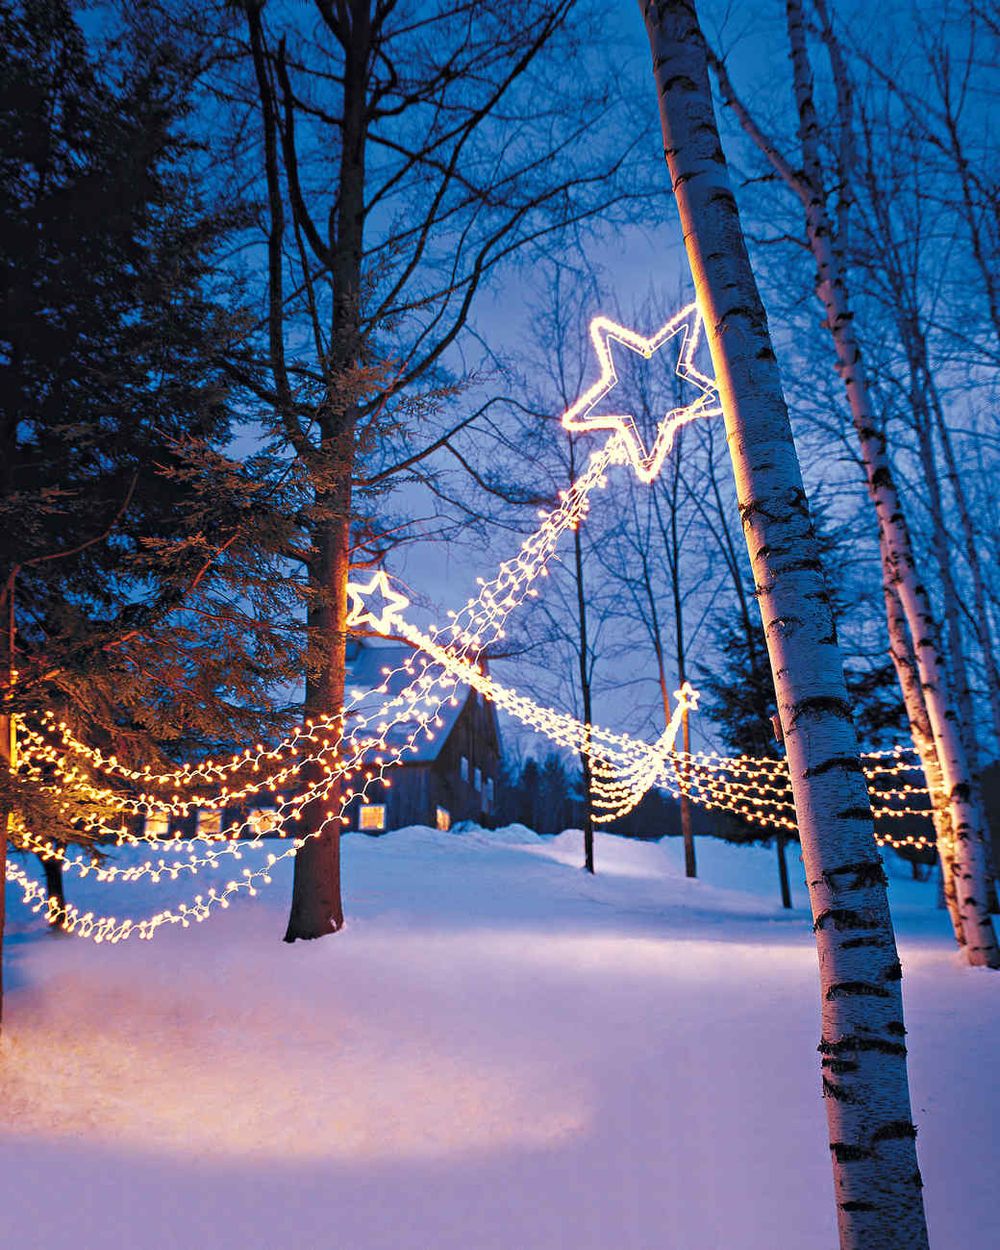
Add a touch of magic to your yard this Christmas with these simple shooting stars!
They’re really easy to make, and all you need is some wire, plastic balls, and LED lights.
Start by bending the wire into a star shape. You can either do this freehand or use a star-shaped cookie cutter as a guide.
After that, start hot gluing the plastic balls onto the wire. Make sure there’s enough space in between each ball so the light will shine through.
Once you’ve finished the star, use the LED lights to create a beautiful shooting star effect. We recommend using battery-powered lights so you don’t have to worry about any cords.
Hang your shooting stars from trees or anywhere else in your yard. If you have any leftover wire, you can also use it to create a garland!
This outdoor Christmas wreath is perfect for anyone who wants to add a bit of festivity to their front yard without going too over the top.
Martha Stewart’s full tutorial has even more details and a lot of helpful photos that could guide you through the crafting process, so make sure you don’t miss it!
30. Lighted Christmas Gift Boxes – Front Yard DIY Outdoor Christmas Decorations
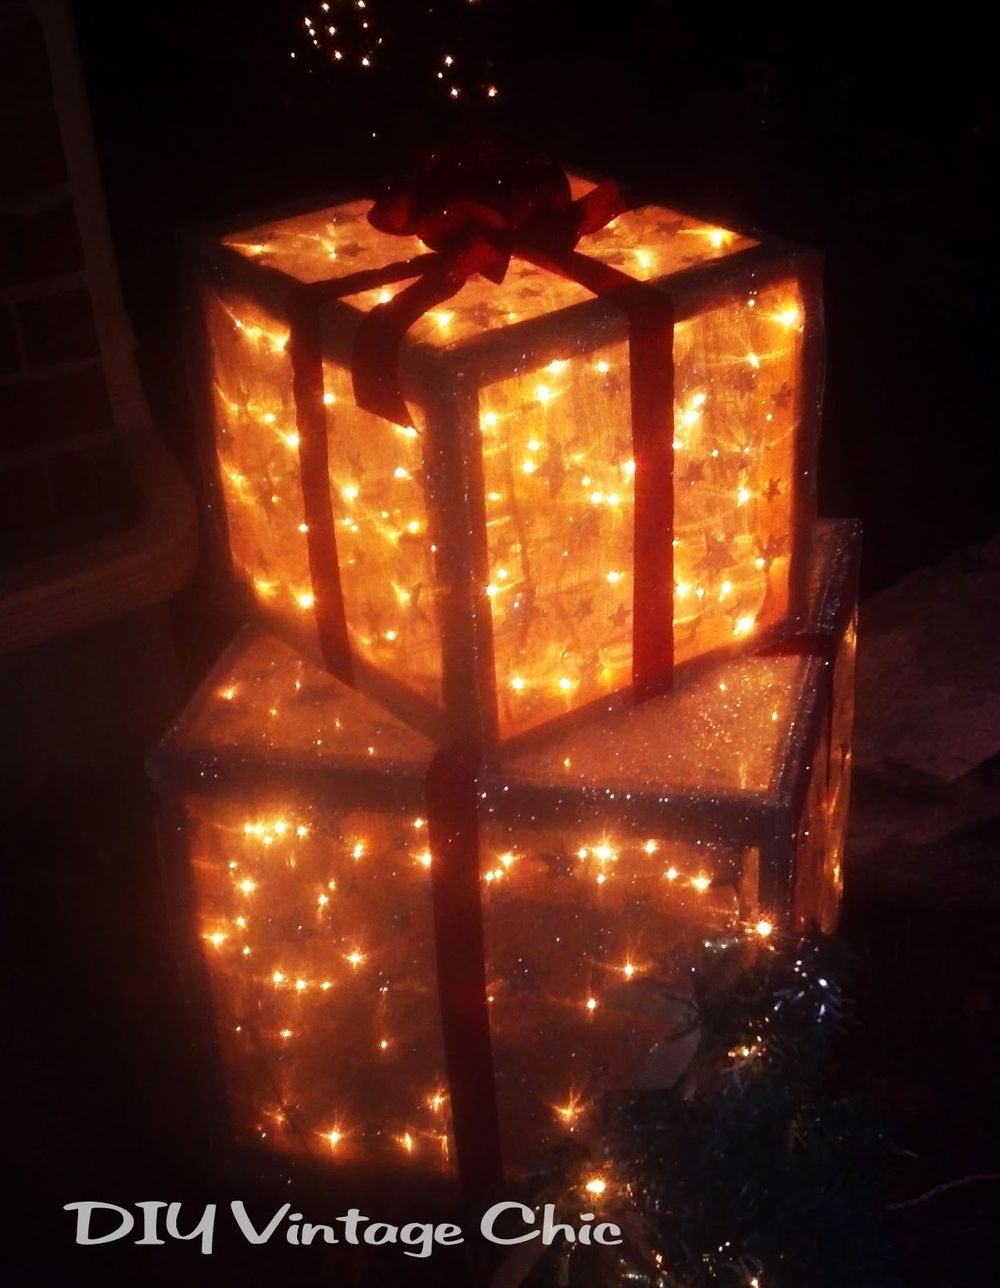
Add a touch of elegant wonder to your yard with these simple lighted Christmas gift boxes!
All you need is some wood for the frame, a ruler, a pencil, and Santa Claus’ magic sack. Well, it’s not really Santa’s, but we can dream, can’t we?
Start by measuring the width and height of your box. Draw the outline on both sides and cut them out carefully to create two openings for your lights.
Now it’s time to get creative! Use some fabulous fabric scraps to decorate your box in any way you want to. You can use lace or simply paint the design right onto the box – there are many options available!
Once you’re done creating an awesome piece of art for everyone to enjoy, simply staple or glue it to the frame.
Last, but not least, add your lights. We recommend using battery-powered LED lights so you don’t have any cords to worry about.
Hang your lighted Christmas gift boxes from trees or anywhere else you please and enjoy the look of wonder on everyone’s faces as they drive by!
Alternatively, you can group them all up so it seems like Santa has paid you a visit and left a bunch of magical Christmas gifts right on your front lawn.
This light arrangement that you can easily do on your own is absolutely perfect for anyone who wants a simple yet elegant front yard decoration.
For some additional information, be sure to check out the DIY Vintage Chic blog post for more instructions and photos!
31. DIY String Light Christmas Tree – Christmas Yard Lights
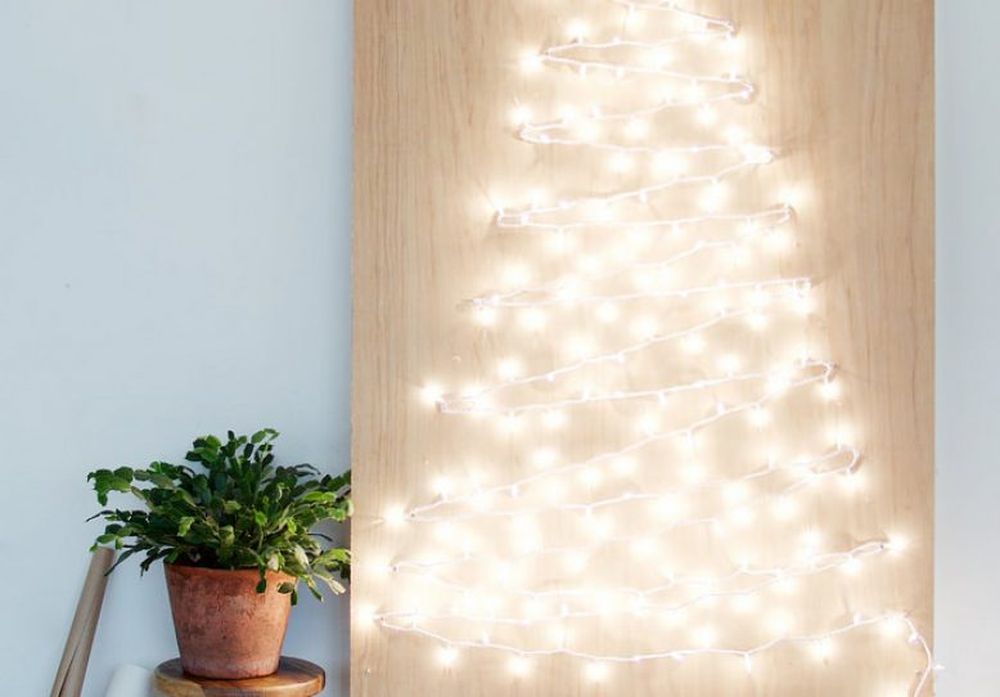
Light up your yard with this amazing DIY string light Christmas tree! It’s not really a tree, mind you, but it should resemble one if you’re crafty enough and know exactly where to pin the Christmas string of lights.
Start by finding an empty spot in your yard where you want your tree to be. It can be any shape or size that you like, but make sure it’s big enough to fit all of the lights!
Once you’ve chosen the spot, start by staking out the outline of the tree with some stakes or long pieces of rebar.
Now it’s time to add the lights! We recommend using battery-powered LED lights so you don’t have any cords to worry about.
Space the lights evenly along the outline of your tree and then use zip ties to keep them in place.
Last, but not least, decorate your tree with whatever ornaments you please! You can use real or fake ornaments, it’s up to you.
We suggest using a mix of both to add some depth and interest to your tree. Enjoy your new light show!
This is another easy DIY project that is perfect for anyone who wants a festive and fun front yard decoration.
There’s a complete tutorial on this project over at Collective Gen’s website, so make sure you give it a look if you want to find even more instructions and photos!
32. Milk Jug Christmas Lawn Lights
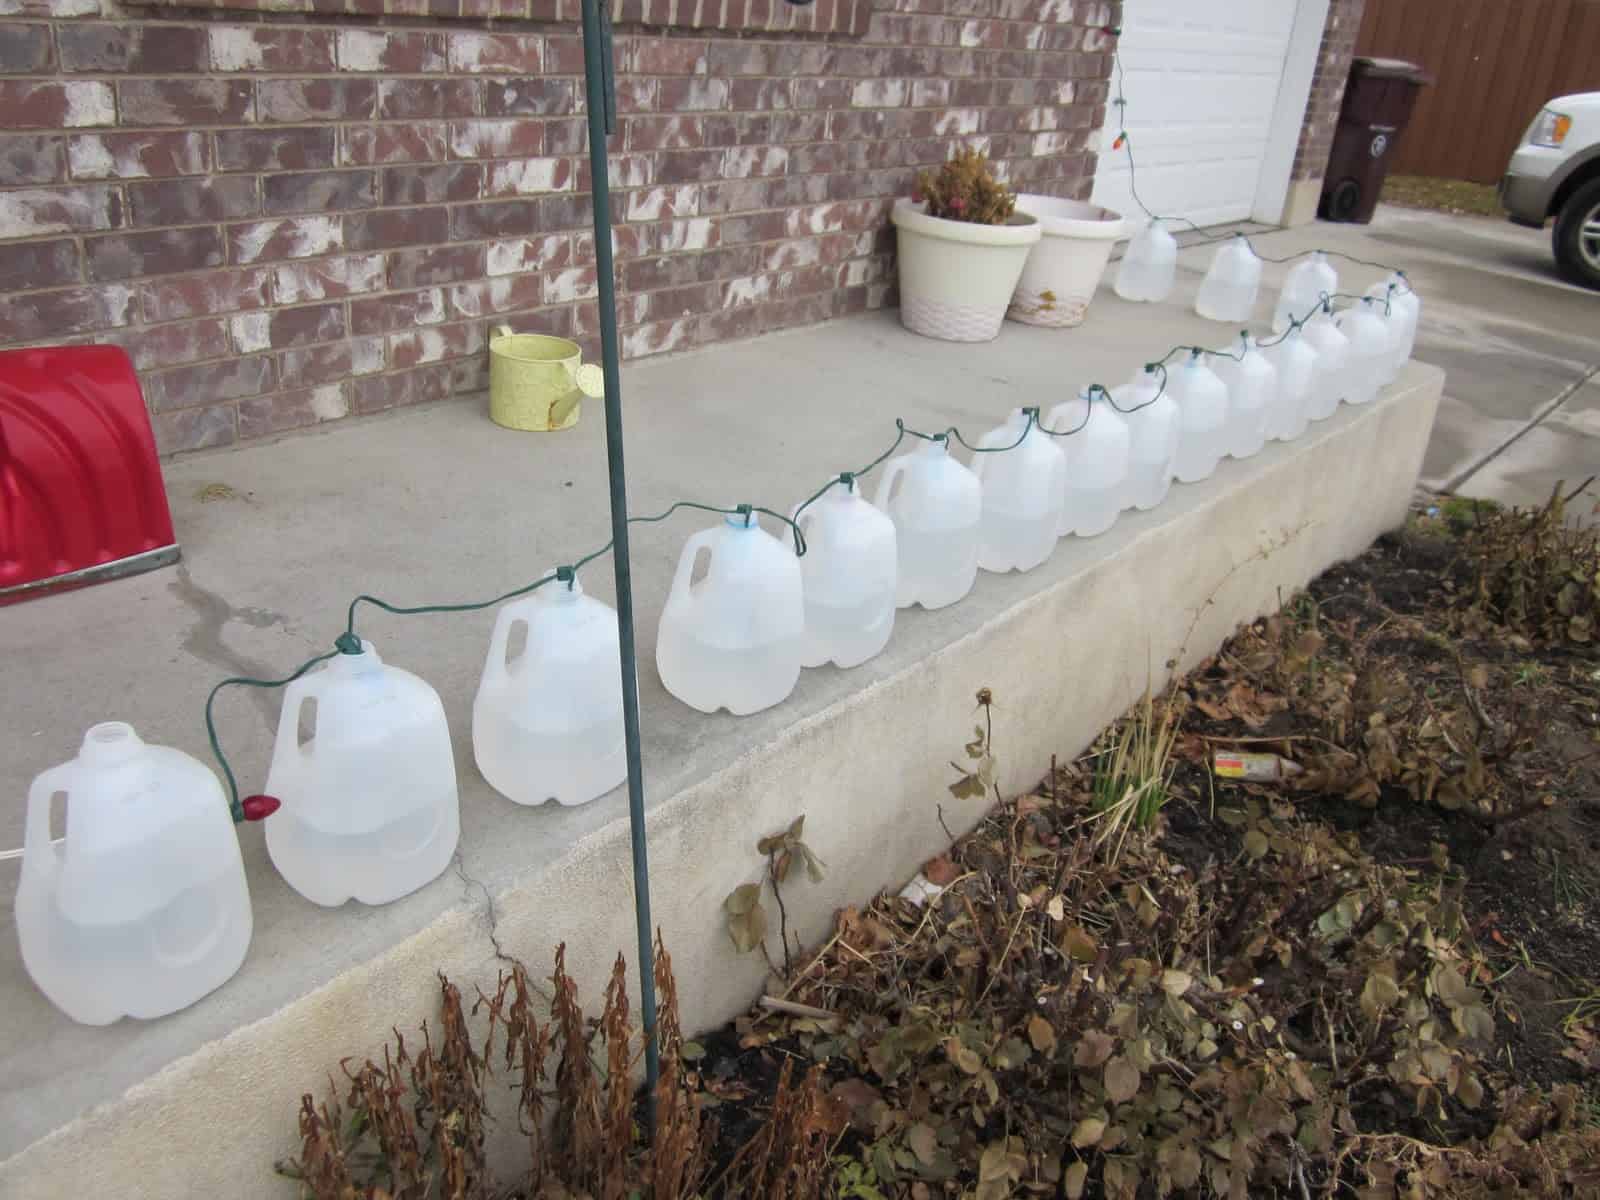
Do you have a yard that’s very far from the street and sidewalk and you find that the Christmas lights you put up each year simply don’t glow as far as you’d like them to so passersby can really see them? Then we have a feeling you’ll get along very well indeed with this fantastic water and milk just trick! Thrifty 101 shows you how the water magnifies the light for a bit more glow.
33. DIY Candy Cane Solar Light – Christmas Lawn Lights
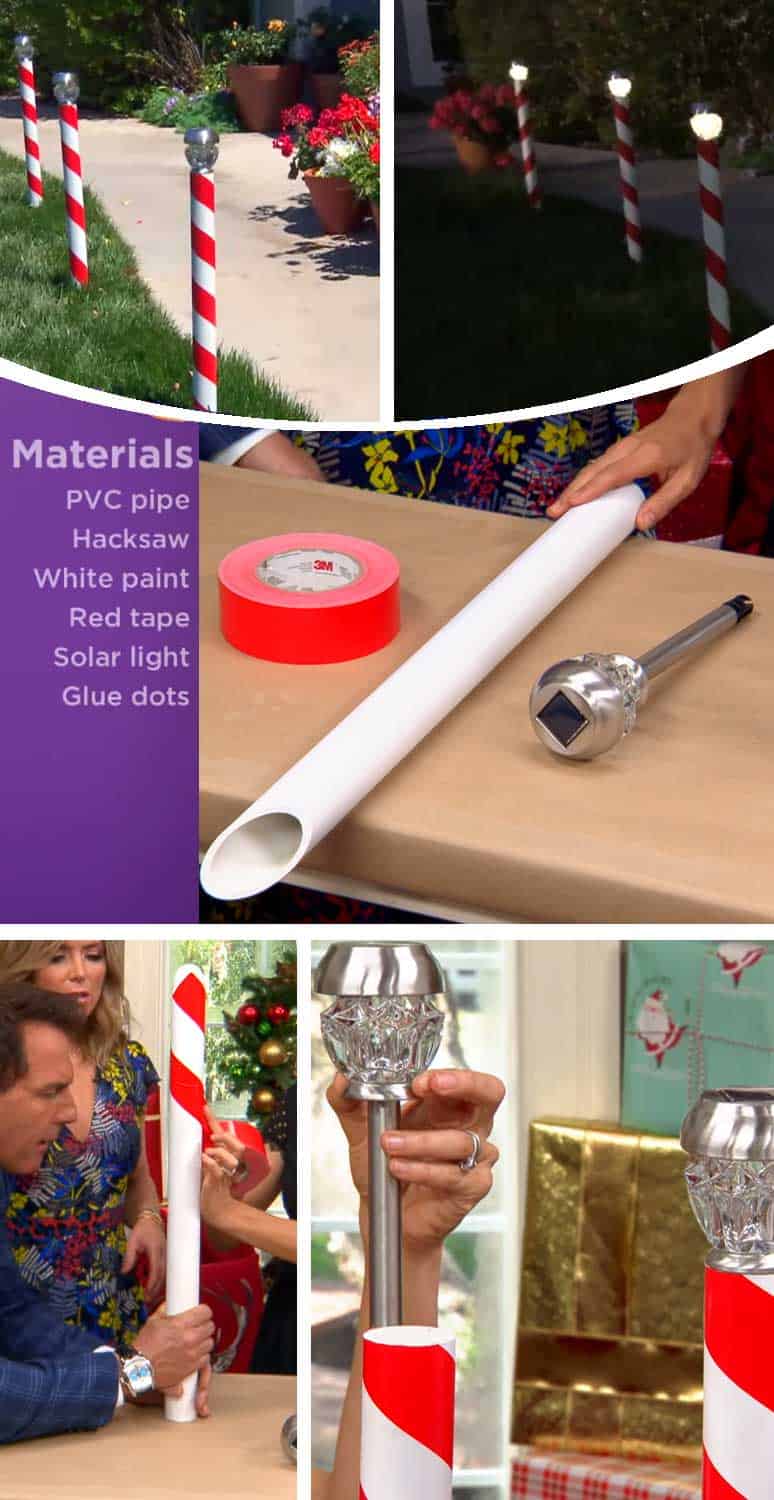
Perhaps you quite enjoyed the idea of lining your yard’s walkway with a holiday-inspired candy but you’re just not sure lollipops are quite Christmassy enough for how you want your yard to look? In that case, we’d absolutely suggest taking a look at how DIY Cuteness made these fantastic candy cane stands that are also solar-powered lights!
34. Lighted PVC Candy Cane – Christmas Lawn Lights
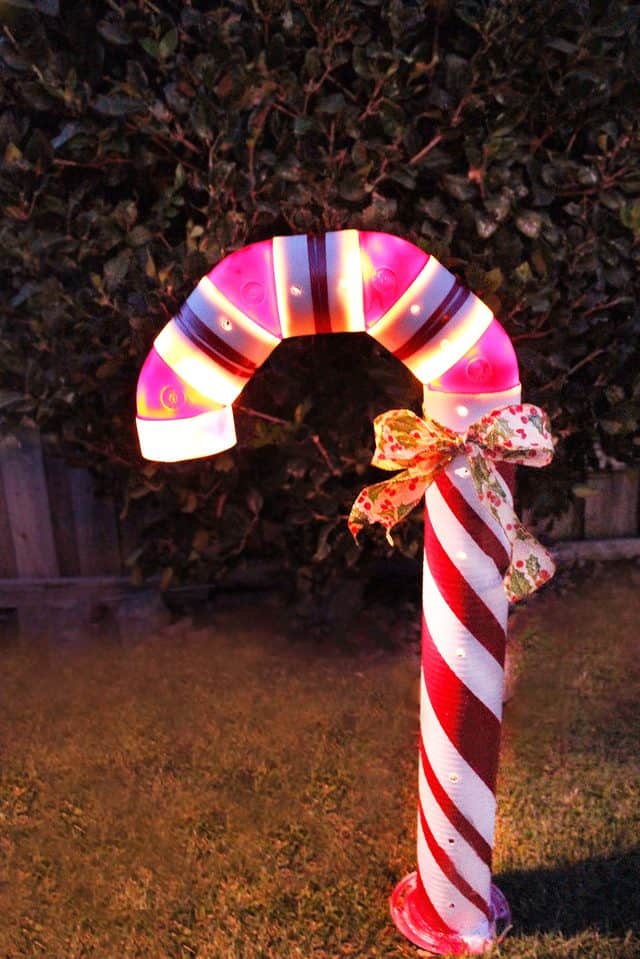
Were you rather intrigued indeed by the candy cane idea but you’re just not sure they look quite right without the signature hooked shape on the top? Well, thanks to E-How, you don’t actually have to leave that part out in order to make a jumbo walkway candy can that lights up! They walk you through the process in full detail.
Wooden Christmas Yard Decorations
35. Christmas Reindeer From Logs – Wooden Christmas Yard Decorations
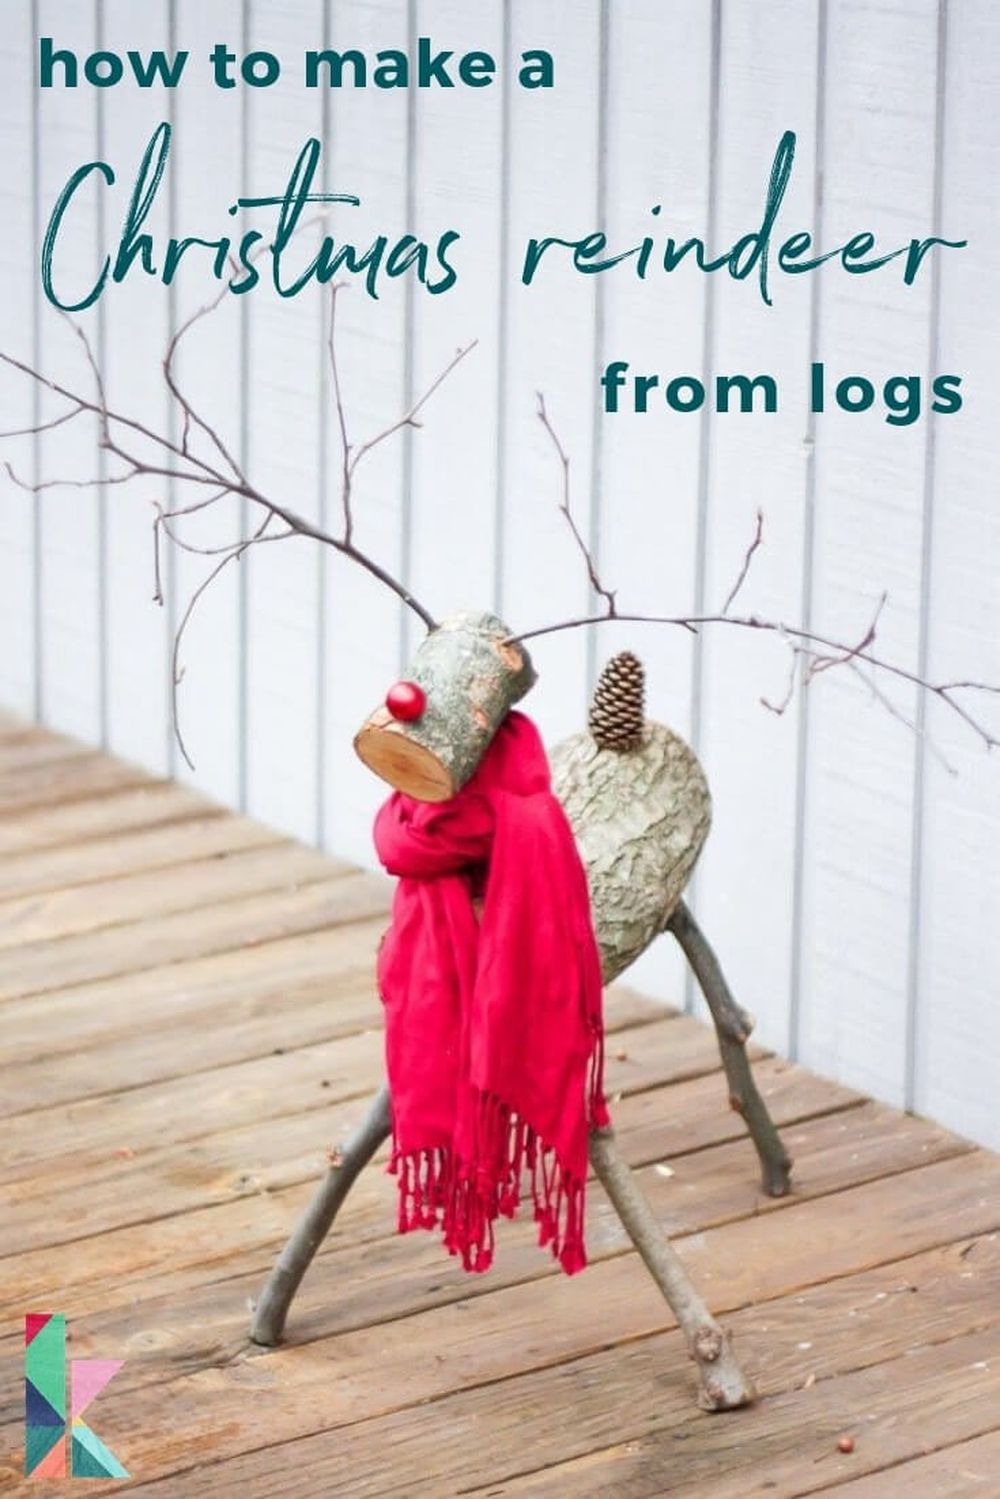
What better way to decorate your front yard than with some cute wooden Christmas decorations?
Start by finding a large log that you can split in half. You’ll also need two smaller logs for the antlers.
Draw the shape of the reindeer’s face on it and cut out the pieces to create the image.
Glue or screw them together so you have a strong piece of art before sanding off any sharp edges.
Add four small holes at the bottom of your larger reindeer so you can flip it over to stand on its own! This is very important if you live somewhere that has heavy winds that might knock it over easily.
Last, but not least, paint or stain your reindeer any color you please and hang it up! If you have a tree in your yard that is big enough to support it, then you can just lean the reindeer against it.
However, if the tree doesn’t have any strong branches to support it, then you may want to screw some small hooks into the log to give it even more stability.
We think these cute wooden Christmas decorations are absolutely perfect for anyone who wants a fun front yard decoration without too much fuss or time involved.
Designer Trapped has a full tutorial and pictures on their blog post if you want to learn more! Just follow the easy steps you’ll find there to make your own Christmas Reindeer from logs!
36. Wood Log Snowmen You Can Do On Your Own – Christmas Lawn Decorations
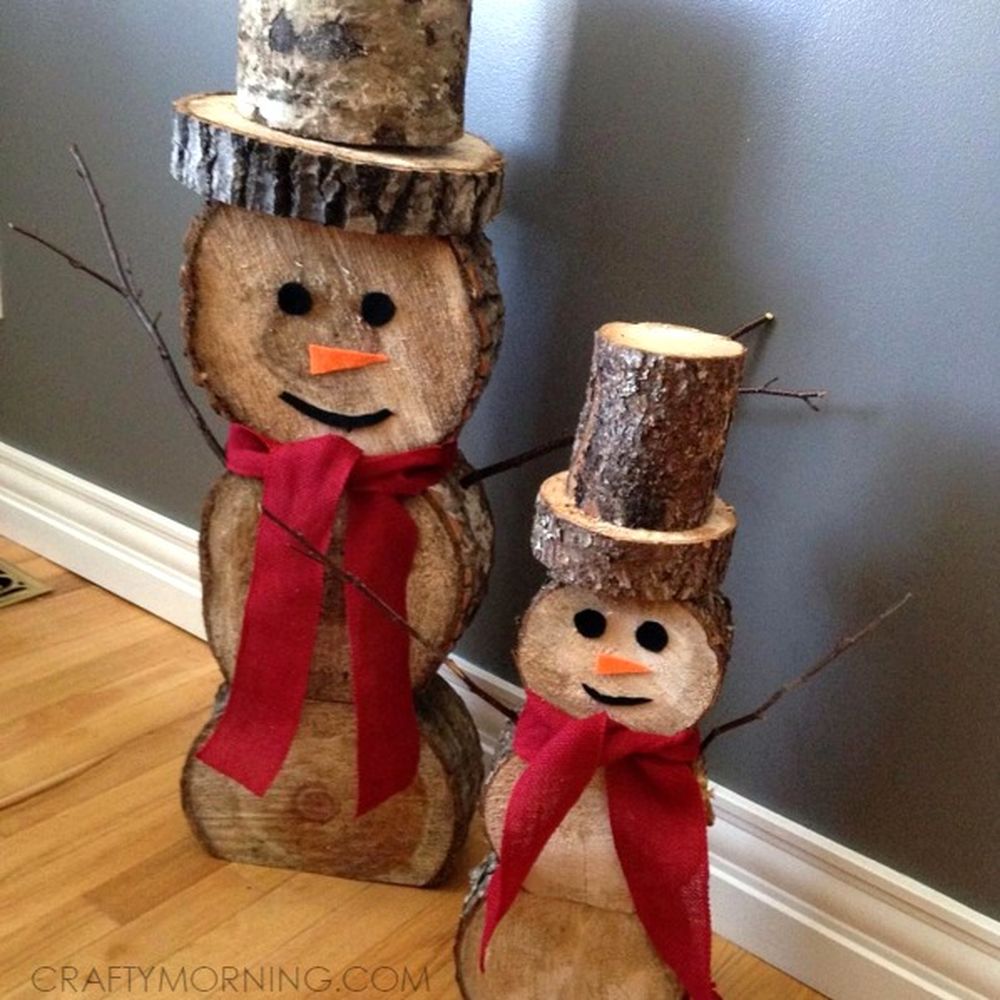
These wood log snowmen are a great front yard decoration for anyone who wants something simple and easy to make.
You’ll need a few logs, some paint, and some accessories to make these little guys come to life.
Start by splitting your logs in half so they are about the same height as you want your snowmen to be.
Then, using a saw, cut off the rounded ends of the logs so they are more rectangular in shape.
Next, drill two holes into the top of each log for the hat and scarf.
Finally, paint or stain your snowmen any color you please and let them dry!
We think these wood log snowmen are absolutely adorable and perfect for anyone who wants an easy front yard decoration that will last all winter long.
Be sure to check out the full tutorial on Crafty Morning for more instructions and photos!
37. DIY Scrap Wood Lanterns – Wooden Christmas Yard Decorations
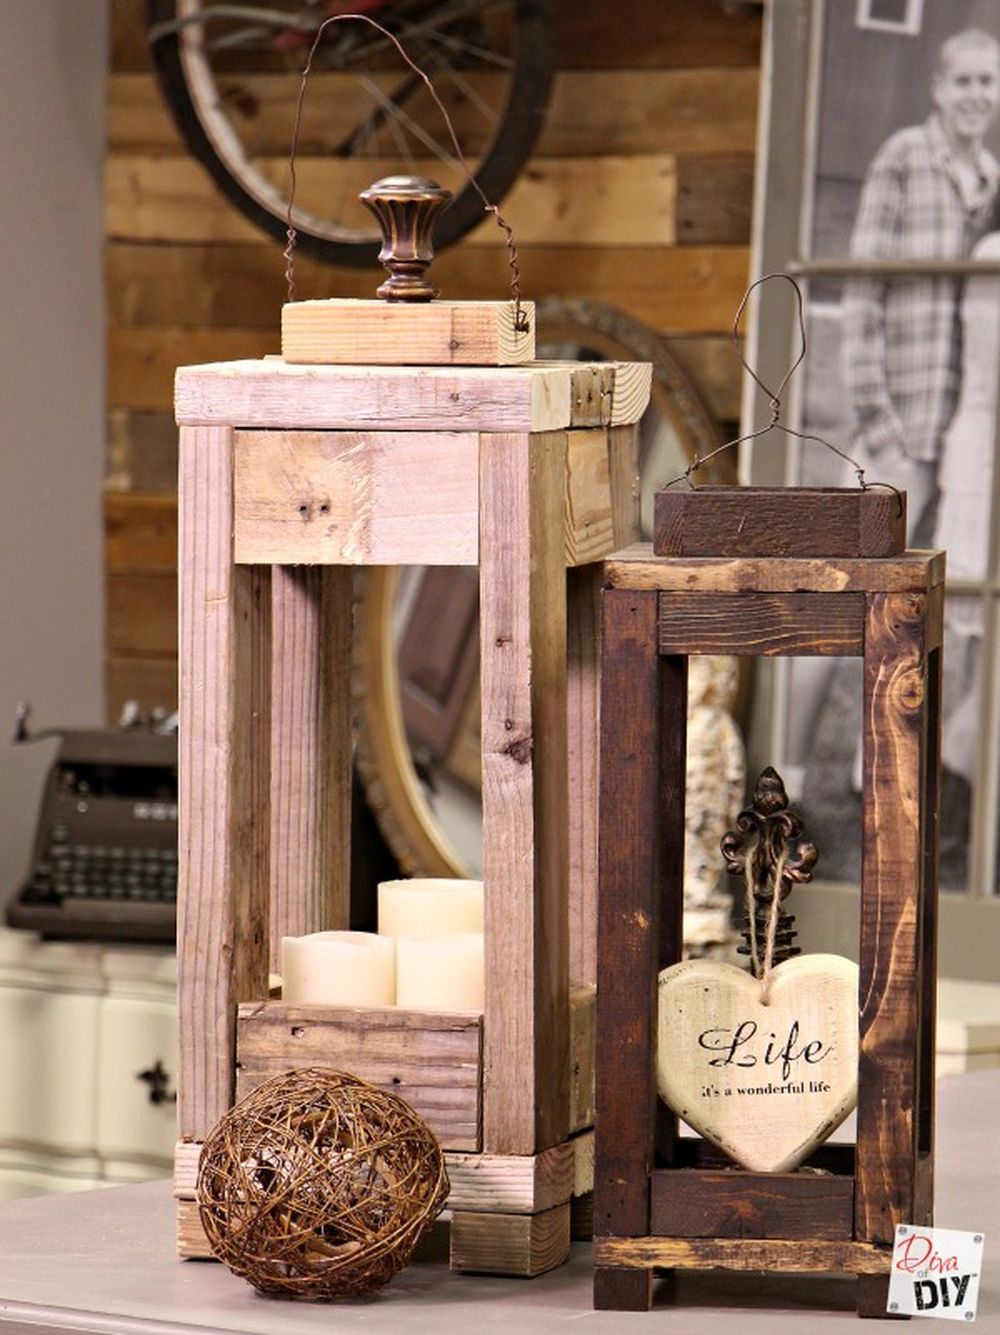
Turn scrap wood into lovely lanterns to decorate your front yard! This project is not as easy to make as others in our guide, but believe us that crafting these lanterns will make passersby stop and stare.
You will need a jigsaw to cut out the shapes for your lanterns, which can be any design you like.
We suggest using a winter-themed design, such as snowflakes, Christmas trees, or holly berries, but if you’re a fan of minimalism, you can skip the design part.
Once you have your design cut out, use a drill to make a hole in the top and bottom of each piece of wood.
Then, use a hot glue gun to attach the pieces of wood together. You can also use nails, but it really depends on what wood type you’re gonna use.
Be sure to add some string or wire to the top hole so you can hang your lantern up!
Last, but not least, add a tea light or other small candle to the inside of your lantern and enjoy!
These beautiful scrap wood lanterns are perfect for anyone who wants a more complex front yard decoration that will really make an impression.
Check out the complete tutorial for this project on Diva of DIY‘s website. It has lots of in-depth instructions and photos!
38. Knock-off Crate & Barrel Ornament Trees – Lawn Decorations
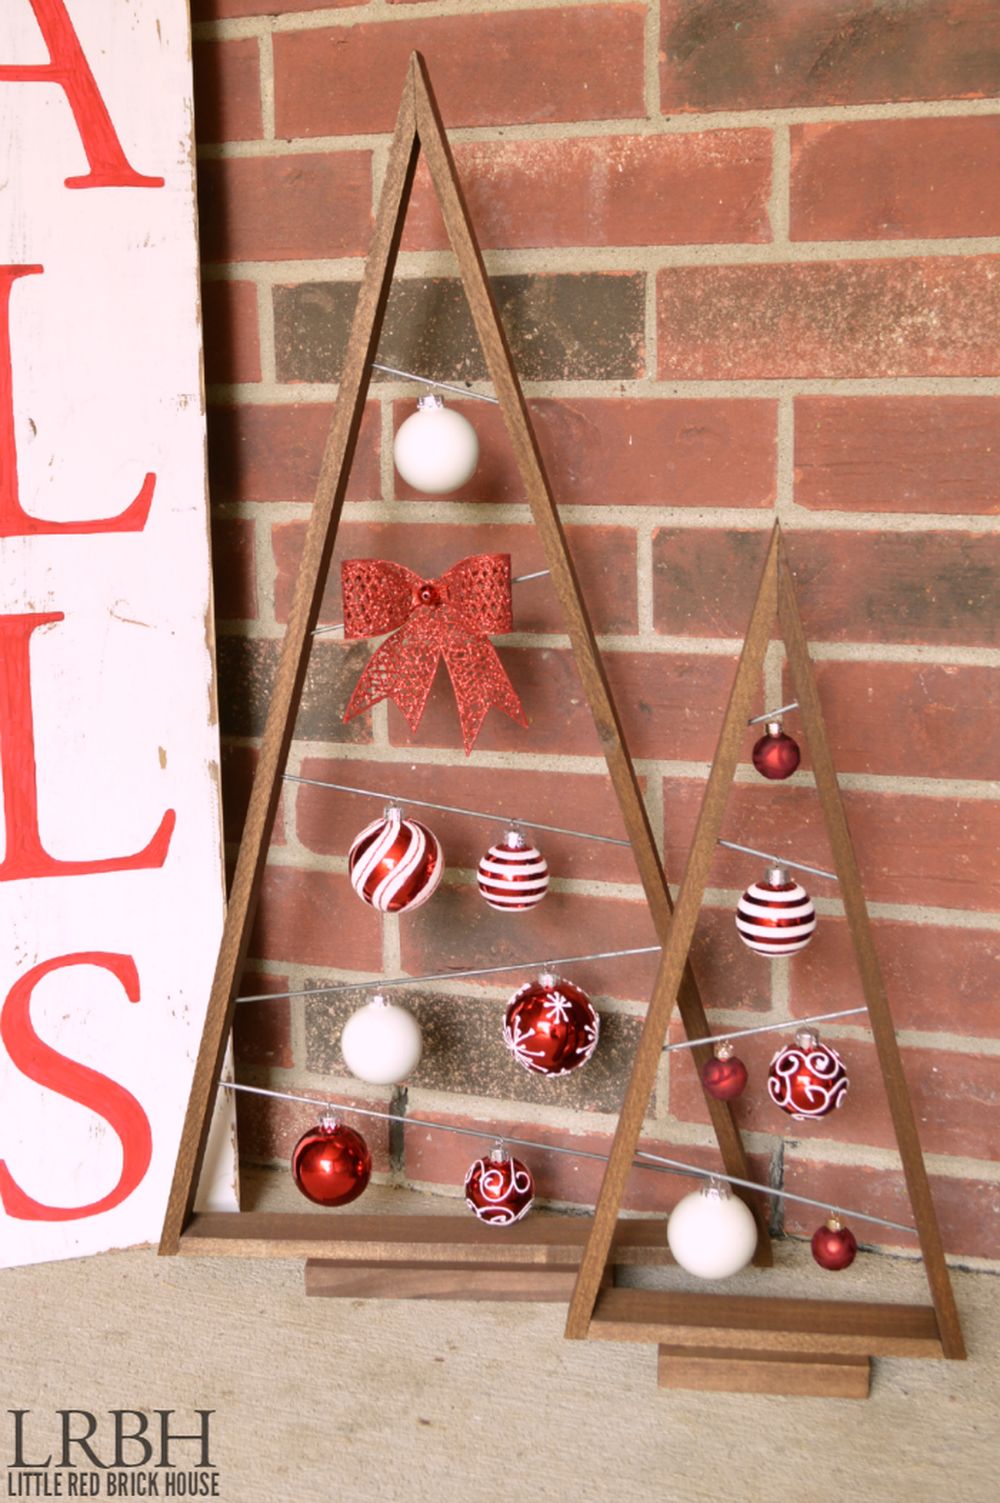
Making your own wooden Christmas ornament trees is a great way to show your holiday spirit without spending a lot of money.
You’ll need some pieces of poplar board, thin metal rods, wood glue, a drill and a drill bit, a metal cutting tool, and some paint or stain if you plan on decorating the ornament trees.
Start by cutting your pieces of wood down to the desired size and shape. You can use any type of wood you like, but the tutorial suggests using poplar, so you’d better stick to that.
Apply the paint or stain before going in any further, and allow enough time to pass so the pieces are completely dry. Once they’re dry, connect the metal rods any way you like (you can drill holes to hold them in place, or you can glue them).
Make sure to cut the ends of the boards at an angle, so you can easily connect them later when needed. Use wood glue to secure the poplar boards one to another, and add some clamps to hold everything together.
We think these knock-off Crate & Barrel ornament trees are perfect for anyone who wants an easy and affordable way to decorate their front yard for Christmas.
If you want to find out more about this project, then you should check out Domestically Speaking for the full tutorial that also comes with lots of photos!
39. DIY Giant Wooden Star (With Lights) – Front Yard DIY Outdoor Christmas Decorations
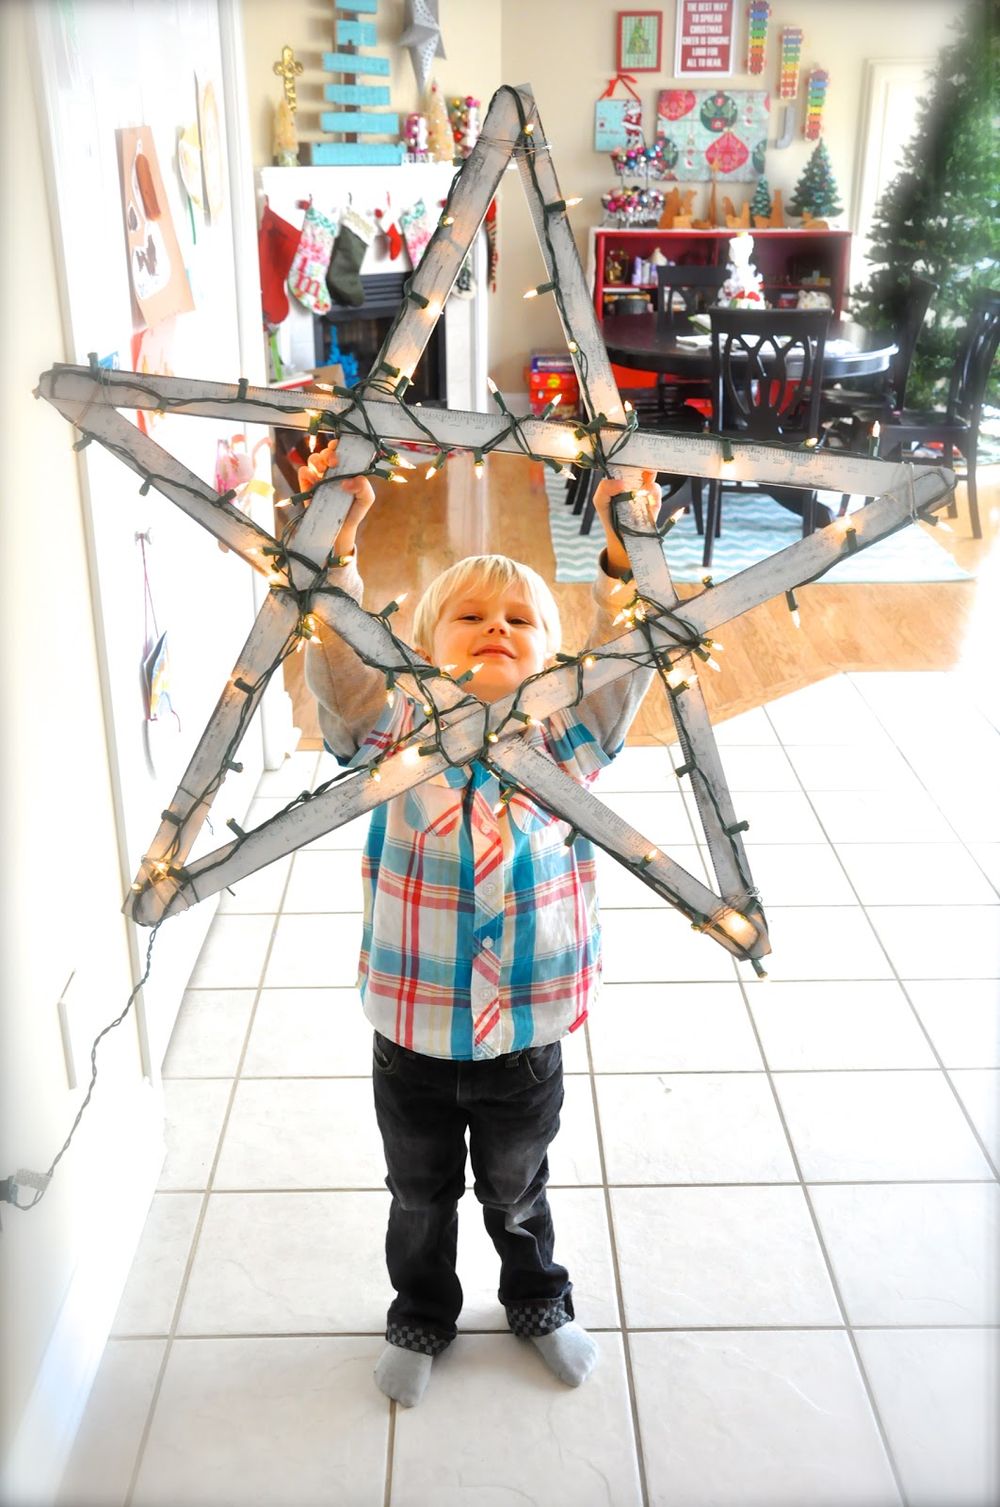
This giant wooden star is a beautiful addition to any front yard during the Christmas season. It’s simple to make and only requires a few basic tools and materials.
You’ll need a piece of plywood (at least 4×4 ft.), a jigsaw, a drill, some wood screws, some Christmas lights, and some wire cutters.
Start by cutting your plywood down to the desired size with the jigsaw. Drill a hole in the center of the plywood for the lights, making sure it’s big enough for the cord to fit through.
Then, use the jigsaw to cut out your star shape. If you’re not confident in your jigsaw skills, you can always trace a star shape onto your plywood and cut it out that way.
Alternatively, you could use several yardsticks to create the star shape, which isn’t only easier (as there’s no power tool involved), but it’s also faster. The downside is that you’d have to buy additional materials as opposed to repurposing leftovers.
Once you have your star shape, drill a hole in the top for hanging purposes.
Decorate as desired with paint or stain. Then, string the Christmas lights through the plywood and use wire cutters to trim off excess cord from both ends of each strand of lights.
Now your giant wooden star is ready to decorate your front yard! We think this DIY project is great for anyone who wants a simple decoration that’s big enough to stand out during Christmastime.
Be sure to check out Little Bit Funky for a comprehensive tutorial that packs a lot of photos to help you through the whole process!
40. Rustic Snowmen Decoration – Christmas Yard Decoration Ideas
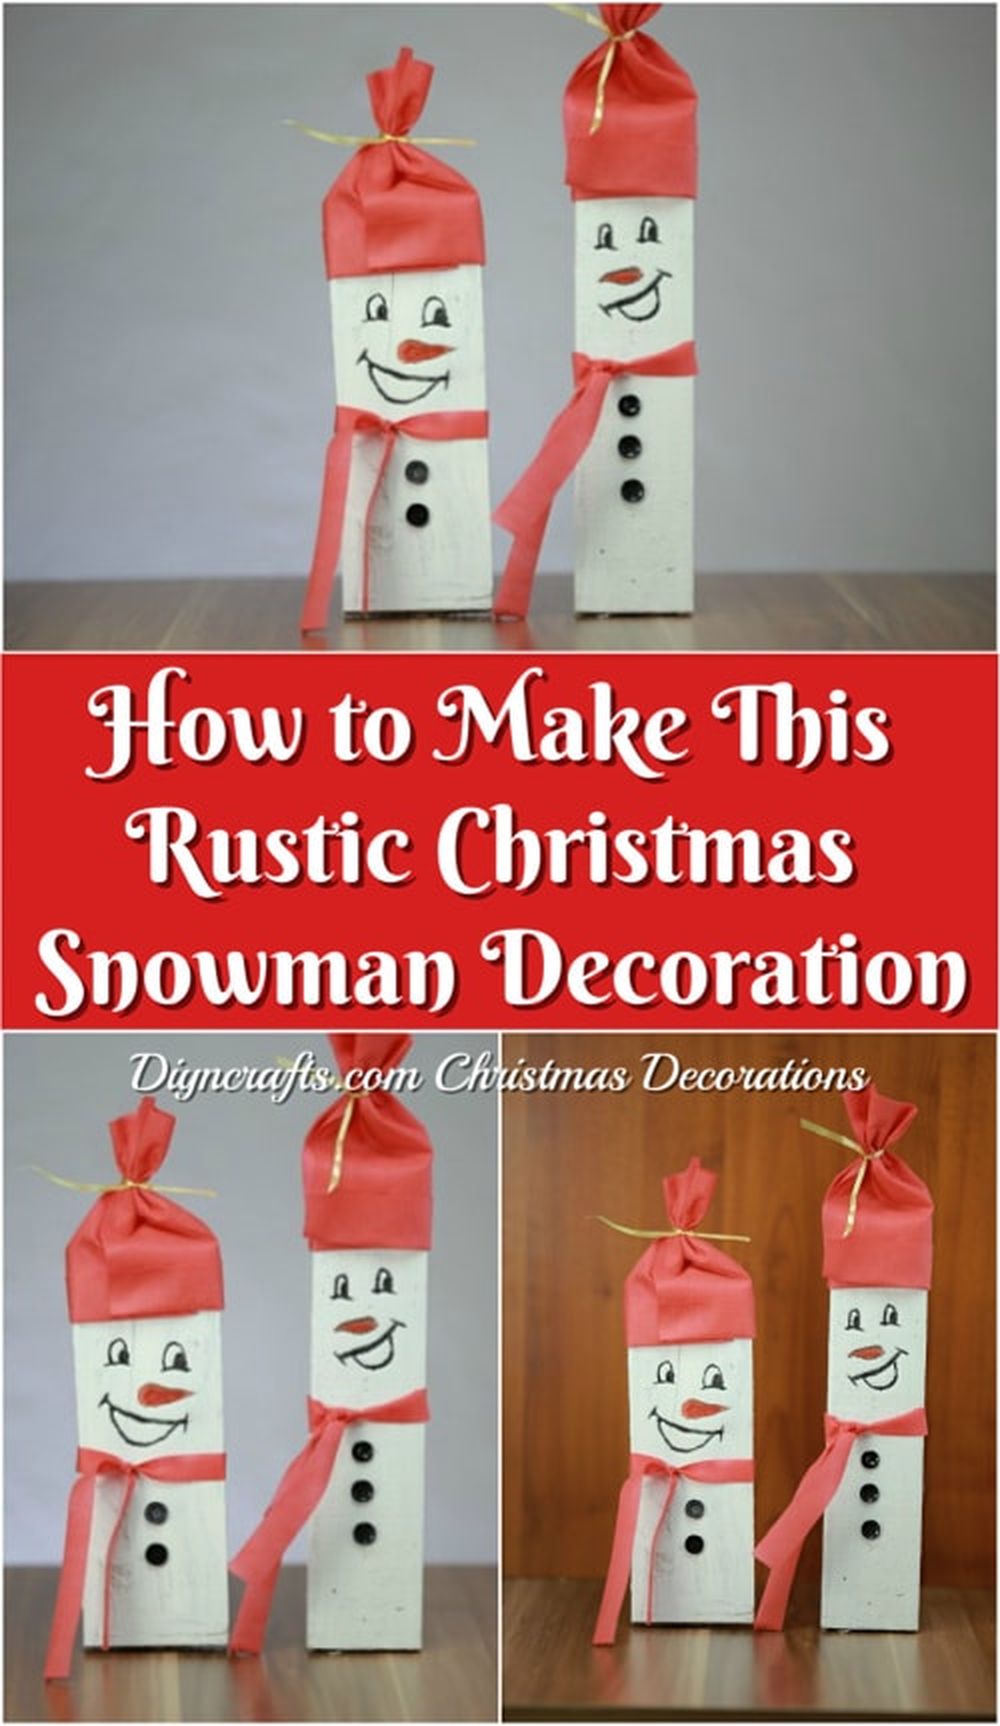
This rustic snowman decoration is a great way to add a touch of winter to your front yard. It’s simple and easy to make and only requires a few basic materials.
You’ll need some wood pallet pieces, some red fabric or tissue paper, some ribbon, paint in various colors (white, black, orange), black buttons, a hot glue gun, some fake snow, and a black Sharpie.
Start by cutting your wood pallet pieces to the desired size and shape. You can use any type of wood you like, but the tutorial suggests using a pallet, so you’d better stick to that.
Paint the boards in various colors (we recommend white, black, and orange), and allow enough time to pass so the paint is completely dry.
Once the boards are dry, use a hot glue gun to attach the red fabric or tissue paper. Cut a piece of ribbon long enough to fit around the neck of your snowman, and tie it in a knot.
Glue on two black buttons for eyes, and use a black Sharpie to draw on a smiley face.
Add some fake snow to your snowman’s body and head, and you’re done! This rustic snowman decoration is perfect for anyone who wants an easy, no-fuss way to decorate their front yard for Christmas.
Make sure you don’t miss DIY & Crafts‘s website if you want to view an in-depth tutorial that comes with comprehensive, in-detail instructions and a lot of helpful photos!
41. Repurposed Shutter Snowman Decoration – Wooden Christmas Yard Decorations
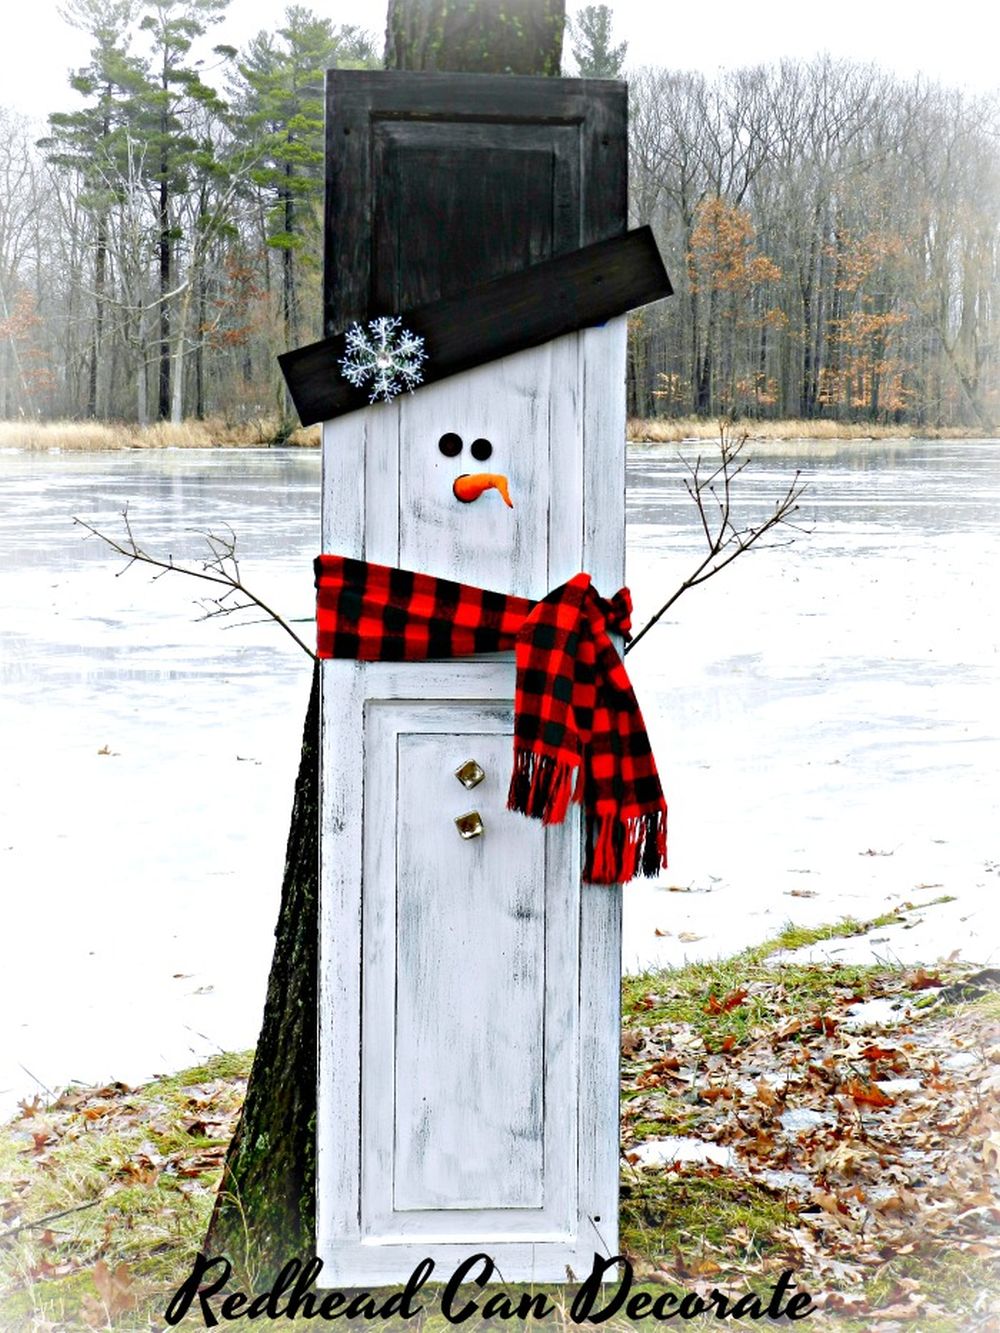
This repurposed snowman shutter decoration is a cute way to add Christmas cheer to your front yard. It’s the perfect addition for anyone who wants something festive that can be used both indoors and outdoors.
You’ll need some old shutters (three will do, but you might want to get at least another one in case of mistakes), spray paint (white, black, orange), sandpaper or steel wool, a bunch of round ornaments, wire, wire cutters, red ribbon, and a glue gun.
If you don’t already have any shutters laying around your home (which most people don’t), you can ask your friends and family members if they happen to have an extra set they’re willing to lend you or pick up a cheap set at a thrift store.
Start by taking the shutters apart so they’re in individual pieces. You won’t need to take them all the way down to the individual slats, but you will want to remove the hinges and any other hardware.
Once you have your shutter pieces, use sandpaper or steel wool to give them a rustic look. This is totally optional, but it will add to the overall effect of the snowman.
Next, spray paint the shutters white (outside and inside), black (outside only), and orange (outside only). Again, make sure everything is completely dry before moving on.
Now it’s time to put everything together! This charming repurposed shutter snowman decoration is perfect for anyone who wants an easy way to add some festive cheer to their home this Christmas.
With just a few simple steps, you can have a cute outdoor decoration that will last for years to come. You can find the full tutorial over at Redhead Can Decorate, so make sure you don’t miss it if you need further instructions!
42. Rustic Nail-Head Christmas Trees – Christmas Lawn Decorations
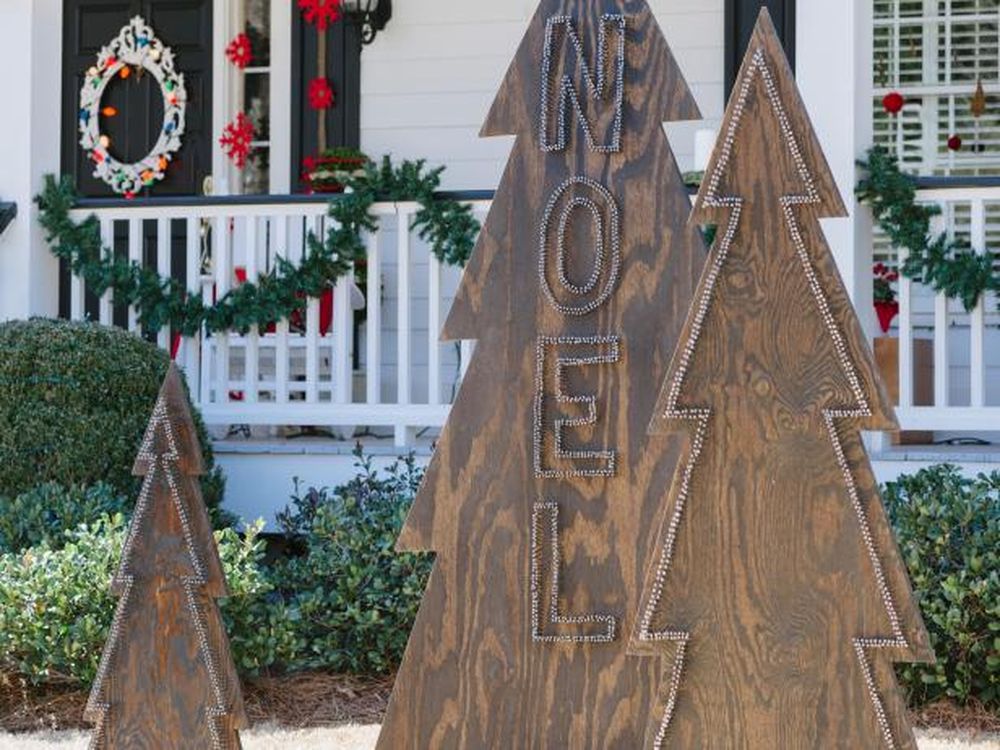
We all know the phrase “little tree, big impact” and that’s exactly what you get with this rustic nailhead Christmas trees lawn decoration. This is a fun and easy project for people of any skill level and only requires a few simple supplies!
You will need three 3/4″ sheets of plywood, a large piece of cardboard, a box cutter, a jigsaw, some sanding paper, paint or stain, a box of penny nails, a hammer, a pencil, two pieces of 2x4s, and a bunch of 1″ wood screws.
Start by drawing your tree shape on the plywood and then use the box cutter to cut it out. If you’re not too confident in your freehand skills, you can always find a printable template online.
Next, use the jigsaw to cut out the shape of the tree. Sand down all of the edges of your tree pieces until they’re nice and smooth. You can either paint or stain them at this point, or leave them natural for a rustic look.
Once everything is dry, it’s time to put it all together! Start by nailing the penny nails into the cardboard. You can always experiment with different patterns, even mixing the colors if you want to make your tree extra-festive!
In the tutorial, the nails are used to spell out a word, so if you want to do that, you’ll need to draw the outline of the words on your plywood Christmas tree and hammer the nails all along the outlines.
All in all, this project is simple enough to do in a quick afternoon session, but if you need additional help with it, don’t shy away from HGTV’s in-depth tutorial. You’ll find a complete list of materials, comprehensive instructions, and helpful photos.
43. Wood Pallet Snowman – Christmas Yard Decoration Ideas
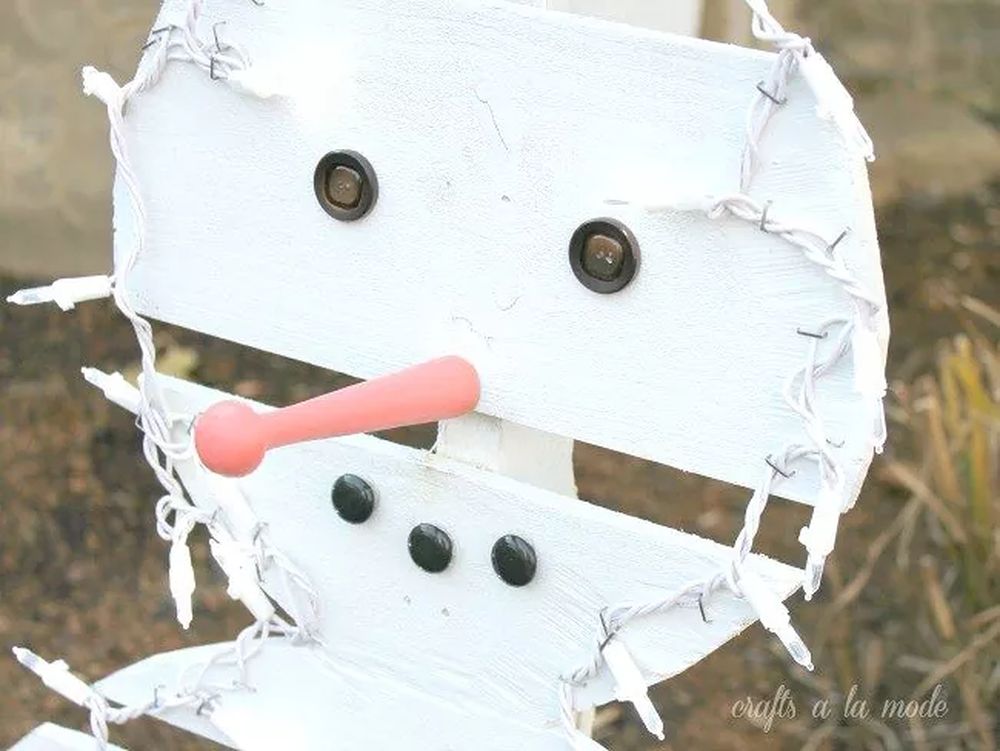
Hometalk has an awesome tutorial that could teach you how to make a snowman decoration for your yard this Christmas out of a wood pallet. You will need a wood pallet, a jigsaw, some wood screws, a drill, sandpaper, paint or stain, and vinyl letters.
The first step is to cut out the shape of the snowman from the pallet using your jigsaw. Sand down all of the edges until they’re smooth and then paint or stain the snowman however you like.
We suggest using white paint since snowmen are usually made out of, you know, snow, and snow tends to be white sometimes.
Jokes aside, you’ll also want to use some decorations such as buttons or gemstones to decorate your snowman once the paint has dried.
If you want to add text to your snowman, now’s the time to do it! Vinyl letters are a great way to do this and you can find them at any craft store.
Once everything is dry, it’s time to put it all together! Attach your snowman to a post or railing in your yard and you’re done!
If you need additional help with this project, check out Hometalk for full instructions and step-by-step photos. You can even ask questions if you get stuck at any point!
44. DIY Wooden Sled Decoration – Christmas Yard Decoration

This wooden sled decoration is perfect for anyone who wants a rustic, winter feel for their Christmas yard decorations.
As opposed to other crafts in our guide, this one will end up decorating your front door, so make sure you cut the pieces of wood at an appropriate size.
You will need a piece of wood for the sled, a drill, jigsaw, wood screws, vinyl letters (or paint and a stencil), sandpaper, and any extra decorations you want to add (we recommend some fake evergreens or berries).
The first step is to cut out the shape of the sled from your piece of wood. Use a jigsaw for this step (or you could ask someone else to do it for you at a local hardware store if you’re not comfortable using power tools).
Next, use a drill to make two holes in the back of your sled – these will be where the hangers for your ornament will go.
To decorate your sled, paint or stain it whatever color you want and then use your favorite ornaments to give it that extra boost of Christmas spirit!
Finally, attach the hangers for your ornament with some wood screws. Then just hang it on your door! Check out The Shabby Tree for more pictures and step-by-step instructions.
45. Repurposed Soda Crates Christmas Decorations – Christmas Lawn Decorations
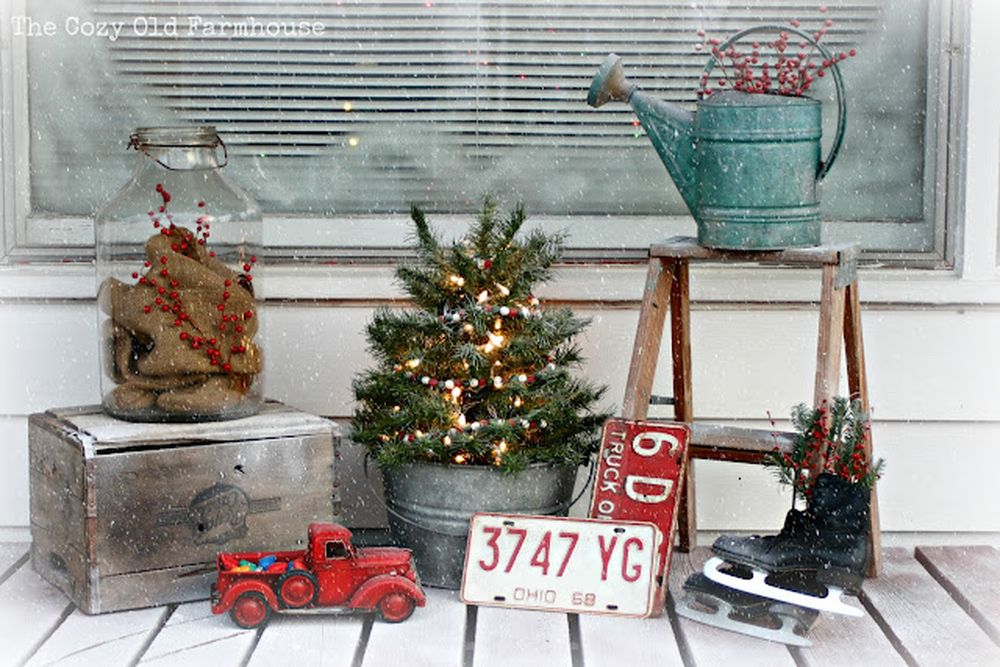
These soda crates Christmas decorations are perfect for anyone who wants a rustic, vintage feel for their holiday decor.
You will need six crates total, some paint or stain, wood screws, wire (or ribbon), and any extra decorations you want to add (we recommend berries, leaves, ornaments, etc).
Start by painting or staining your crates however you want. If the crates are already painted, you could focus on giving them a rustic, vintage look by gently using sandpaper here and there.
Next, use wood screws to attach the crates together in two rows of three. Make sure that the front of each crate is facing outwards.
Now it’s time to add your wire or ribbon! We recommend using wire so that it can be easily rearranged if needed. Wrap the wire around the top of the crates and use staples to keep it in place.
Finally, add any extra decorations you want (we used berries and leaves). Check out The Cozy Old Farmhouse for more pictures and detailed instructions.
46. DIY Wooden Candles – Wooden Christmas Yard Decorations
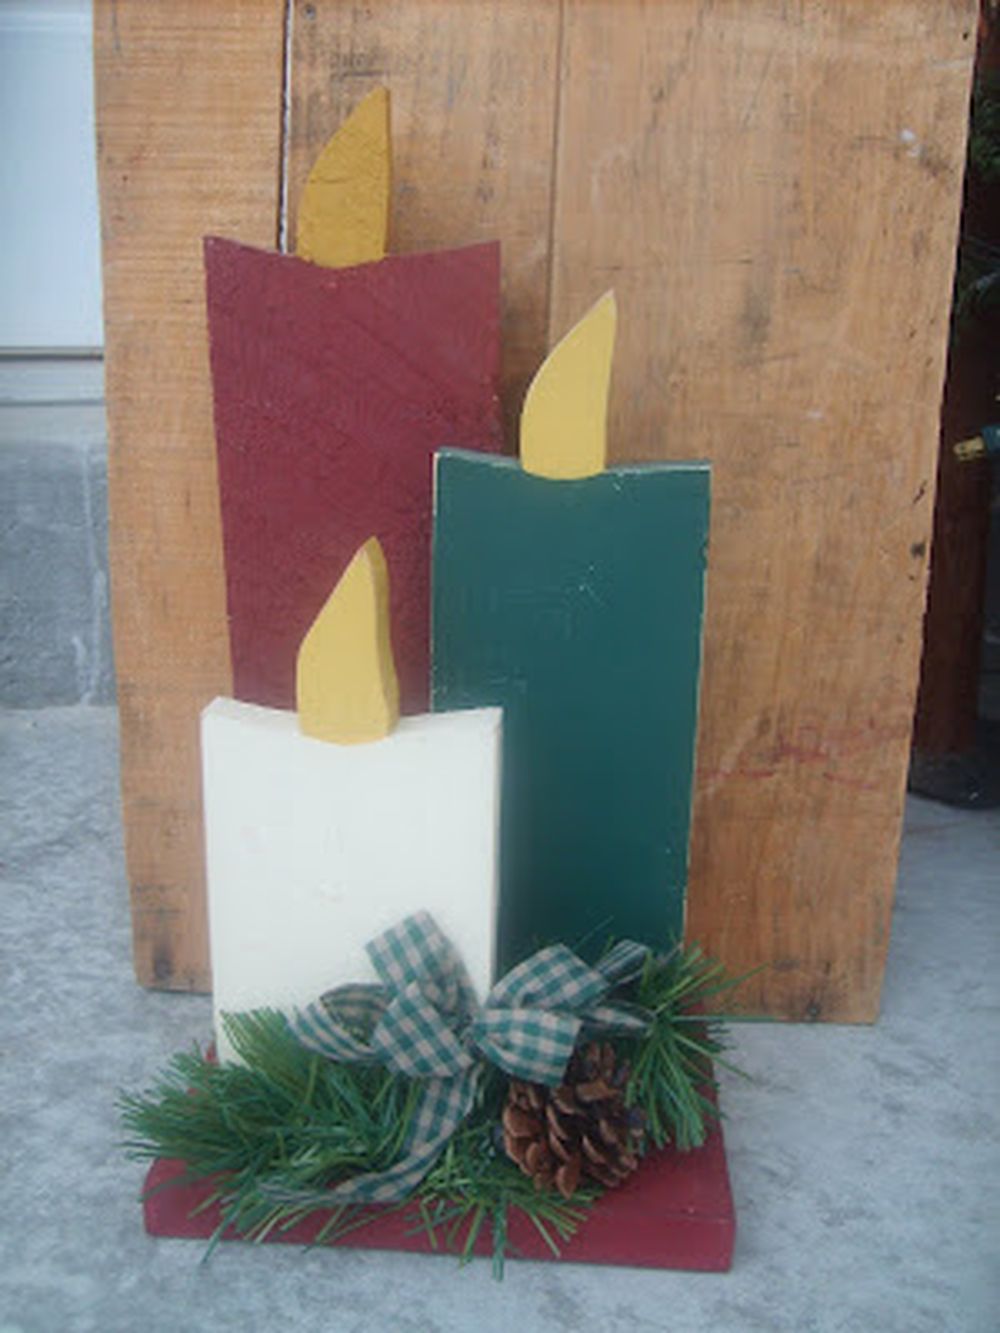
This wooden candles tutorial will give you an easy way to decorate your yard for the holidays.
You will need some thin wood pieces, a drill, paint or stain, wire (or ribbon), and any extra decorations you want to add (we recommend berries).
Cut your thin wood pieces into rectangles – keep in mind that these are going to be the candles. You can either cut them at the same size or use varying sizes if you want to.
Now here’s the tricky part: at the very top of each wooden plank (the rectangles), trace a flame design like the one in Craft Critters‘ tutorial. It goes without saying that this will be the lit wick of the candle.
Next, paint or stain your wood pieces in various colors, so that they resemble colorful candles.
Make sure you paint the flame in a different color, such as yellow, or if you want a more realistic flame, you could paint the core of the candlewick orange and the outer part yellow. Use your imagination!
Finally, add wire, ribbon, or anything else you can think of at the bottom of the make-believe candles! We recommend using wire for your decorations so that they can be easily rearranged if needed.
47. DIY Wood Slice Santa Ornament – Wooden Christmas Yard Decorations
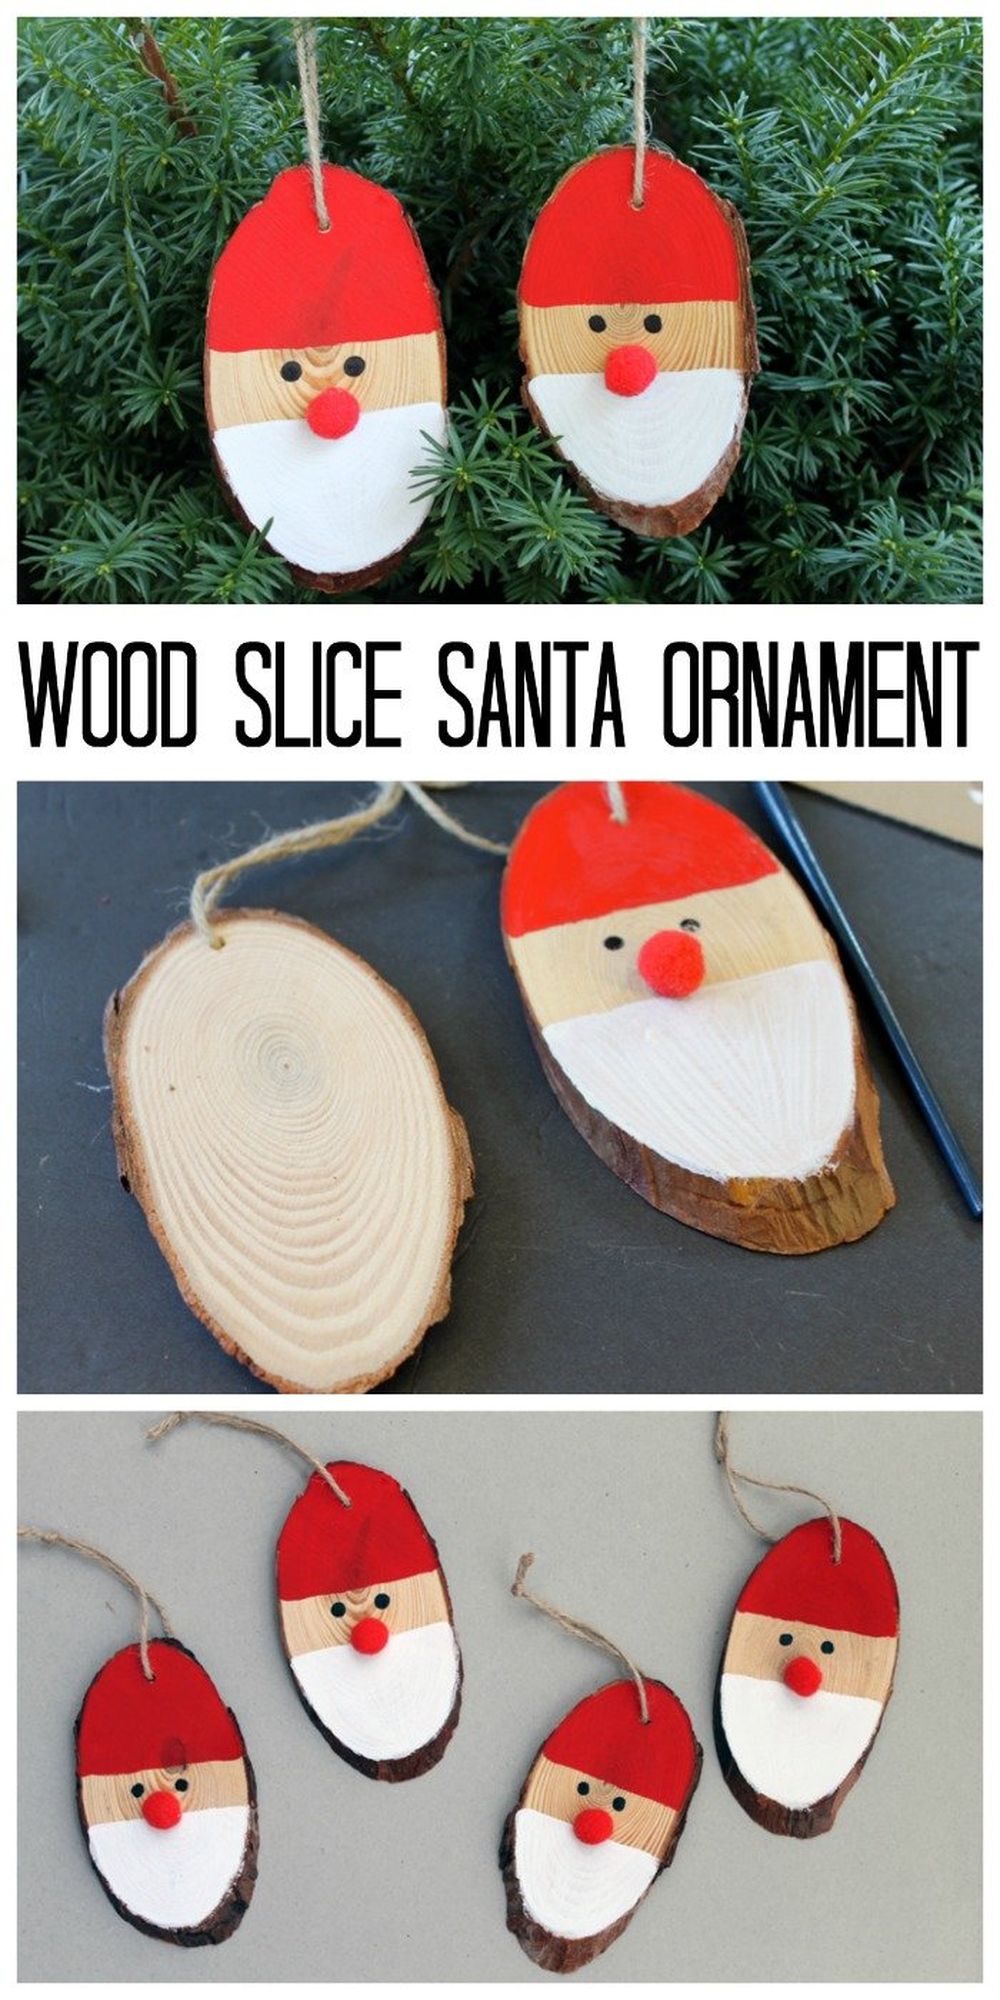
If you’re looking for a rustic, country-inspired decoration for your yard this Christmas, look no further than these wood slice Santa ornaments!
They’re extremely easy to make, and the end result will have everyone wondering about where did you buy the decorations from.
As you can probably figure out on your own at a glance from The Country Chic Cottage’s tutorial, you’ll need some slices of wood to craft these creative little Santa decorations.
First, prepare the slices of wood, as well as some white, red, and black paint. Although there’s no one stopping you from using a base for your Santa, leaving the wood slice as it is would result in a nice, rustic vibe.
Paint the slices of wood according to the tutorial above and use some red pom-pomps to give your wooden Santas noses.
Now drill a small hole at the top of each wood slice Santa decoration and hang them wherever you see fit in your yard. Merry Christmas!
48. DIY Rustic Glam Christmas Ladder Decoration – Lawn Decorations
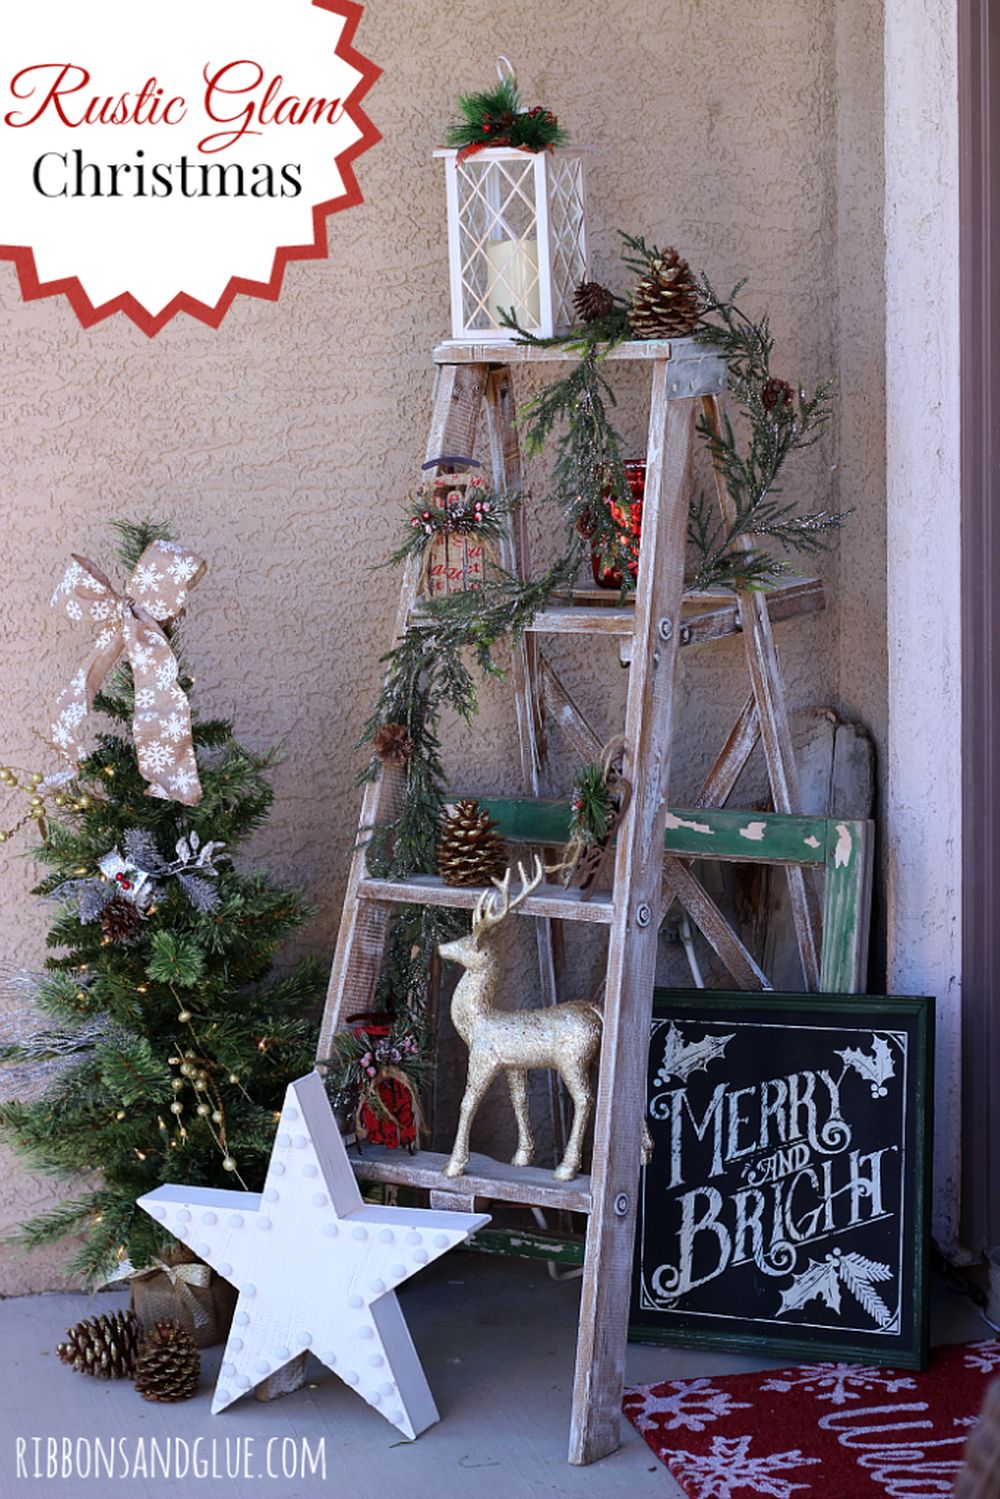
If you’re looking for a stunning Christmas decoration that will set your home apart from the rest, look no further than this rustic glam ladder decoration.
It’s easy to create using ribbon, pine cones, twine, wooden ladders, and sticks! Just follow Ribbons And Glue’s tutorial to learn how to turn your yard into a magical winter wonderland.
We recommend using a wooden ladder for this project, but if you don’t have one on hand, any old ladder would work.
Paint the ladder white and then get creative with your ribbon and pine cone decorations. Twine is a great way to attach everything together and give it a rustic look.
Add in some sticks or wooden figures for some added character – elves, reindeer add, Santa Claus, etc.
You can even some pine cone garland at the bottom of the ladder so that it looks like the entire thing is one decoration. It’s entirely up to you!
Once you’ve decorated your ladder, hang it on a wall or out in your yard (if it’s sturdy enough to hold the weight). We recommend painting some snowflakes and snowmen on the bottom part of the ladder for some extra flair!
49. Danish Santa Logs Christmas Lawn Decorations

Have you actually been hoping to find something a little more rustic and traditional looking than some of the novelty things we’ve shown you so far?
In that case, we’d definitely suggest taking a look at how Smart Girls DIY made these lovely painted log Santas that are based on a traditional type of homemade Christmas piece originally hailing from Denmark!
50. DIY Jumbo Nutcracker Soldiers Christmas Yard Decorations
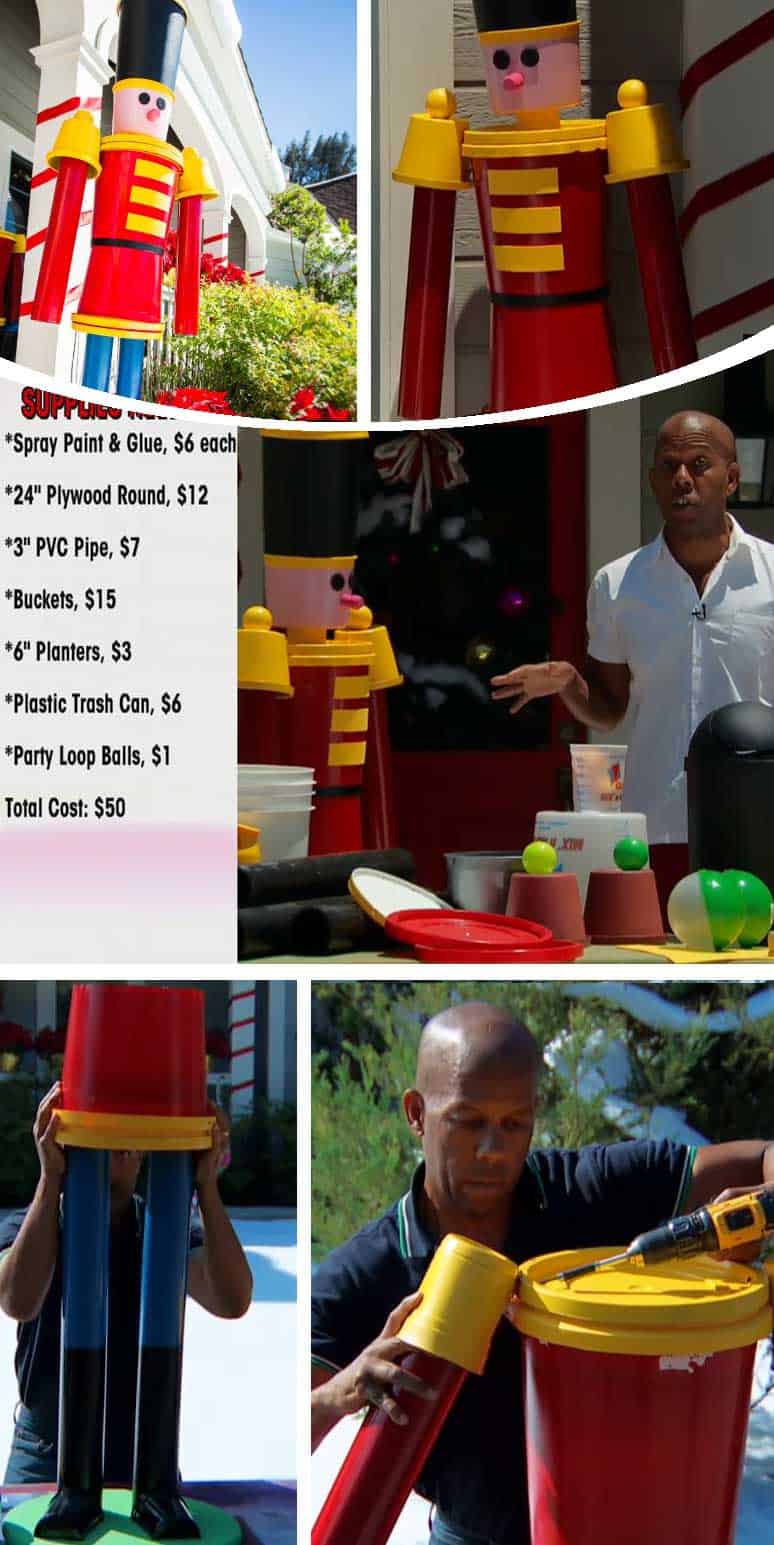
Just in case you thought we were done with the jumbo lawn decor ideas, here’s one more to keep you going!
We’re completely in awe of how simple DIY Cuteness makes it look to create a whole nutcracker from buckets and plastic tubes but we’re also grateful that they outlined their entire process in detail so that we can all follow along and make our own as well. Talk about eye catching!
51. Branch and Log Lawn Reindeer Lawn Decoration
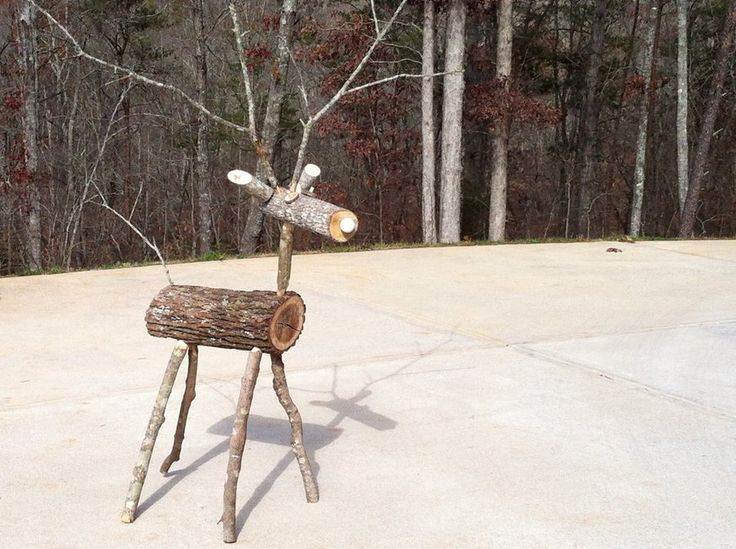
Did we really catch your attention when we started talking about ways to make hands on wooden lawn decor out of wood and branches, even though you already have some Santa pieces and you don’t really need another one?
In that case, we’d definitely suggest taking a look at how Mrs Vera made this adorable reindeer from differently sized branches found in their very own yard!
5 Christmas Decorations You Can Buy
Let’s check out a few Christmas decorations you can buy, if you don’t feel like making your own.
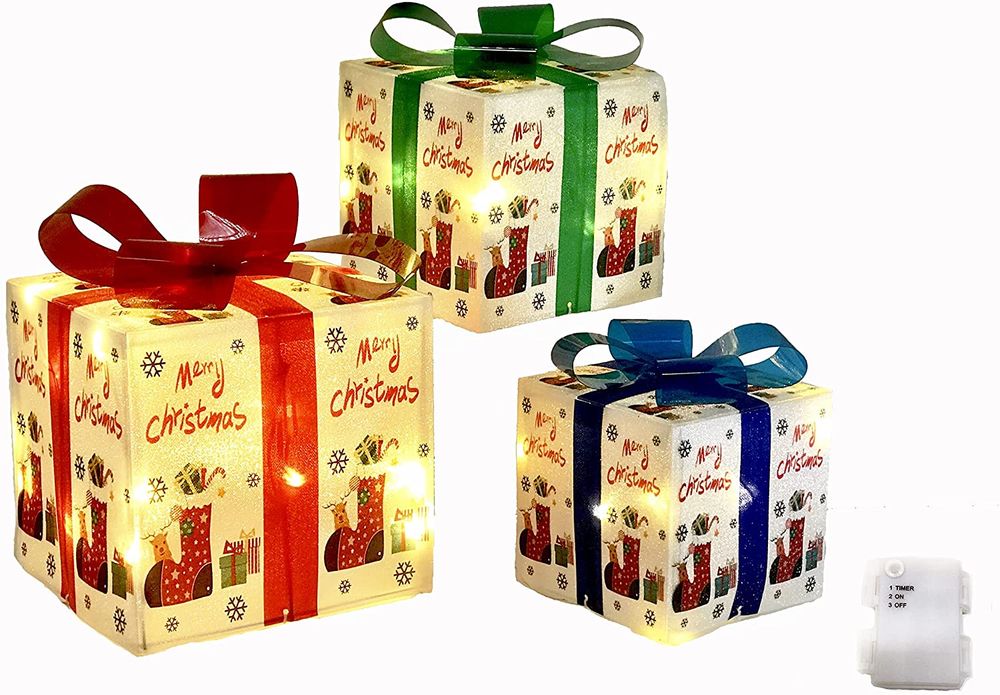
1. SNOWSTORM Christmas Lighting Gift Boxes Yard Decoration
Give the gift of light this holiday season with lighting boxes. Simply wind the lights around these boxes to create a magical glow, perfect for decorating your home or yard.
These lights come in a set of three, so you can have one for the front porch and one at the back or window. Because they’re waterproof, you can even take them with you on your Caribbean vacation to help decorate your room!
Joking aside, these lighting boxes are extremely easy to use. They only require you to plug them in, adjust a bunch of easy settings and that’s about it!
These boxes are weatherproof and can be used indoors or outdoors, so you can really deck out your home for the holidays.
We recommend using these boxes to line your driveway or porch, or even to light up your Christmas tree.
View price on Amazon2. Twinkle Star Lighted Christmas Tinsel Penguin Lawn Decoration
This lighted penguin decoration is perfect for anyone who wants to add a little bit of whimsical fun to their yard.
Made from metal and plastic, this penguin is easy to assemble and comes with a built-in stake that can be stuck into the ground.
He’s dressed up in a Santa hat and scarf and looks like he’s ready to deliver some presents!
Once it’s in the ground, just plug in the penguin and watch as it lights up with a soft, twinkling light.
We recommend placing this ornament in your garden, just next to your front door for an extra bit of cheerful fun as you head out of the house.
This decoration is sure to bring a smile to everyone’s face and will definitely get you into the Christmas spirit.
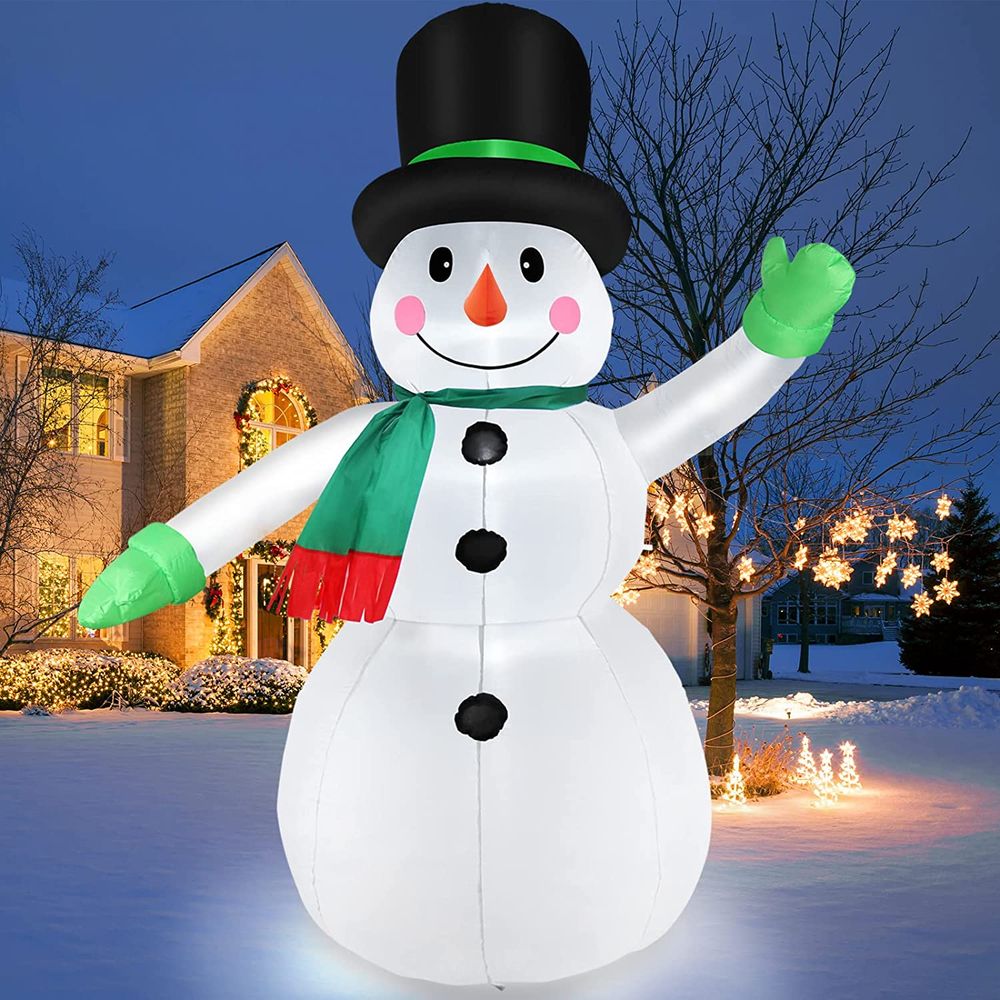
View price on Amazon3. Thanger 7 FT Inflatable Outdoor Christmas Yard Decoration
Looking for a cute decoration to celebrate the holidays? This snowman inflatable is both cute and durable. It’s made from heavy-duty vinyl that’s built to last all throughout the Christmas season.
The best part? You don’t even need an air pump to set up the decoration! All you have to do is stake it into your lawn and it’ll be good as new.
This inflatable is 7 feet tall and 5 feet wide – so you can really take up a decent amount of space with this decoration!
We recommend using this snowman to decorate your front porch or lawn during the winter season, but he’s also perfect for summertime uses – like a Fourth of July barbecue or pool party.
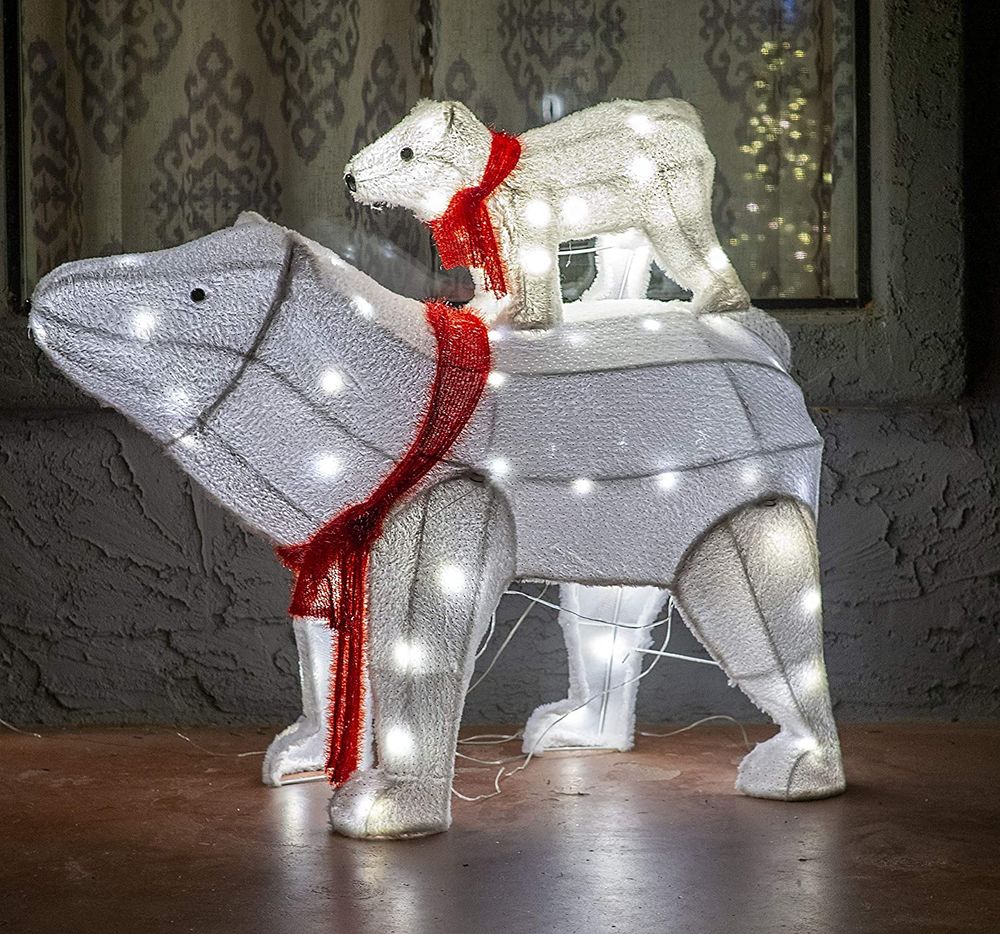
View price on Amazon4. Joiedomi 2-Pack Plush Polar Bears Christmas Lawn Decoration
Add a touch of cuddliness to your yard with these plush polar bears.
These bears are made from high-quality materials and are stuffed with soft, plush fabric. They’re also very easy to assemble – all you have to do is pop them into the included stands and they’re good to go!
Each bear is about 19 inches tall and 16 inches wide, so they’re the perfect size for decorating your yard or porch.
We recommend using these polar bears as part of a larger Christmas display or simply standing them on their own to add a touch of cozy charm to your home.
Your Christmas dinner guests will definitely love these bears!
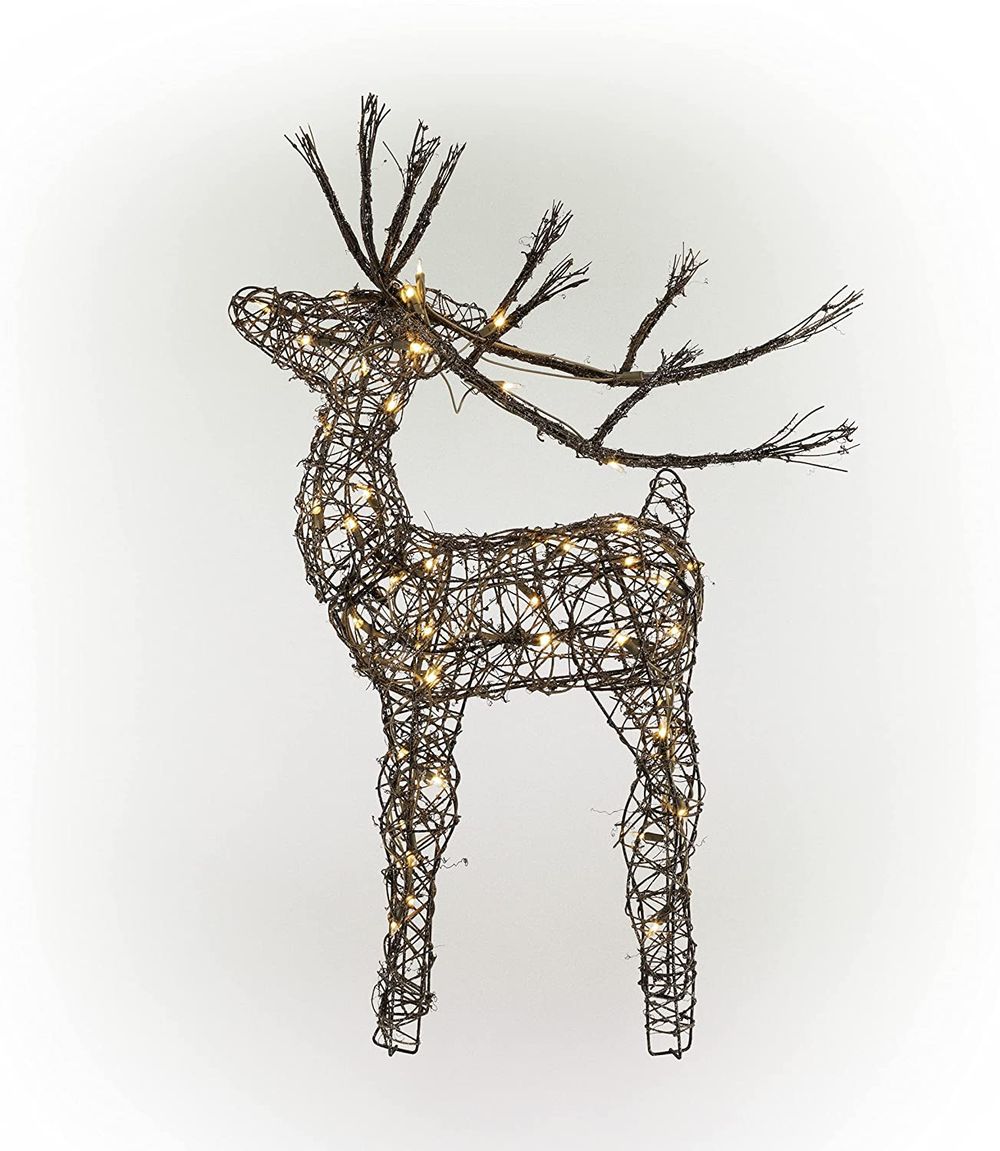
View price on Amazon5. Alpine Corporation Lighted Reindeer Christmas Yard Decoration
This lighted reindeer decoration is perfect for anyone who wants to add a little bit of rustic charm to their yard.
Made from rattan, this reindeer is easy to assemble and comes with a built-in stake that can be stuck into the ground.
Once it’s in the ground, just plug in the reindeer and watch as he lights up with a soft, twinkling light.
We recommend placing this ornament in your garden or on your lawn, just next to your front door.
This decoration is sure to bring a smile to everyone’s face and will definitely get you into the Christmas spirit.
View price on AmazonChristmas Yard Decorations Are Not Hard To Make
All things considered, if you’re trying to find cheap, simple ways to get your home ready for the holidays, crafting is both fun and rewarding.
If you’re up for the challenge of making your own yard decorations this Christmas season, why not try out some of these DIY Christmas lawn decorations?
With our guide in hand, if you follow one of our steps exactly, you should be able to complete your project in no time!
But if you’re feeling creative, feel free to change things up a bit to make them your own. We hope that this guide has helped and inspired you. Merry Christmas and happy crafting!
The post 55 Christmas Lawn Decorations to Light Up Your Yard appeared first on DIYs.com.

